5.0 Completing the Reimage to UCX 7.0 Process
Section Contents
5.1 Log into the UCX 7.0 software
5.2 Update to the latest UCX 7.0 software component versions
5.3 Reconnect the Remote Access (Support VPN)
5.4 Perform a "Clean" System Backup (Optional)
5.5 Restore the original Telephony Configuration
5.6 Update the System License
5.7 Check and/or Reactivate Specific Settings and Status
5.8 Install any Add-on packages you require
5.9 Log into the UCX 7.0 software
5.0 Completing the Reimage to UCX 7.0 Process
After the newly reimaged UCX Release 7.0 system has been powered up and startup is complete, you will be able to connect again to the system using the Web Based Configuration Utility. The system will have retained its non-telephony related data. Licensing will need to be re-applied in addition to restoration of the system configuration. The username will be admin with the E-MetroTel standard default password.
5.1 Log into the UCX 7.0 software
To complete the Reimage to R7 process, log in to the Web Based Configuration Utility using the admin account.
-
You will be placed in the Edit User screen.
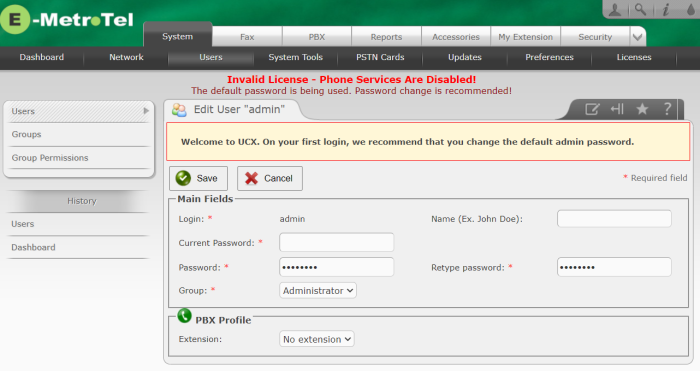
- Change the password for the Admin user from its default value to a new one.

5.2 Update to the latest UCX 7.0 software component versions
-
Update the system to the latest Release 7 updates by navigating to System - Updates and selecting Check for Updates
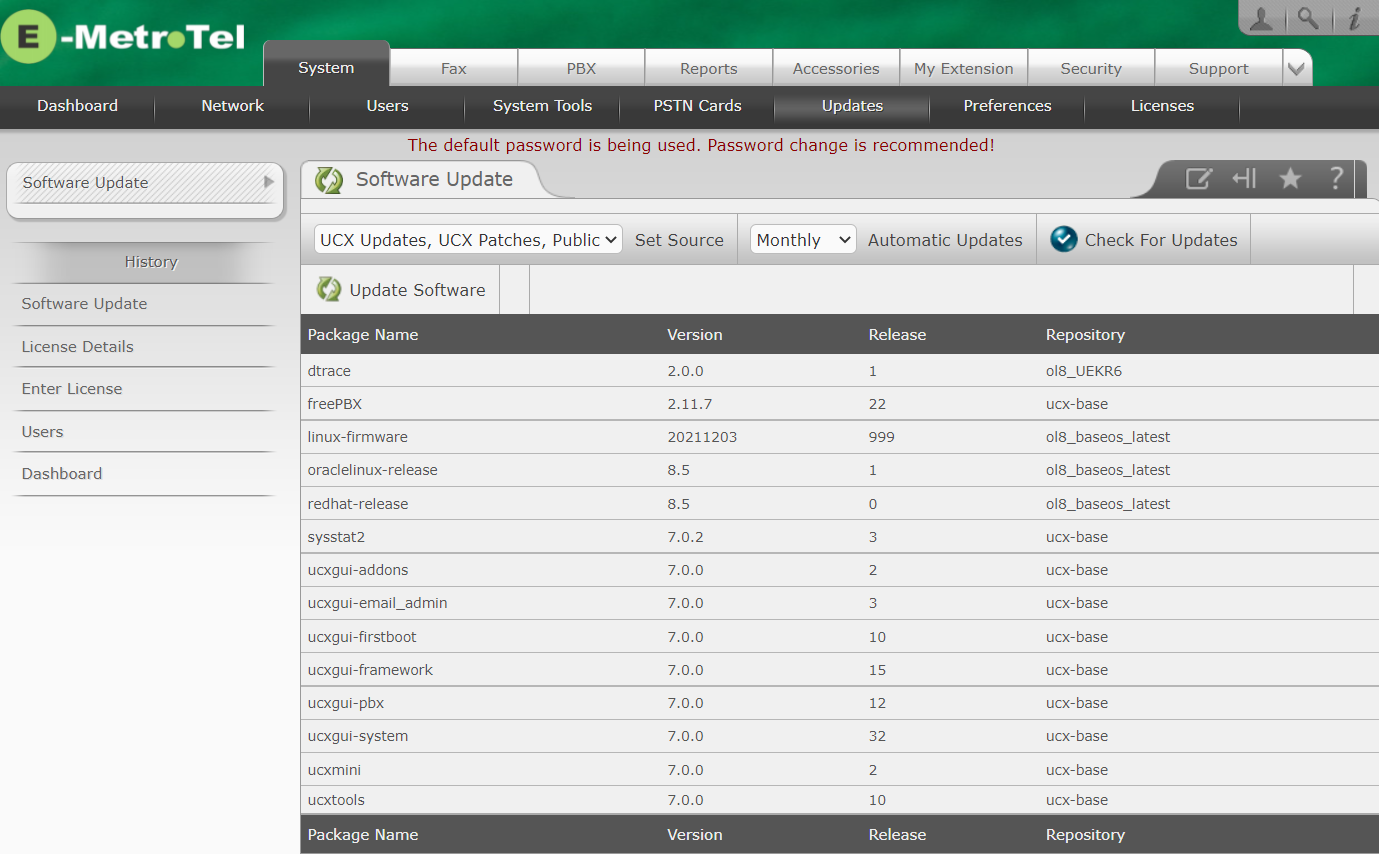
- You can leave the update source as the default UCX Updates, UCX Patches, Public setting.
- Click on Update Software.
- When the UCX presents the message "Software update successfully completed" proceed to the next step.
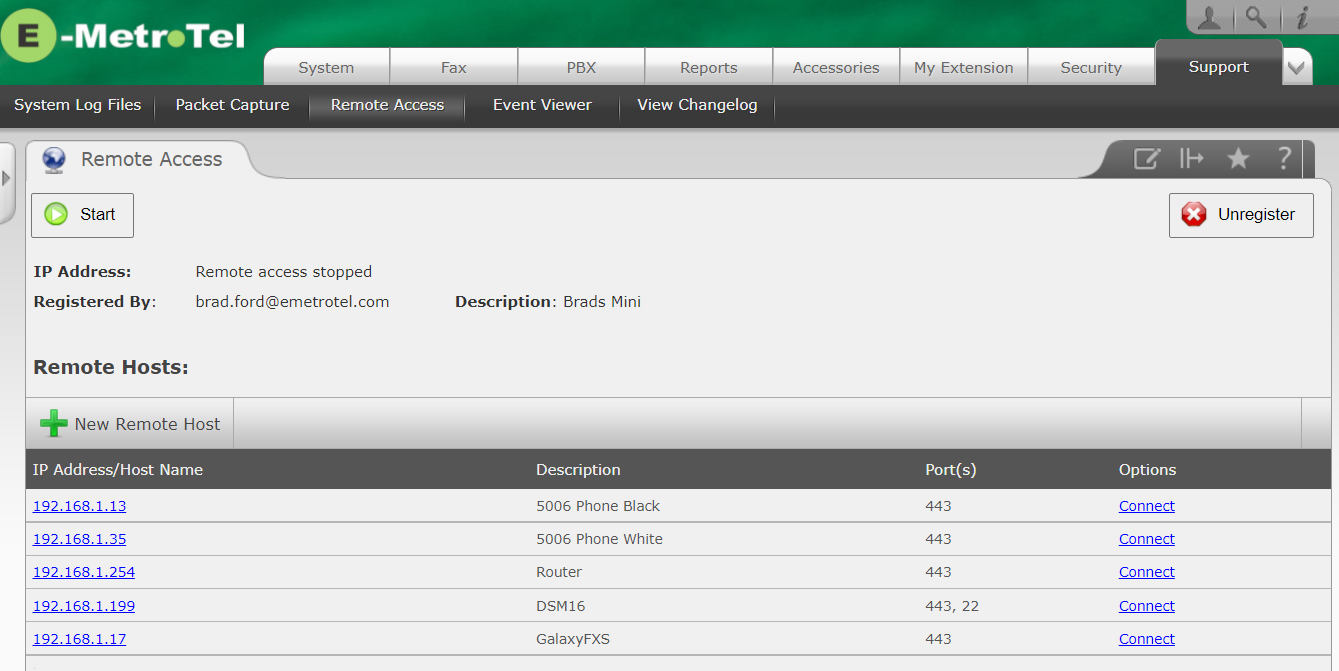
5.3 Reconnect the Remote Access (Support VPN)
The Reimage to R7 process will retain all the previously configured Remote Host IP Address/Host Name, Description and Port(s) as well as the Registered By and Description of the Remote Access connection. However, it will not automatically start the Remote Access connection to the E-MetroTel Support VPN.
To activate Remote Access:
- Open the Web Based Configuration Utility
- Navigate to Support - Remote Access
-
Click on the Start button
5.4 Perform a "Clean" System Backup (Optional)
If you would like to have a telephony backup of a completely blank system:
- Open the Web Based Configuration Utility.
- Navigate to the PBX tab, and click the pink Apply Config bar (if shown).
- Navigate to the System - System Tools tab, which should land on the Backup/Restore page.
- Follow the standard Backup process to create a blank backup on either the hard drive or on a separate USB drive (or both).
5.5 Restore the original Telephony Configuration
If you have retrieved the license prior to this step you may need to remove specific addresses from the Block list or add the addresses or entire subnets to the Do Not Block entries for telephony services to restore proper operation of these devices.
Restore the telephony configuration data from the previously made UCX 6.0 or UCX 5.0 backup
- Navigate to System - System Tools, Backup/Restore is the default page on that tab in UCX 7.0.
- If your Release 6.0 Backup file was less than 1 Gb and you downloaded the file to your PC, you may now follow the procedure noted in Restore, specifically the first section titled Uploading a Backup File
- Insert the USB containing the final Release 6.0 Backup generated during the Preparing for the Update step.
- Set the USB Drive as the backup location (refer to Restore for additional details)
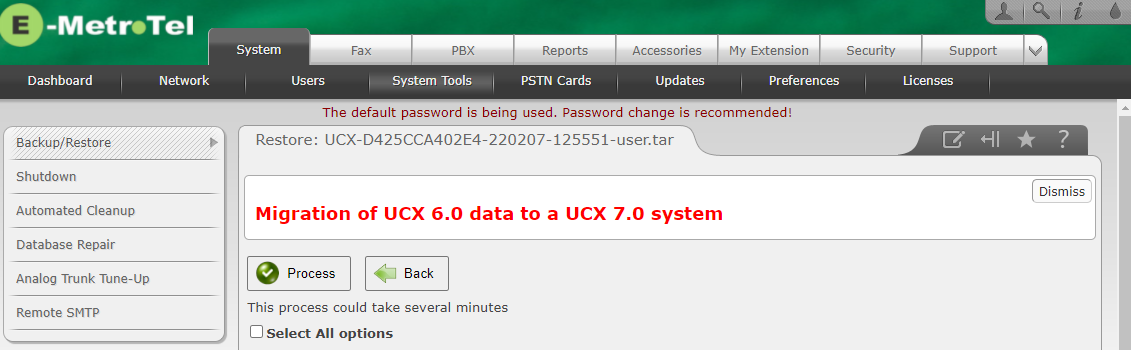
-
When you start the process to restore the UCX 6.0 or UCX 5.0 data on the UCX 7.0 software, you will see one of the following two warnings:
 or
or
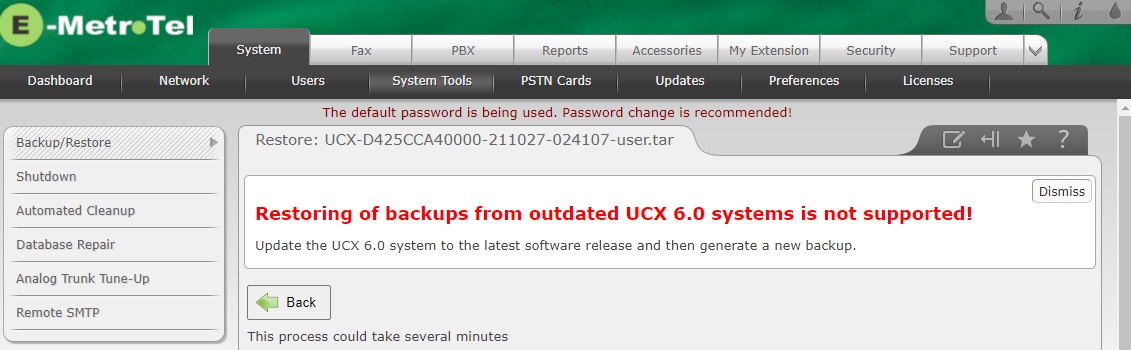
- When you see the first warning Migration of UCX 6.0 data to UCX 7.0 system then you may proceed to the next step. If you see the second warning Restoring of backups from outdated UCX 6.0 or UCX 5.0 systems is not supported! you cannot restore your backup as it was not created after doing a final UCX 6.0 or UCX 5.0 update. Read Section 5 below for next steps.
- Select the type of data you wish to restore (refer to Restore documentation for additional details).
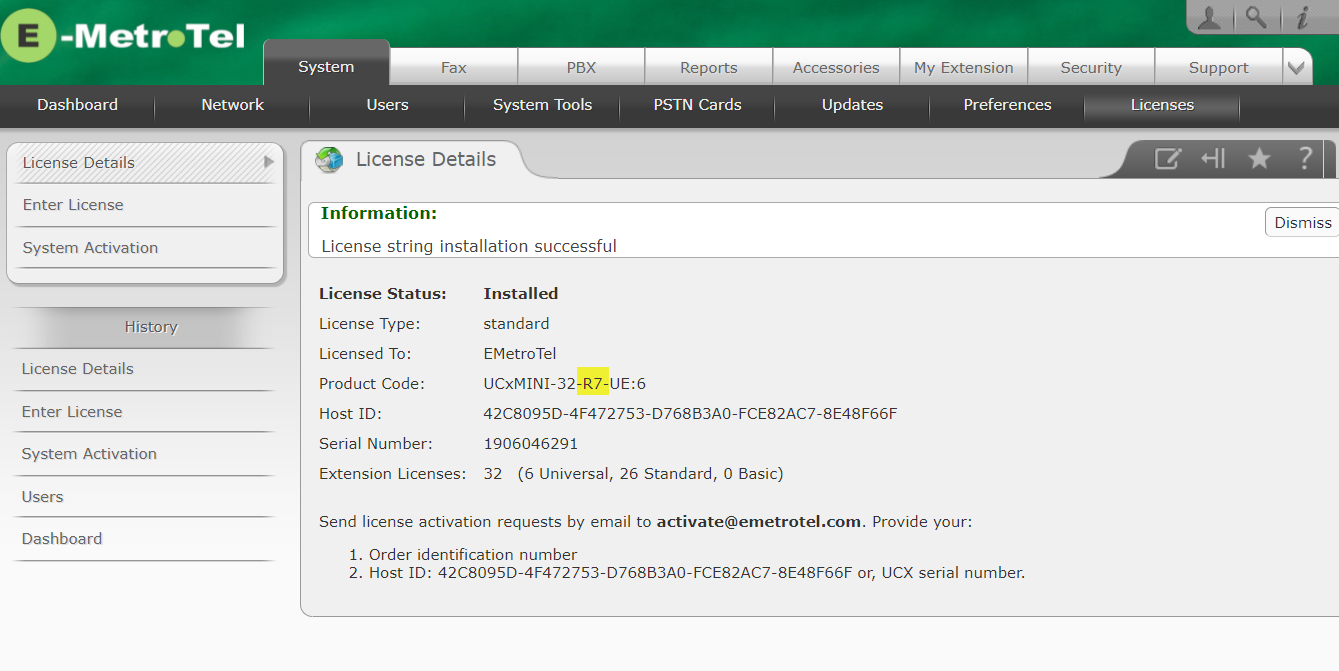
5.6 Update the System License
The Reimage to R7 process will carry forward the Serial Number and the Host ID of the original system. However, the existing licenses associated with the Host ID will need to be re-applied. To update the licensing: