

SIP Trunk Integration
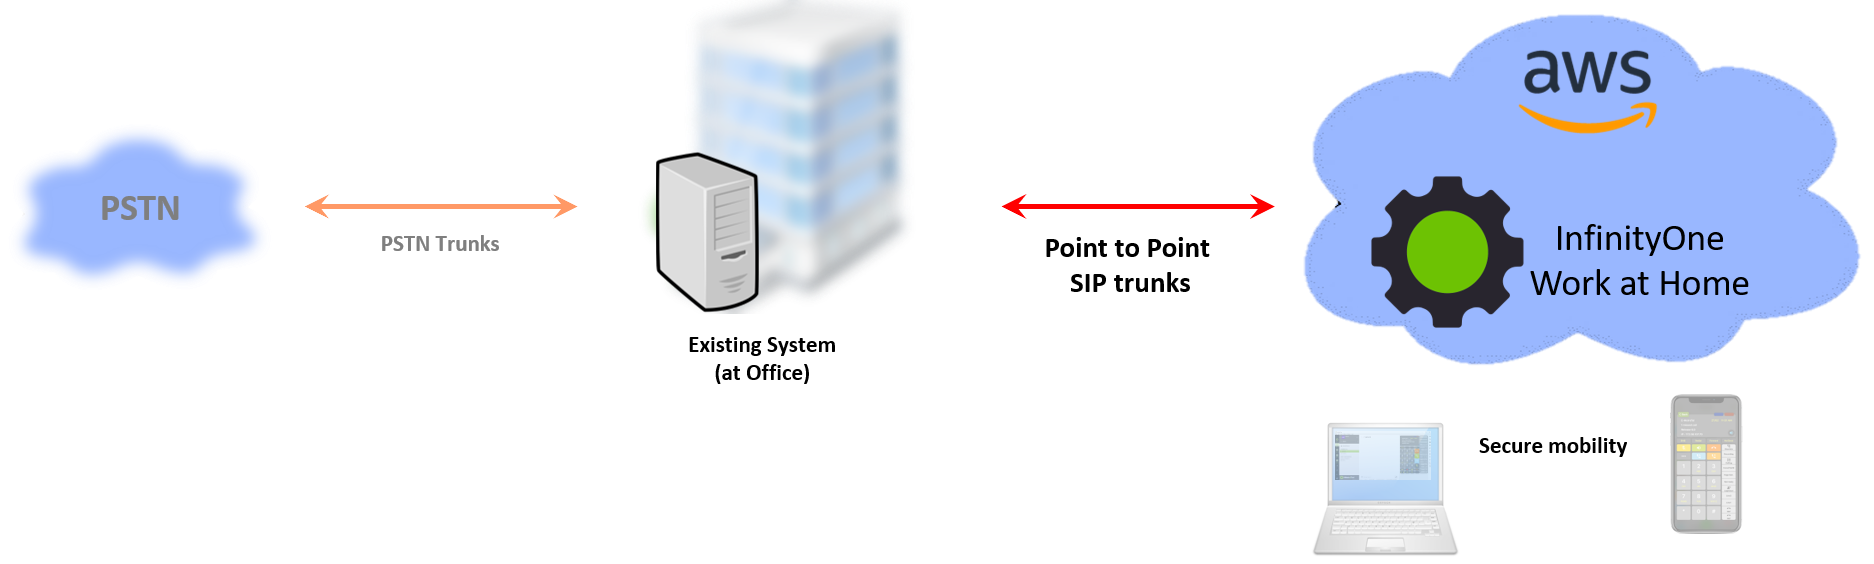
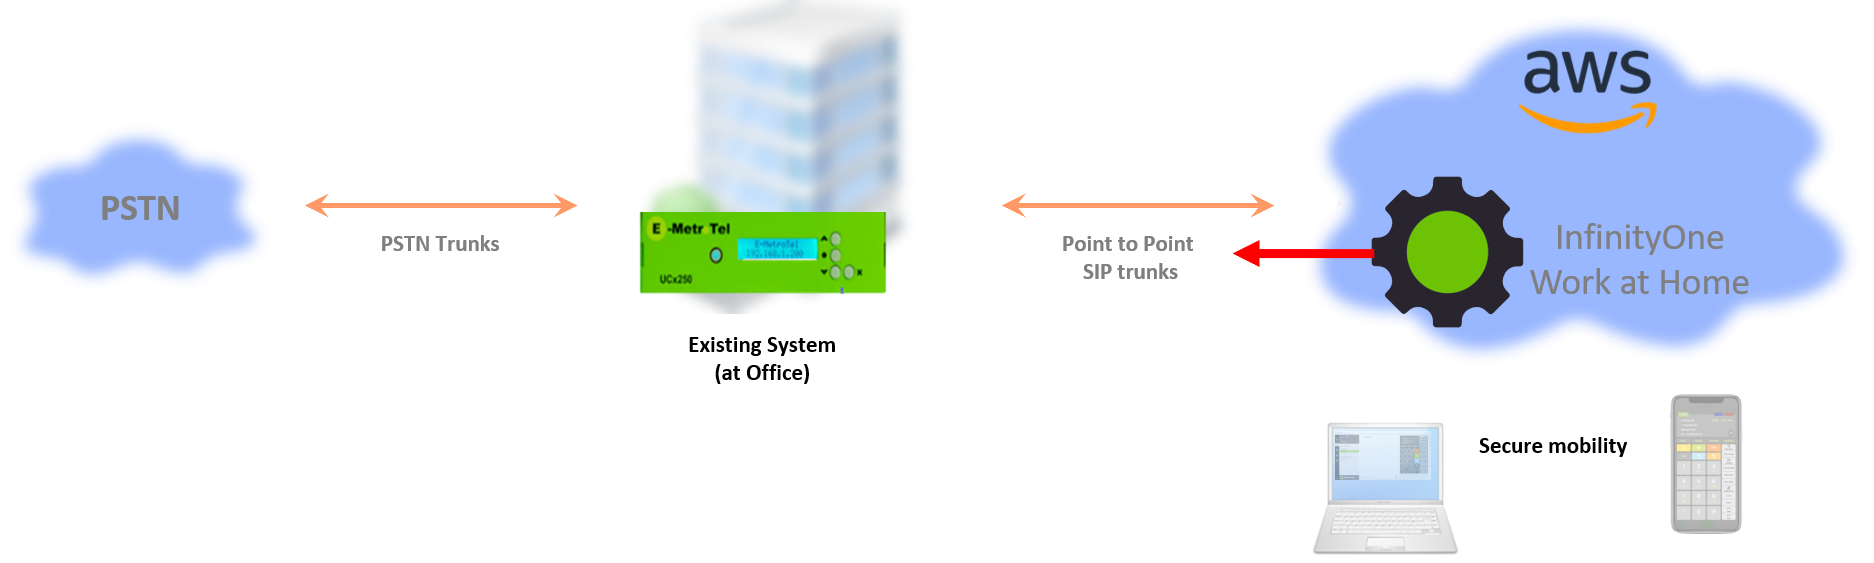
To get the most of the InfinityOne Work at Home solution, connecting your existing system to your new AWS hosted InfinityOne Work at Home solution is very beneficial both in terms of security and from a cost perspective, as it avoids hairpin connections that would reduce the PSTN trunk capcaity by half. The target architecture is shown below:

In the following example, a UCx system is used as the existing office system in order to be able to capture the general steps of the configuration needed to be able to route calls from the existing incoming trunks to the InfinityOne Work at Home solution using SIP trunks.
Step One: Connect the SIP Trunks
- On your existing system, add SIP trunks that point to the IP Address or Domain Name of the InfinityOne Work at Home solution you created in your AWS account.
- The default SIP port on AWS implementations of the InfinityOne Work at Home solution is 5960. If this can be configured on your existing office system, use that port. If not, it will be necessary to change the settings on the InfinityOne Work at Home solution, and may require changing the security settings on the AWS to open that port.
-
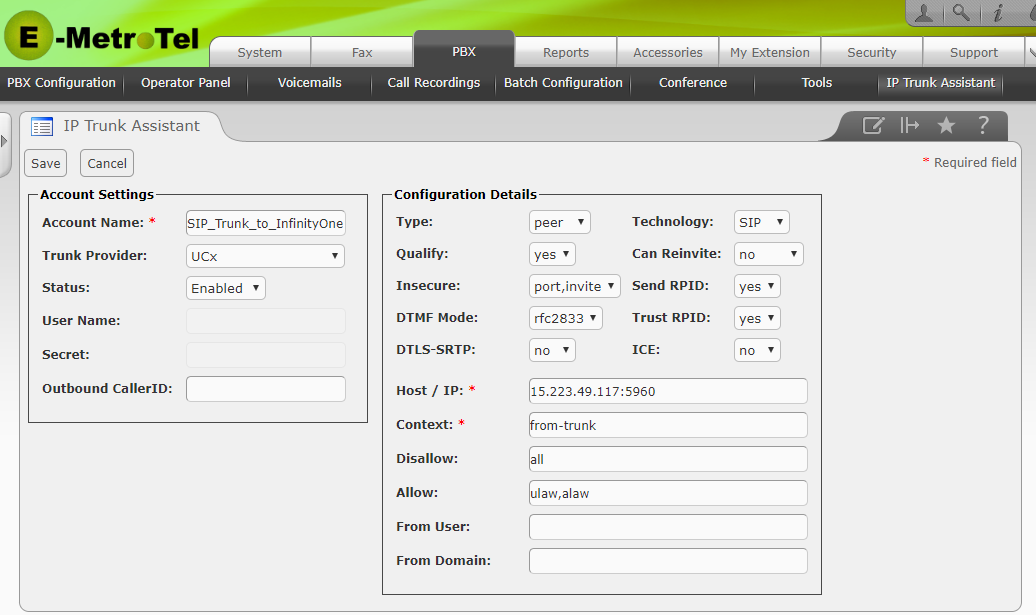
The following is a screen shot of the configuration UCx SIP trunk to the InfinityOne Work at Home solution:

-
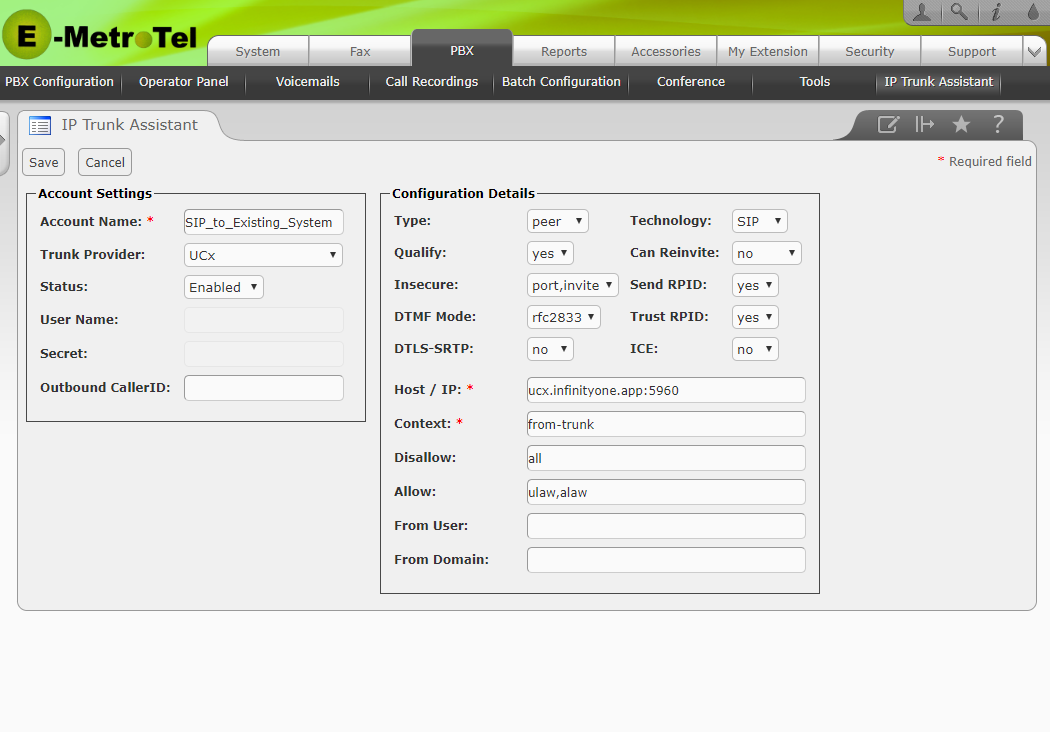
The following is the configuration of the SIP Trunk at the InfinityOne Work at Home solution:

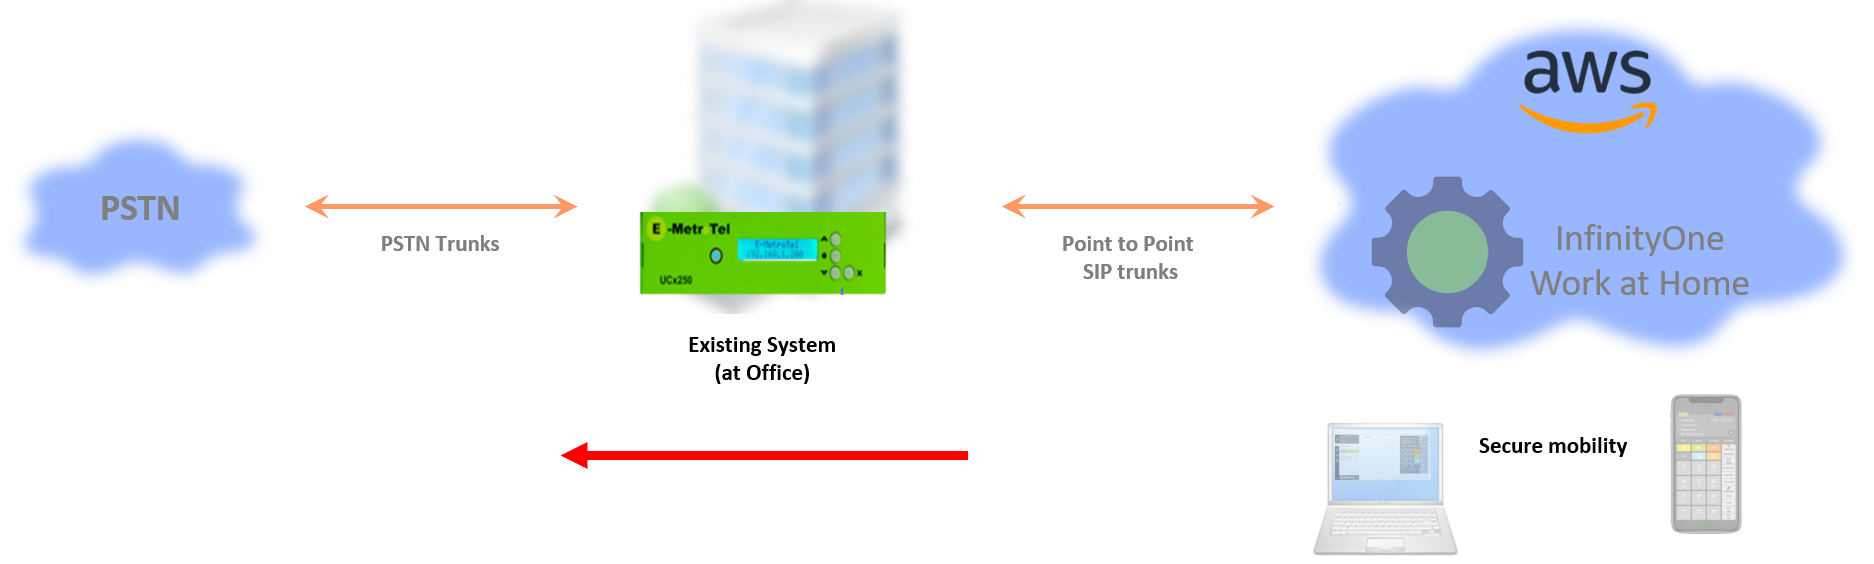
Step Two: Re-Route all Incoming Trunks from the Existing System to the InfinityOne Work at Home system

- Navigate to PBX -> PBX Configuration -> Inbound Routes.
- For each of the existing inbound routes, scroll down to the Set Destination section, select Trunks followed by the SIP trunk from the existing system to the InfinityOne Work at Home solution created in Step One.
- Press the Submit button to save the inbound route.
Step Three: Create a Route to Pass InfinityOne Work at Home solution calls to the PSTN
- Navigate to PBX -> PBX Configuration -> Inbound Routes.
- Enter a descriptive name for the new route (e.g. PSTN_10_Digit)
- In the DID number filedenter an underscore, followed by a the route pattern that you want to direct to the existing PSTN trunk (e.g. _NxxNxxXxxx)
- Scroll down to the Set Destination section, select Trunks, and then select the PSTN trunk you already use (e.g. Existing_PSTN_Trunk).
Step Four: Configure Inbound Routes on InfinityOne Work at Home solution

- Navigate to PBX -> PBX Configuration -> Inbound Routes.
- Enter a descriptive name for the route in the Description field.
- Enter the DID number or pattern in the DID Number field.
- Scroll down to the Set Destination section, select the desired destination. Note this may be a Time Condition, IVR, Ring Group, etc.
- Press the Submit button to save the inbound route.
If you have specific handling requirements for different DIDs, you would need to have a route for each one. In this example there are 2 DIDs that terminate directly on the Admin and Boss extensions, and one that terminates on an IVR to provide an announcement of changes to business operation (hours, response times, etc.)
Step Five: Configure Outbound Route to Existing System
- Navigate to PBX -> PBX Configuration -> Outbound Routes.
- Enter a descriptive name in the Route Name field.
- In the Dial Patterns section, enter one or more dial patterns that will use this route to send calls to the existing system.
- In the Trunk Sequence section, select the SIP trunk built in Step Two from the InfinityOne Work at Home solution to the existing system.
- Press the Submit button followed by the Apply Config bar.