2N Verso Doorphone
2N's Helios IP Verso doorphone The 2N® IP Verso security intercom is designed for access control and communication in various environments, such as residential complexes, commercial buildings, and more. The IP Verso is known for its flexibility and scalability, allowing you to customize it to your specific needs.
Note: The model used for testing was the Helios IP Verso is SIP intecom (doorphone). The following settings are the same for the whole lineup of 2N IP intercoms (doorphones).
STEP ONE: Configuration on the UCx Server
- Login to the UCx Web-based Configuration Utility
- Navigate to PBX - PBX Configuration - Extensions page
-
Add an Extension for a Generic SIP Device with the following basic parameters
- User Extension (e.g. 111)
- Display Name
- secret
- Click on Submit to create the extension
- Press the Apply Config bar at the top
STEP TWO: Configuration of the 2N IP Verso
- Configure 2N® IP Verso using your PC with any internet browser:
- Launch your internet browser (Internet Explorer, Firefox, etc.).
- Enter the IP address of your intercom (eg. http://192.168.1.100/).
- Log in using the username Admin and password 2n.
- Refer to the 2N Installation Manual (optional)
Step-by-Step Procedure:
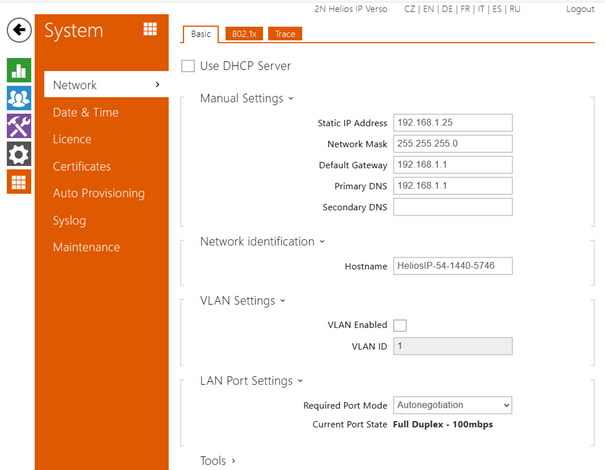
-
Configure Network Parameters

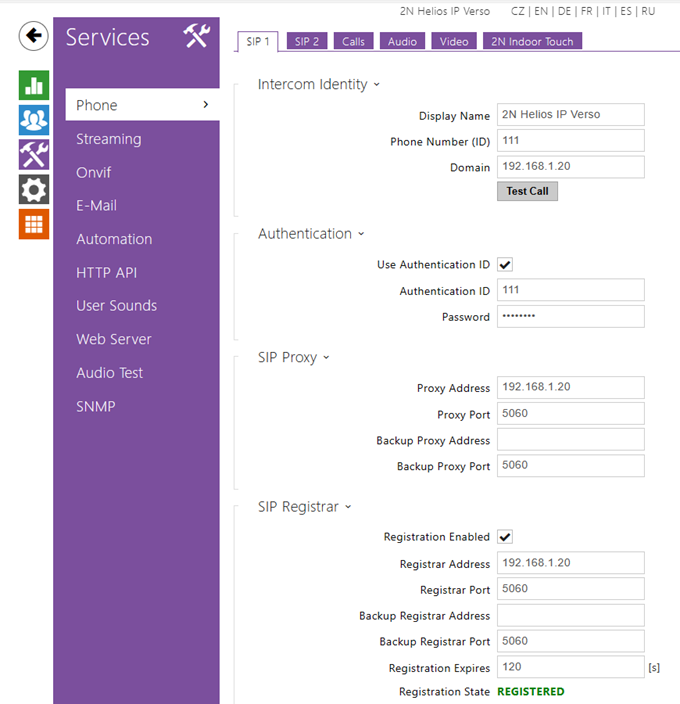
-
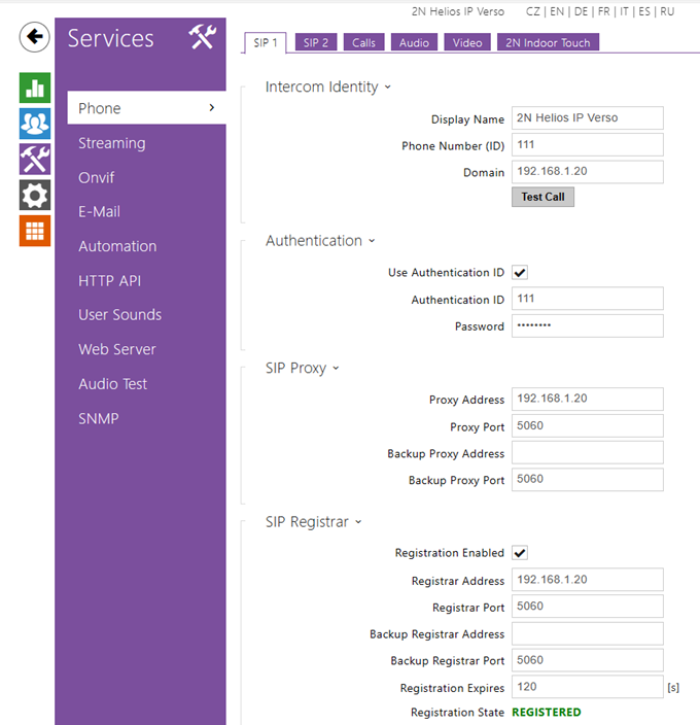
Configure SIP Account as created on UCX
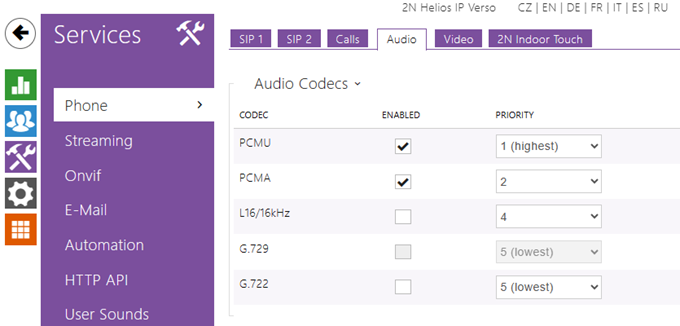
-
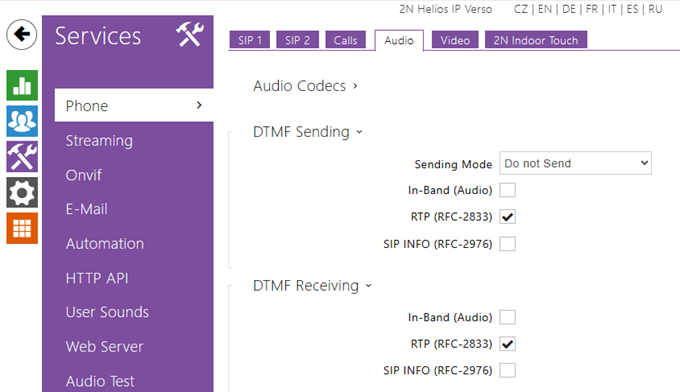
Set up the Audio Codecs

-
Setup the DTMF Signaling

-
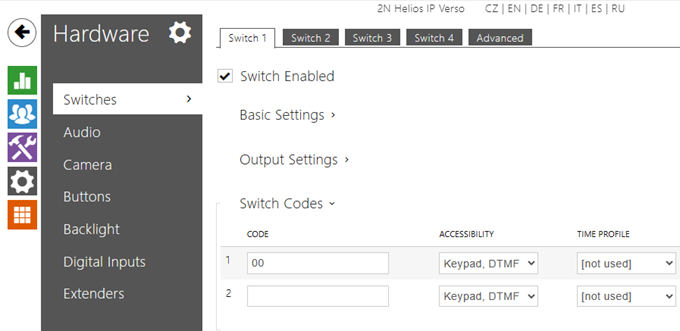
Set up Switch Code to open the door (Default setting is 00)
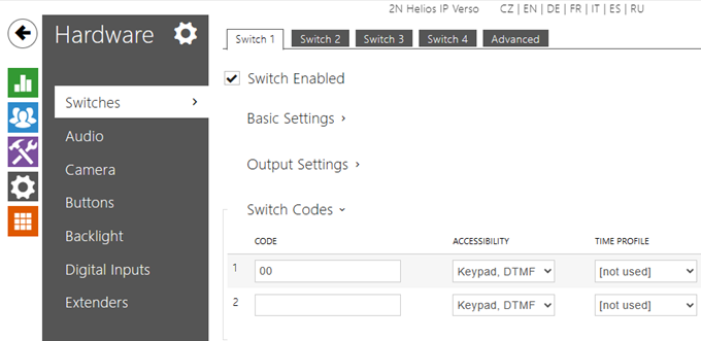
-
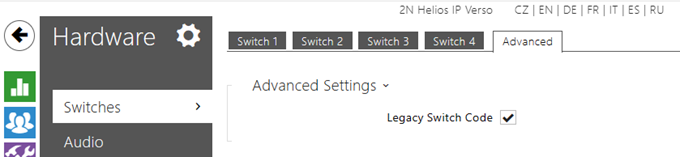
Select "Legacy Switch Code" in the Switches Advanced Settings

-
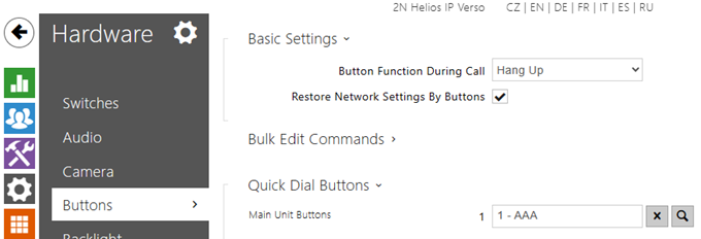
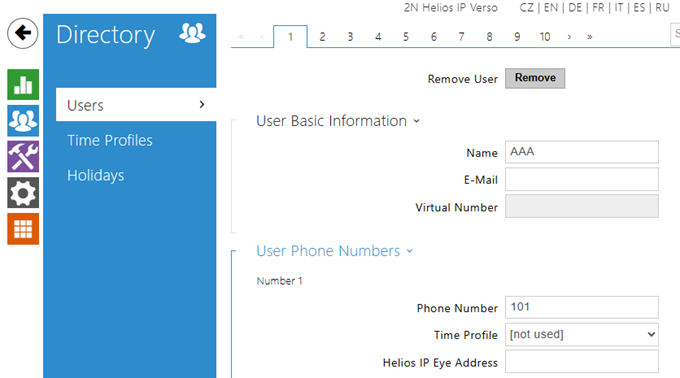
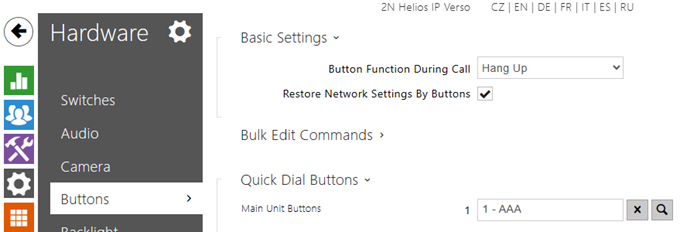
Create user and enter Extension Number where you want to ring when press the button

-
Select User ( EXT. Phone) where it will ring after push Button at the doorphone. Select user with has been prepared at previous step (in this example: AAA)