

UCx Notifier - Usage
Accessing the UCX Notifier System
To log in to the Notifier system perform the following steps:
- Enter the IP address of your UCX in the address field of your browser using http. For example: http://<ipaddress>
- If you do not see the UCX Notifier login screen, try entering the IP address with the port number 4001. For example: http://<ipaddress>:4001
- Login with the account provided by your administrator
- Click the Sign in button

After logging in, the first page displayed will be the main Notifier page.
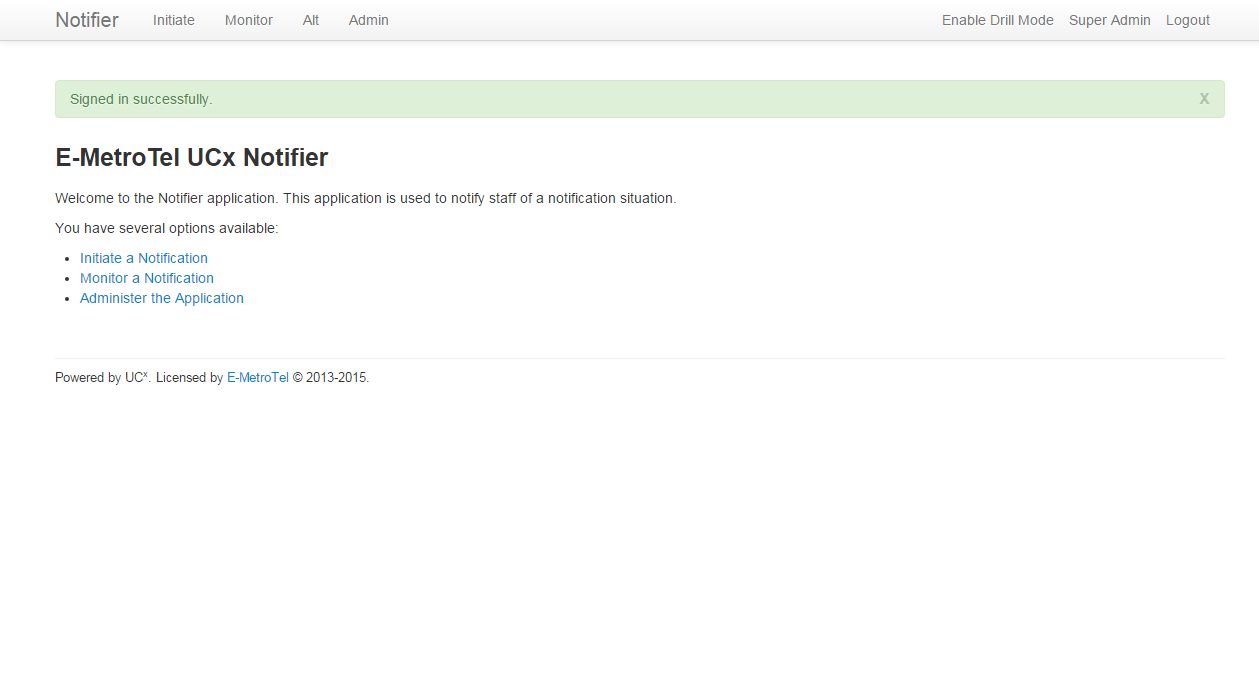
From the main Notifier page, you can perform the following functions:
- Initiate a Notification
- Monitor a Notification
- Enable/Disable Drill Mode
Auto Login
Configured Auto Login
If your administrator has configured auto-login, you can access the respective notifier pages directly. The accounts used to login to these pages are pre-configured by the administrator, you only need to enter the password.
The following are examples of the auto-login pages that may be configured for your system:
- http://<UCXipaddress>/notifier
- http://<UCXipaddress>/notifier/monitor
Token-based Authenticated Login
If your administrator sent you a token-based authentication URL link, then all you have to do is click on the link to access the page without having to login. You can then proceed to bookmark the link or create a shortcut on your desktop.
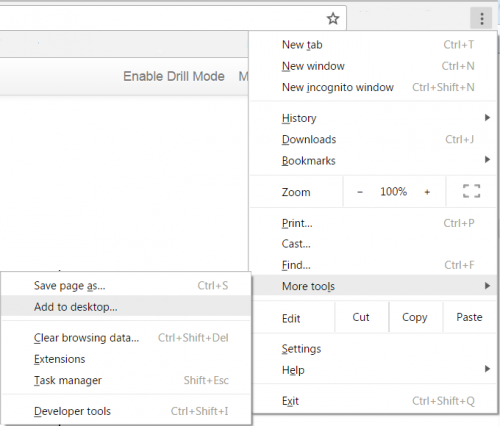
To create a desktop shortcut, perform the following steps:
- Proceed to the URL link provided by your administrator.
- Go to top right corner of your browser and select "Tools" or "More tools".
-
Select "Add to desktop ...".
- A shortcut will be created on your desktop.
- To access the Notifier page, just double click on the desktop shortcut.
Initiate a Notification
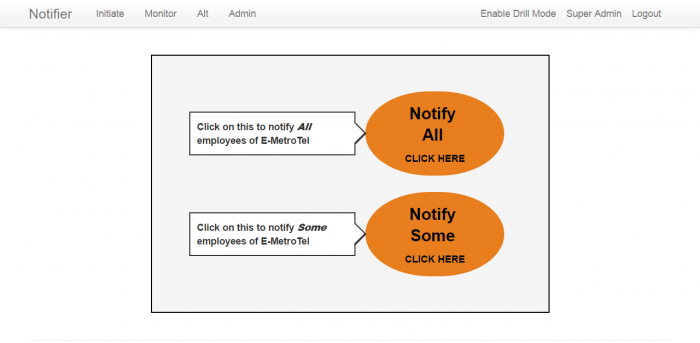
To initiate a notification, perform the following steps:
- Cick on the Initiate link at the top menu bar.
-
Click on the corresponding button to notify the desired group.
-
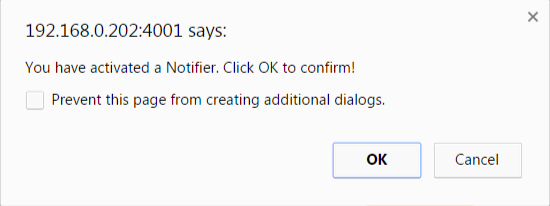
Click on OK to confirm.
-
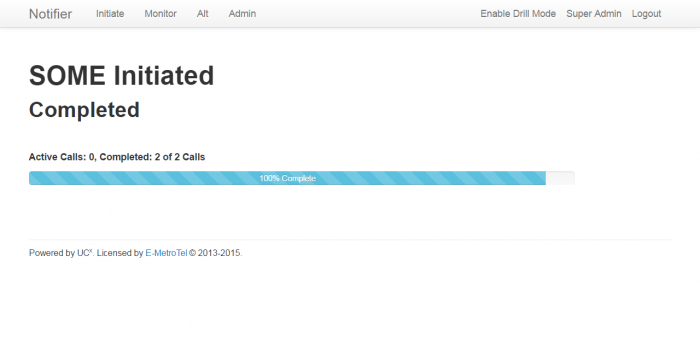
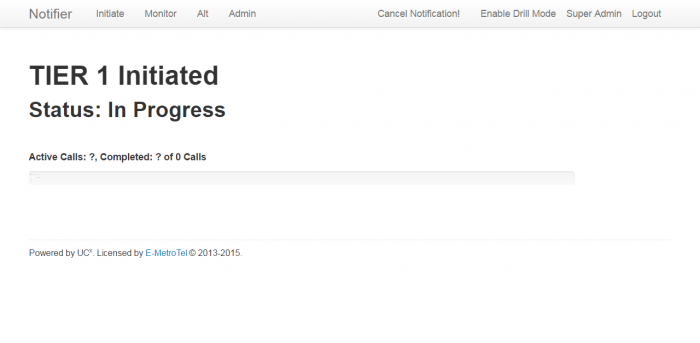
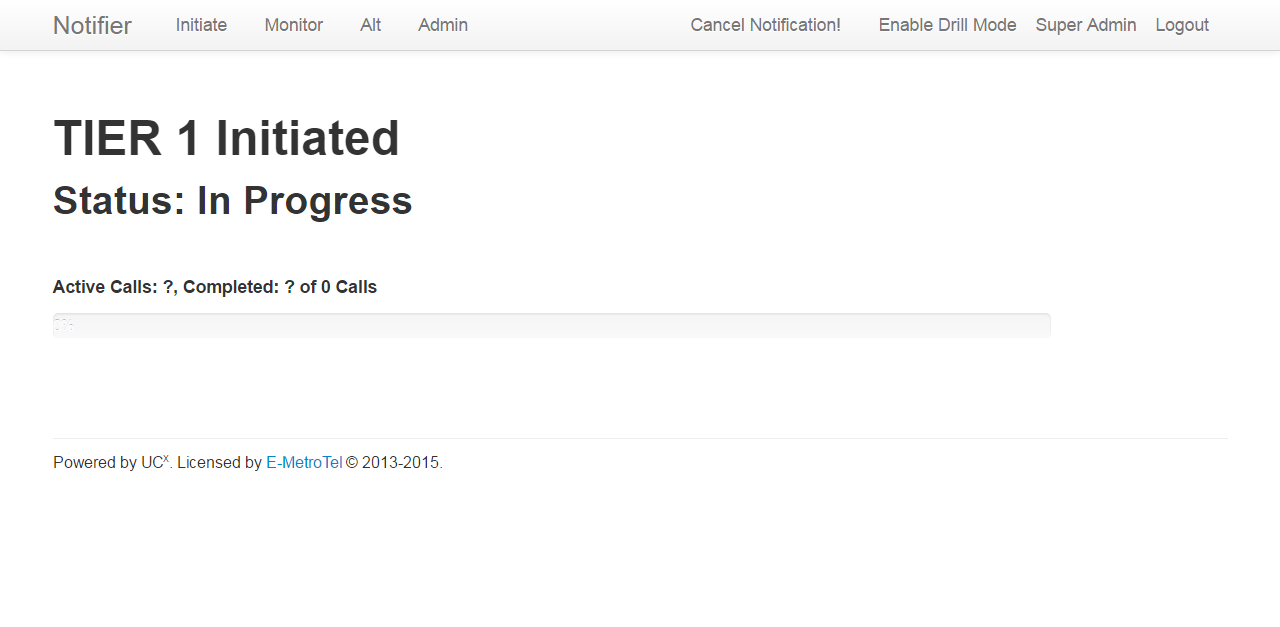
The page will begin to show progress and completion of the notification.
-
While the notification is in progress, you can click on the Cancel Notification! link on the top menu bar to cancel the notification.


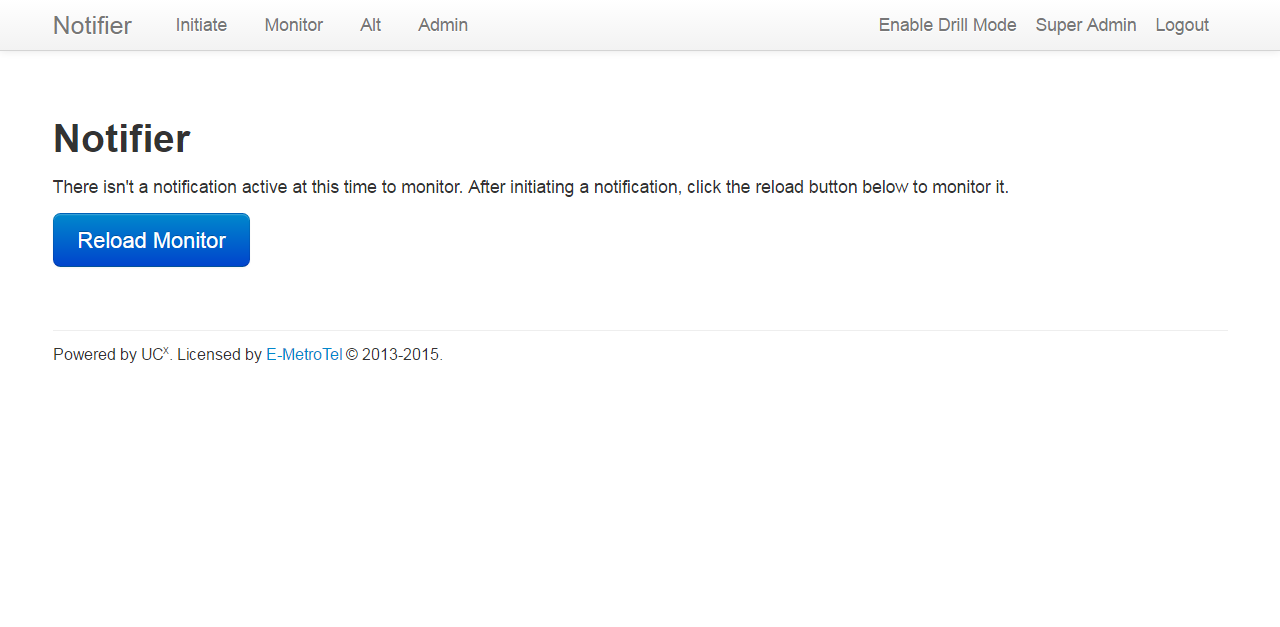
Monitor a Notification
To monitor a notification, click on the Monitor link at the top menu bar.
If there is no active notification, you will see the screen below. Once you have initiated a notification, you can click the Reload Monitor button to start monitoring.
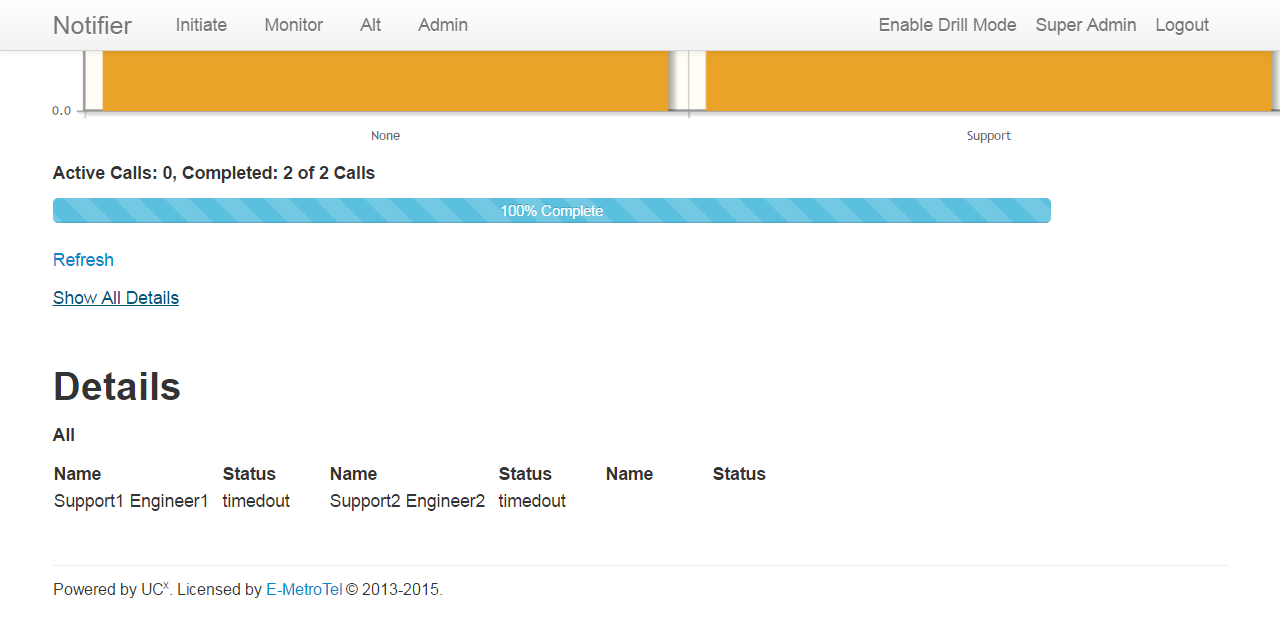
The Summary section provides a graphical summary of the notification status. Clicking on a bar in the graph will bring up the details of the notification, displayed in the Details section of the page.
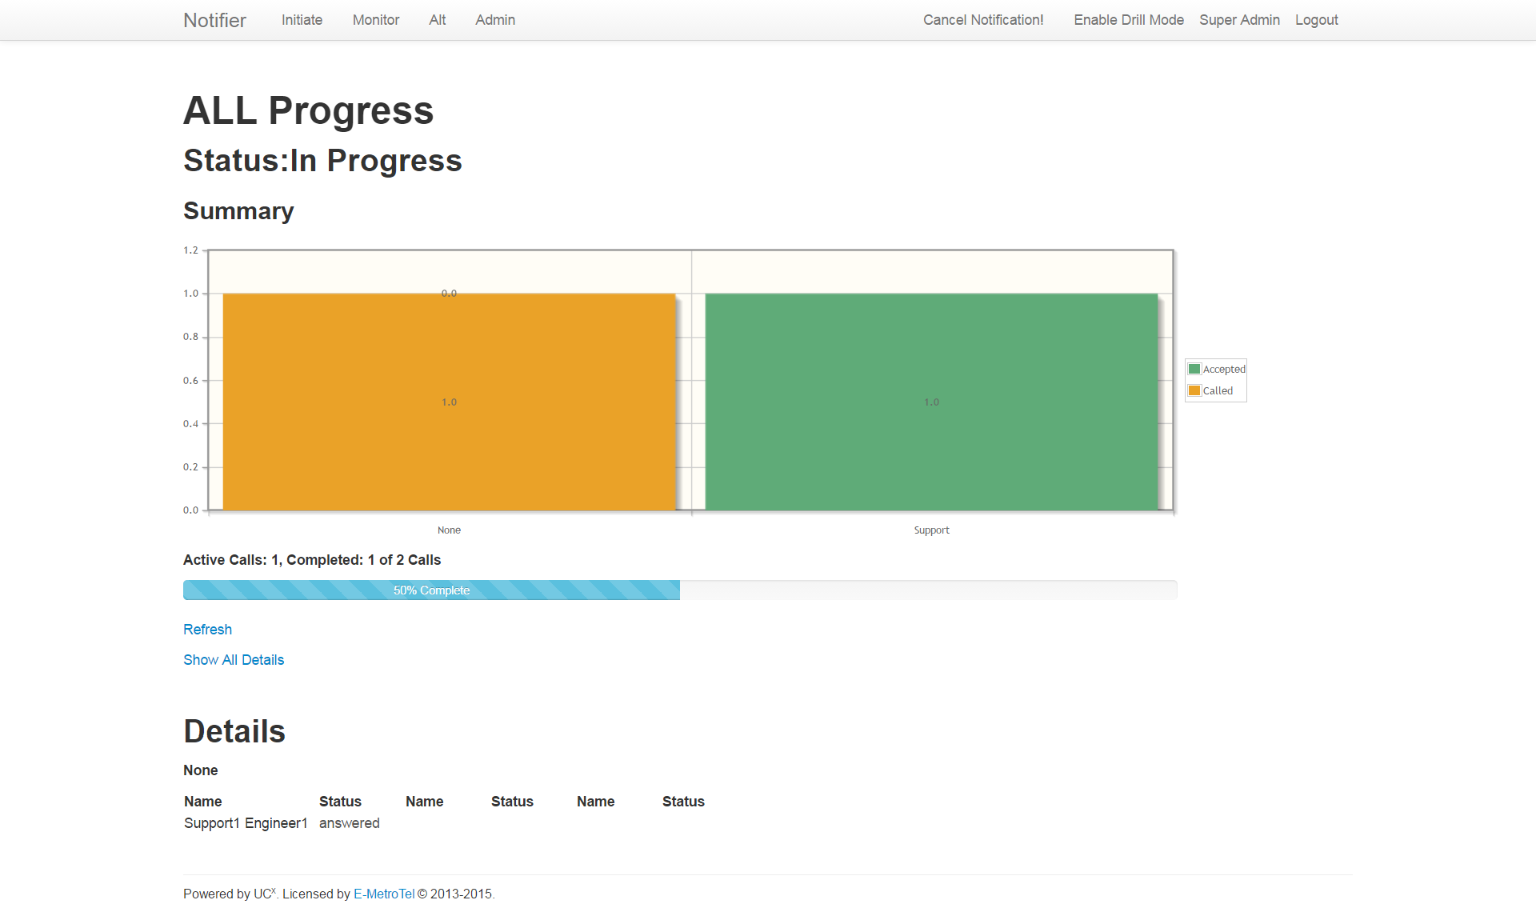
To view details for all calls, click on the Show All Details link.
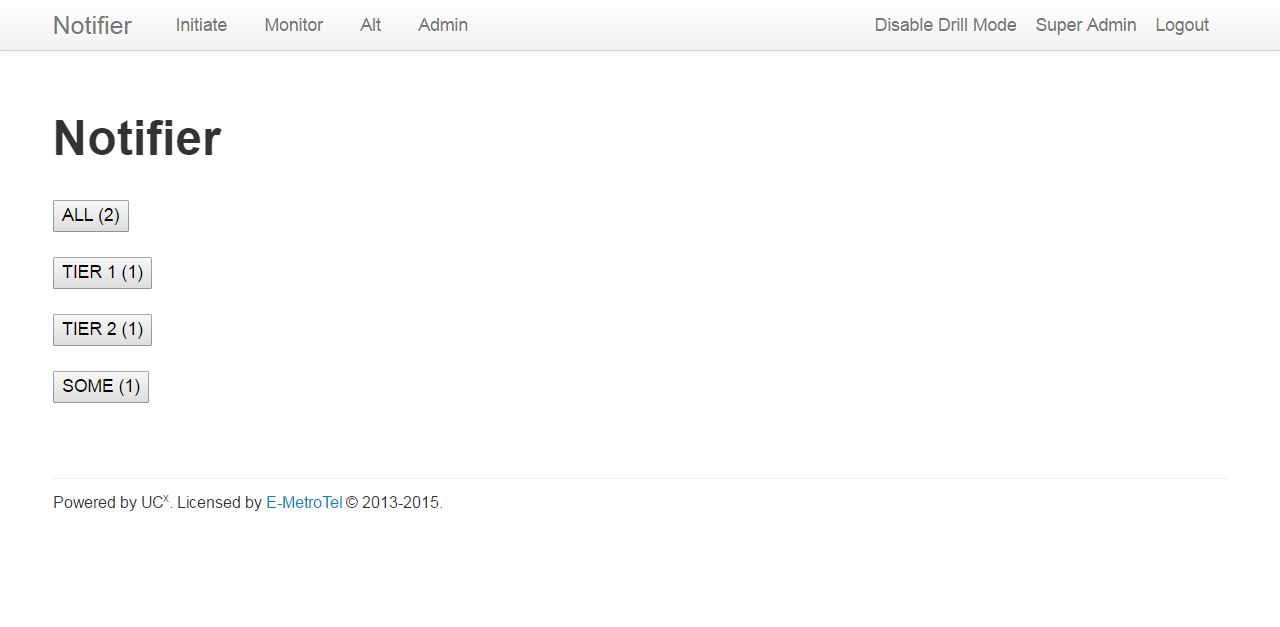
Enable/Disable Drill Mode
Periodic notification process testing can be done with the Drill Mode feature. This may be important for emergency notification applications like hospitals. A separate set of recordings are used when the system is set to Drill Mode.
The Notifier system can be placed into drill mode by clicking on the Enable Drill Mode toggle link at the top menu bar. When in drill mode, notifications will use recordings for drill mode.
To place the system back to normal mode, click on the Disable Drill Mode link.
Important Note: Drill Mode is reset after each callout to ensure the system is ready for the next emergency.
Alt Menu
The Alt Mode is intended to help with initial setup and testing and should be disabled when the application is in production. The Initiate Notification page only provides buttons for the groups provisioned in the application configuration file. However, more groups may have been defined in the Notifier Admin page. The Alt link provides access to all provisioned groups.
If the Alt_mode option is enabled in the configuration file, the Alt link will be available at the top menu bar. Clicking on the Alt link will bring you to the Notifier page that displays all the configured groups, including groups that are not configured to appear in the Initiate page.
From this page, you can initiate notification to any of the groups listed by clicking on the corresponding group's button.
The number listed in parenthesis followig the group name is the number of contacts in the group.