

Installing UCX on your AWS Account
This document is intended to provide the basic steps and settings required to gain access to and launch a Amazon Machine Image (AMI) of the E-MetroTel UCx software on a self-managed Amazon Web Services (AWS) account. It is not intended to provide a comprehensive training on how to establish an AWS account or to install, configure, or manage any AWS resources. Please refer to Amazon documentation for details on the AWS environment.
Prerequisites
- An Amazon Web Services (AWS) Cloud account (Instructions on how to create an AWS account are located in Amazon AWS AMI Environment)
- Minimum of 2 CPUs (recommended minimum Instance Type is "t2.medium")
- An allocated Elastic IP Address that can be associated with the UCx AMI that you will be creating
Step 1: Request Access to E-MetroTel's Private AMI
E-MetroTel uses a Private AMI distribution for the UCx software on AWS accounts. In order to do so, E-MetroTel requires both the user AWS account number and the AWS Region you intend to operate the UCx in. Once this information is made available to E-MetroTel, a Private AMI in that region will be made accessible to the designated account.
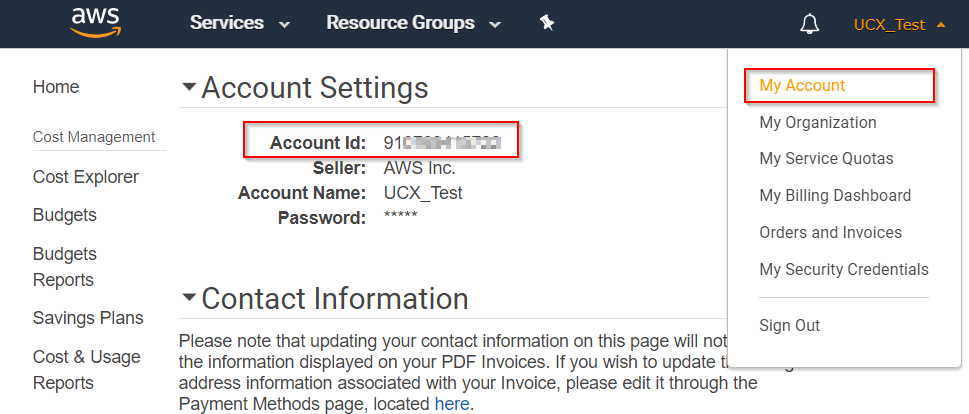
The AWS Account ID is located at the top of the My Account page on your AWS Billing Management Profile page:
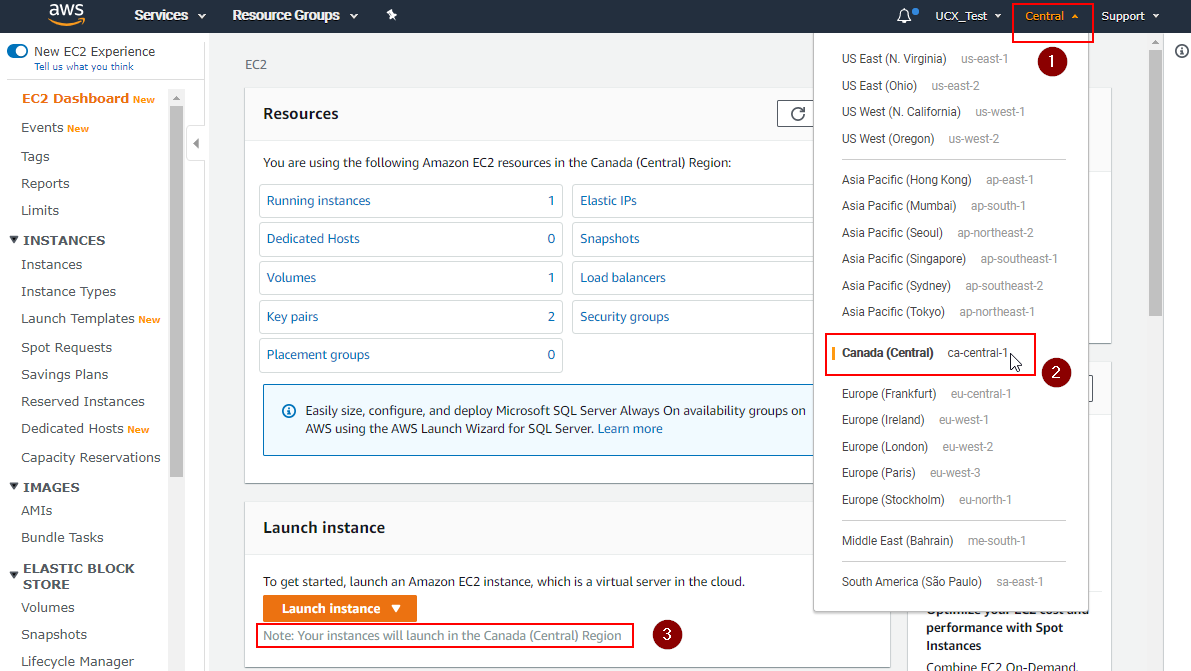
You can set the region where you wish to create your AWS instance by
- Clicking on the drop-down box in the gray AWS bar at the top of the new EC2 Services page.
- Select the location where you want your instances to operate.
- You can also use this page to confirm your current setting for the location.
Once you have noted the Account Number and the Region, provide this information in an E-MetroTel support ticket; you will be notified as soon as access to the AMI has been granted. The next time you wish to create another UCX instance in this same region you will already have access to the AMI.
Step 2: Locating the UCx AMI
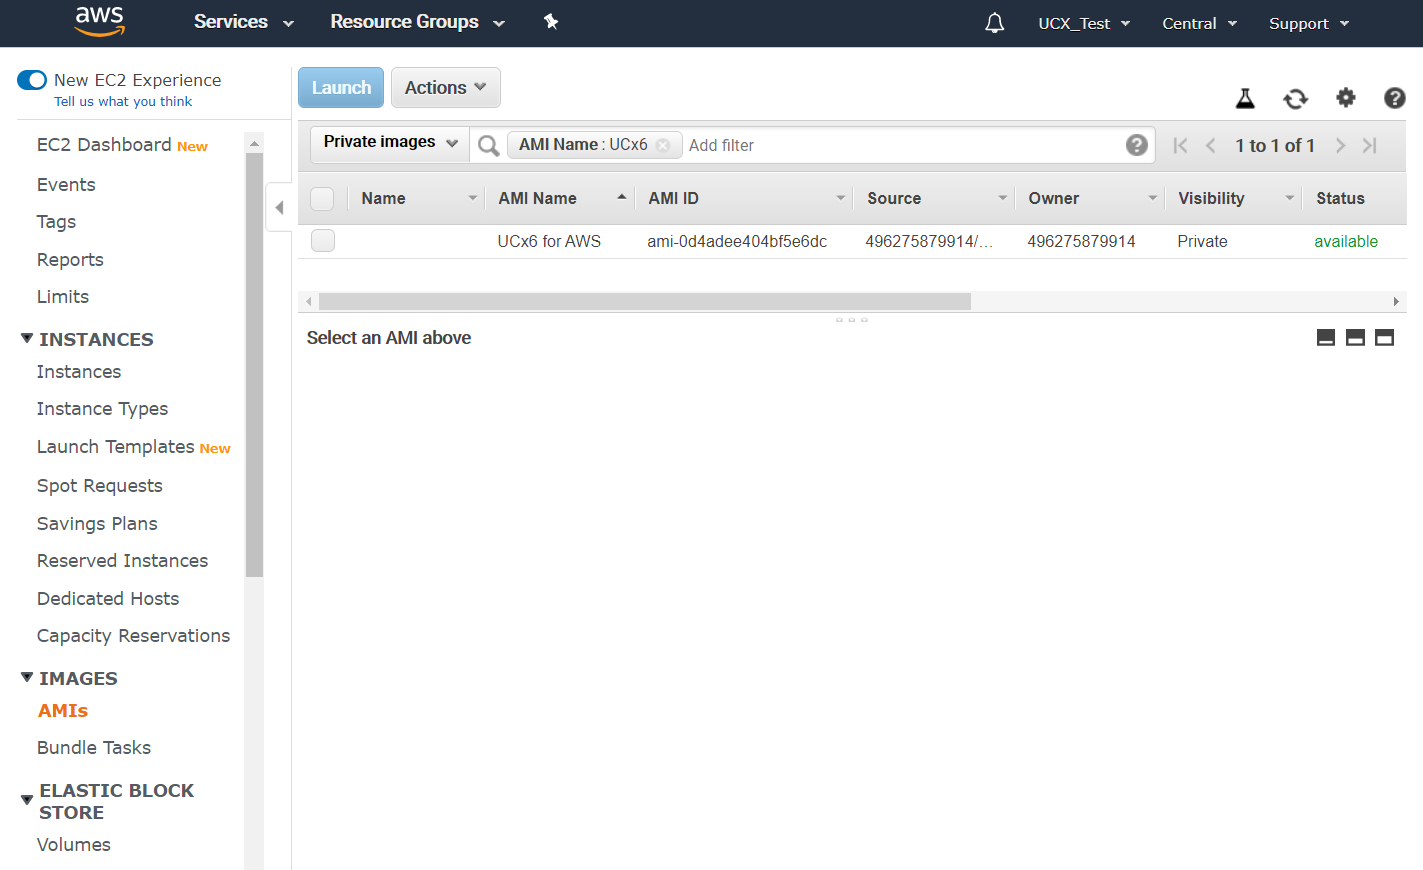
Once you have been notified by E-MetroTel that the AMI has been shared, you may search for it in your AWS EC2 Dashboard. Navigate to the Images / AMIs section of the dashboard, and select Private Images from the search bar at the top of the page. If you have access to a large number of Private Images, you can add a filter for AMI Name and search for UCx.
Step 3: Launching the UCx AMI
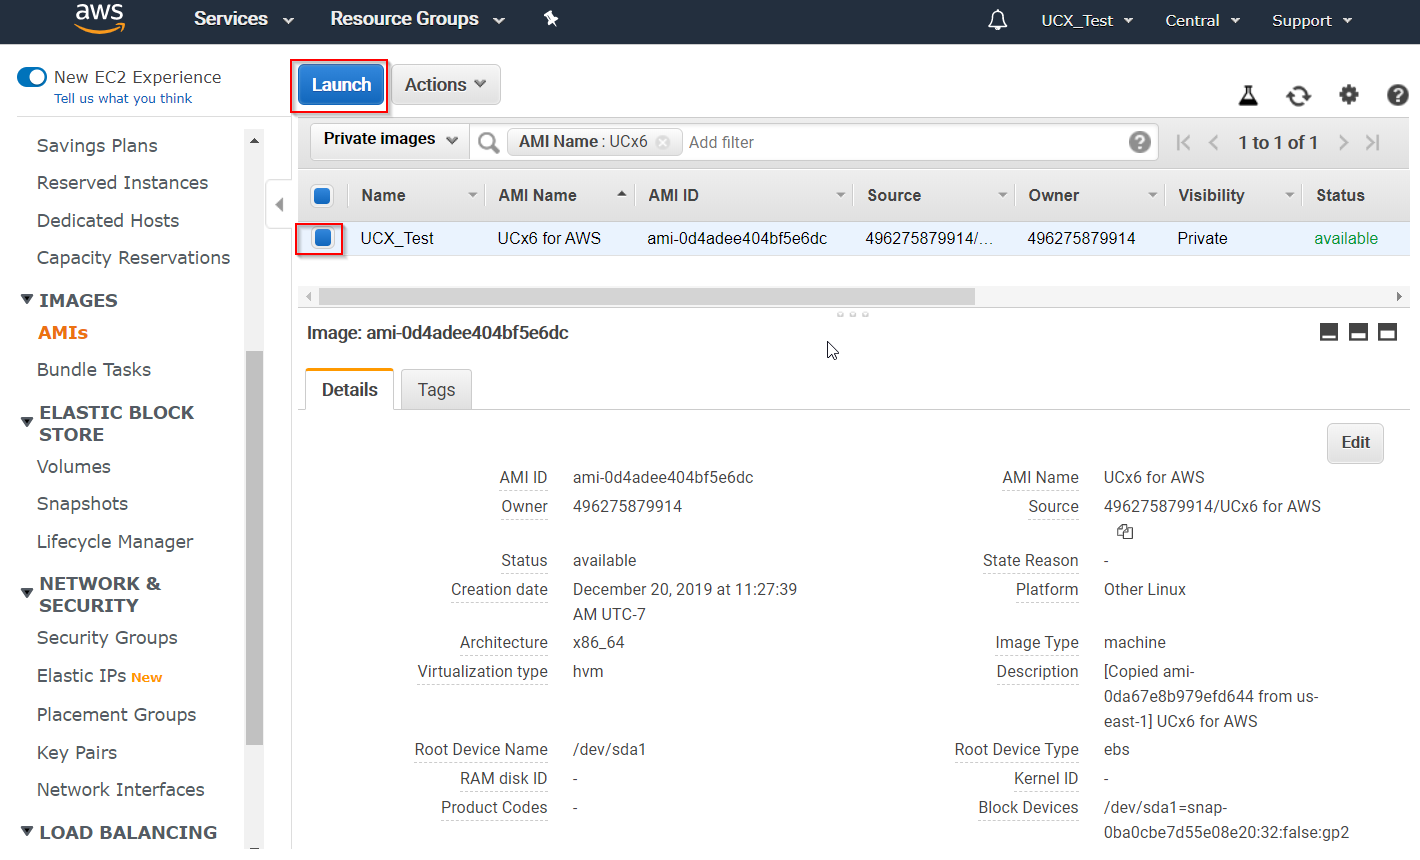
Once you have located the E-MetroTel UCx AMI, you may optionally provide the AMI a name for your own internal reference. You are then ready to launch the instance:
-
Select the UCx AMI instance, and click Launch
-
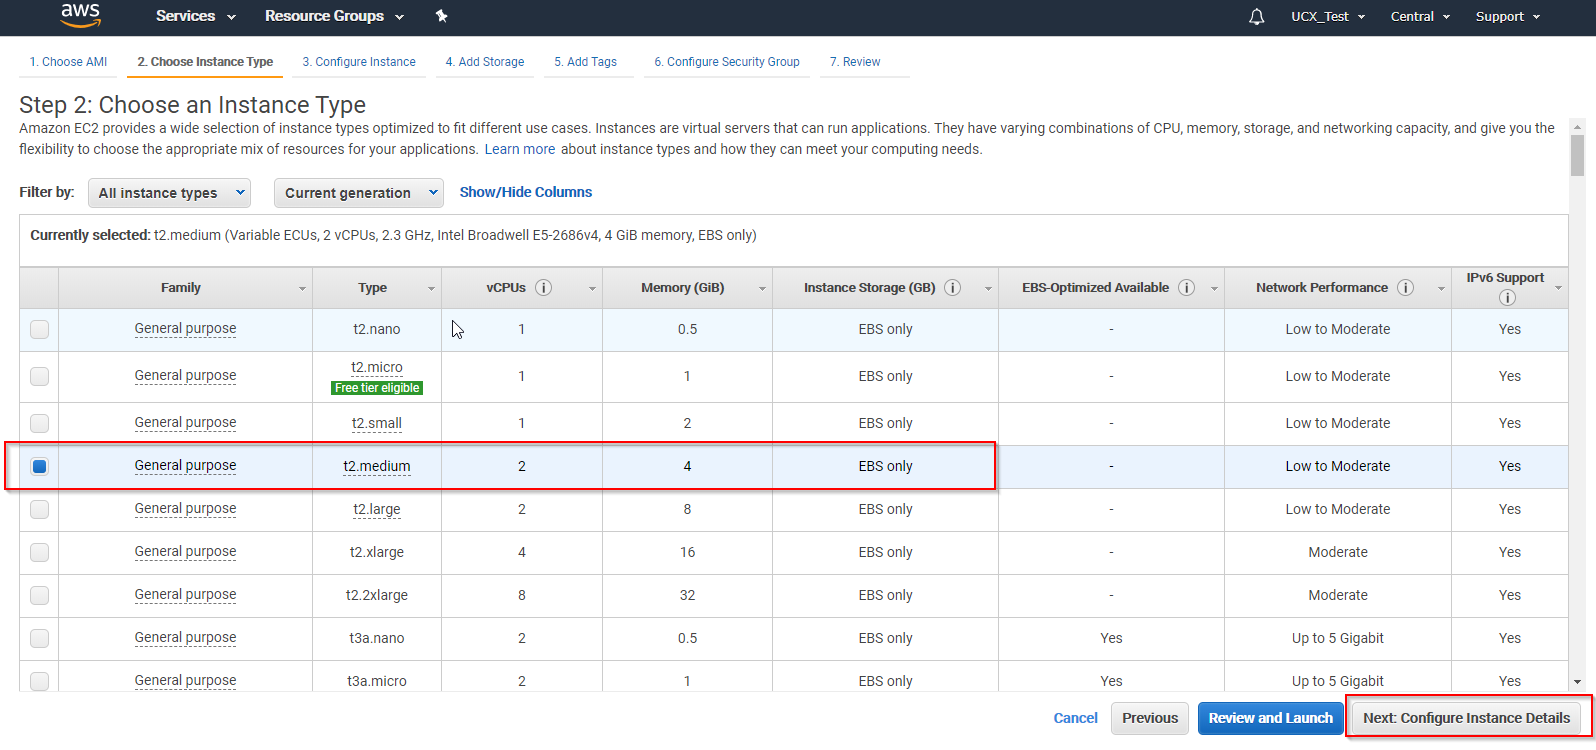
After clicking Launch, you will be prompted to Choose an Instance Type. You should select an instance type for the UCx Software that provides a minimum of 2 CPU's and 2 GB of memory. In this example we have selected an instance type of t2.medium. Select your desired instance type and click Next: Configure Instance Details.
-
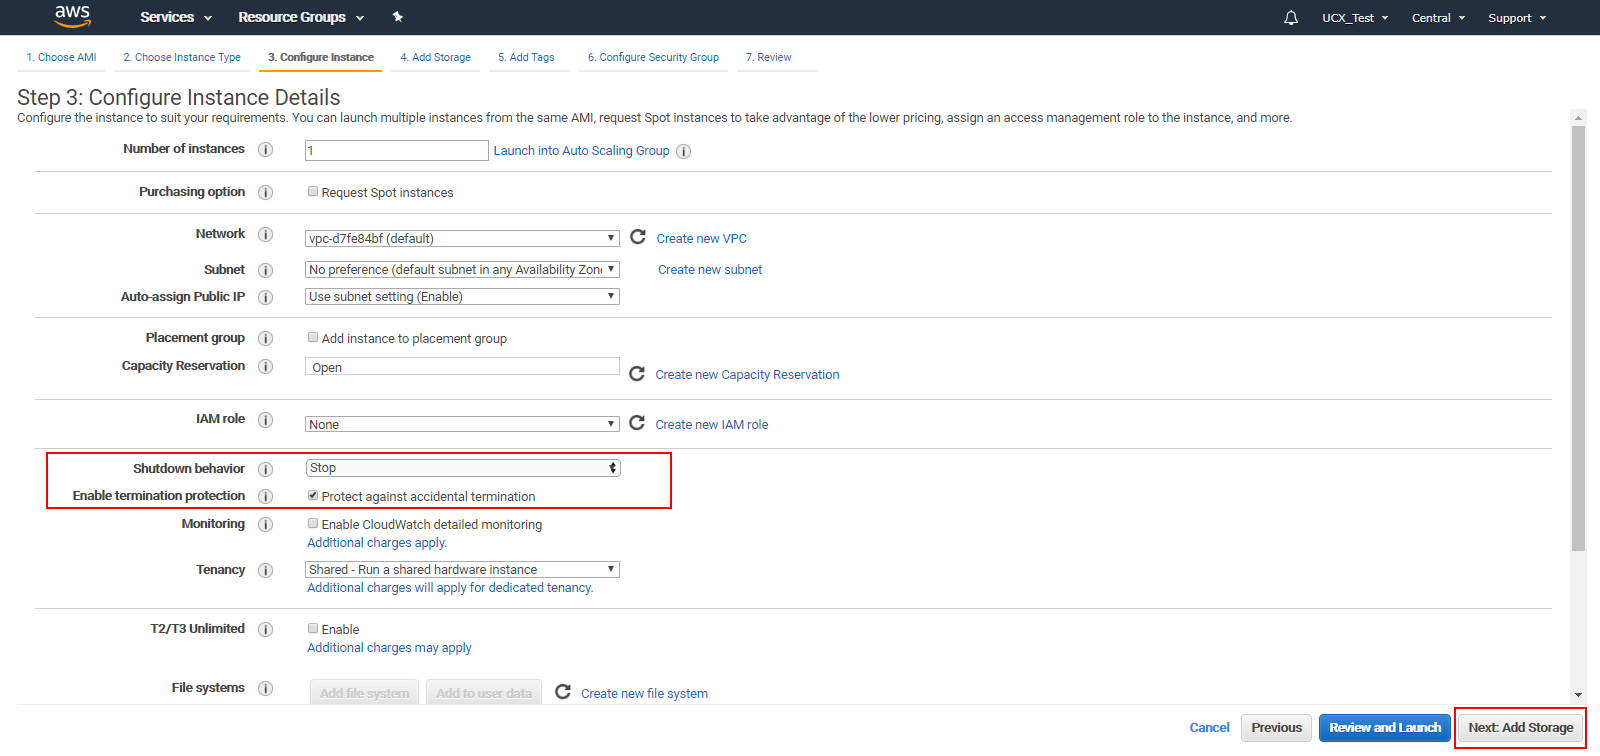
On the Configure Instance Details screen, change the Shutdown behavior to Stop, select the Enable termination protection checkbox. (Note that T2/T3 Unlimited setting can be left disabled as it can cause additional charges to be incurred.) Then click Next: Add Storage.
-
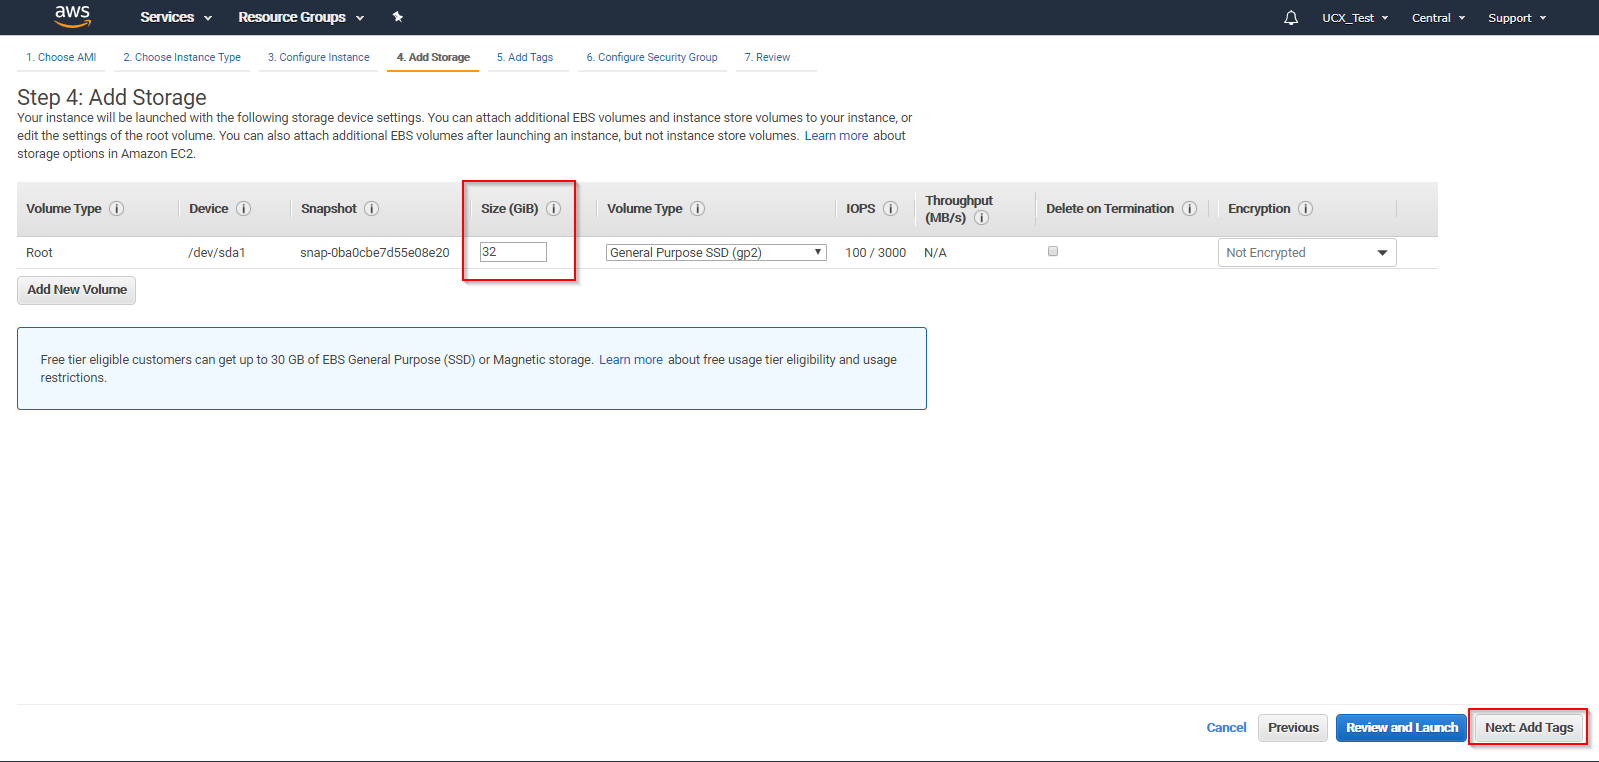
In the Add Storage screen, ensure that the instance is allocated at least 32 GiB and then click Next: Add Tags.
-
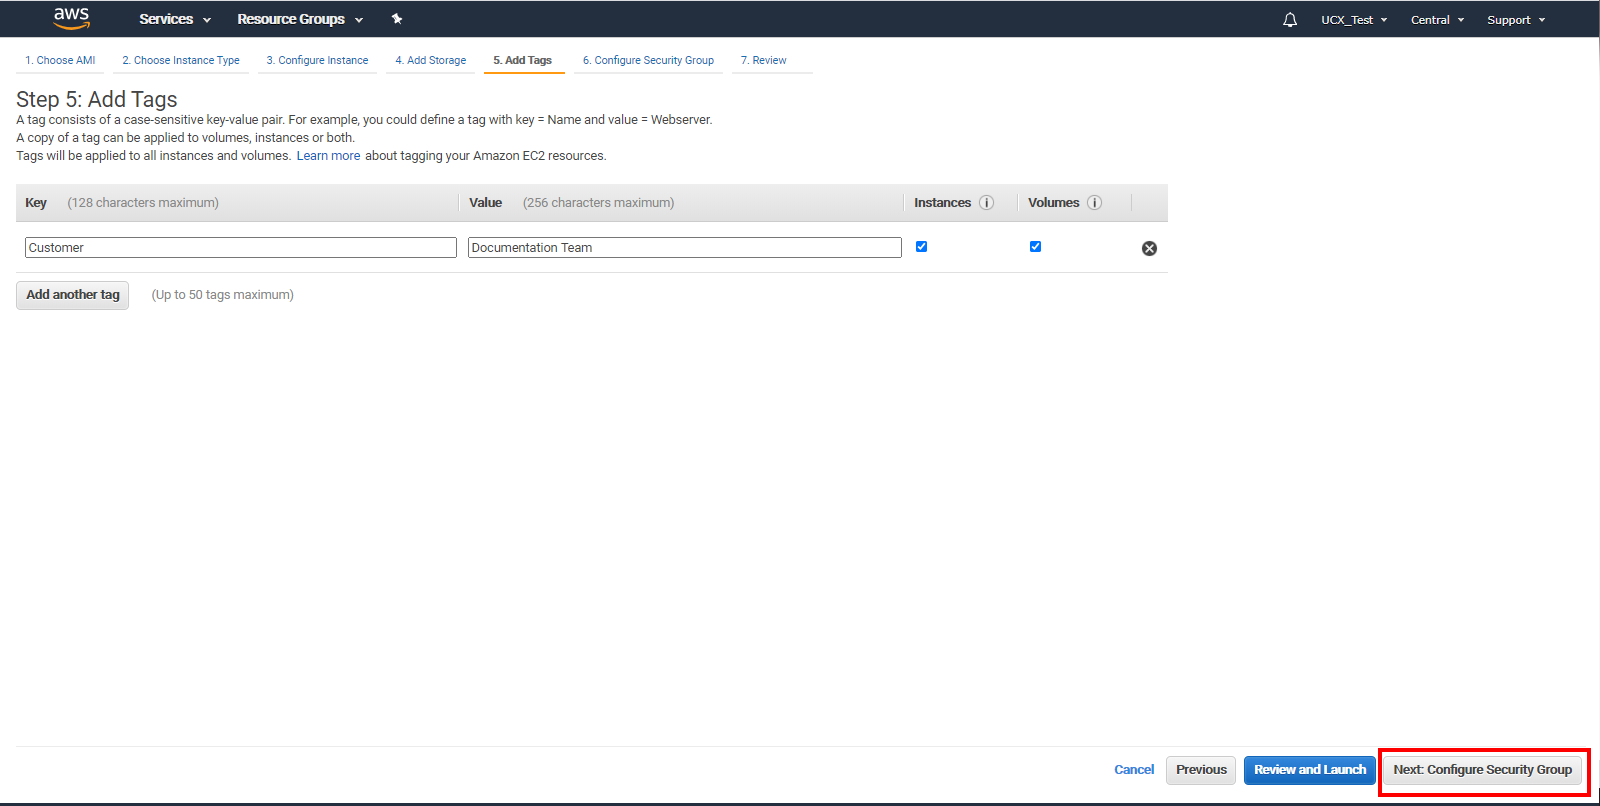
In the Add Tags screen, optionally add whatever tags you wish to help identify this particular instance such as the customer or site name as this will make it easier for future reference and can be used across all components involved in this instance (such as Storage Volume and Elastic IP) as a tracking aid. Click the Add Tag button, enter a Key such as Customer and a Value such as Documentation Team. By default the key and value will be applied both to this Instance and Volume as denoted by the blue checkboxes. Then click Next: Configure Security Group.
-
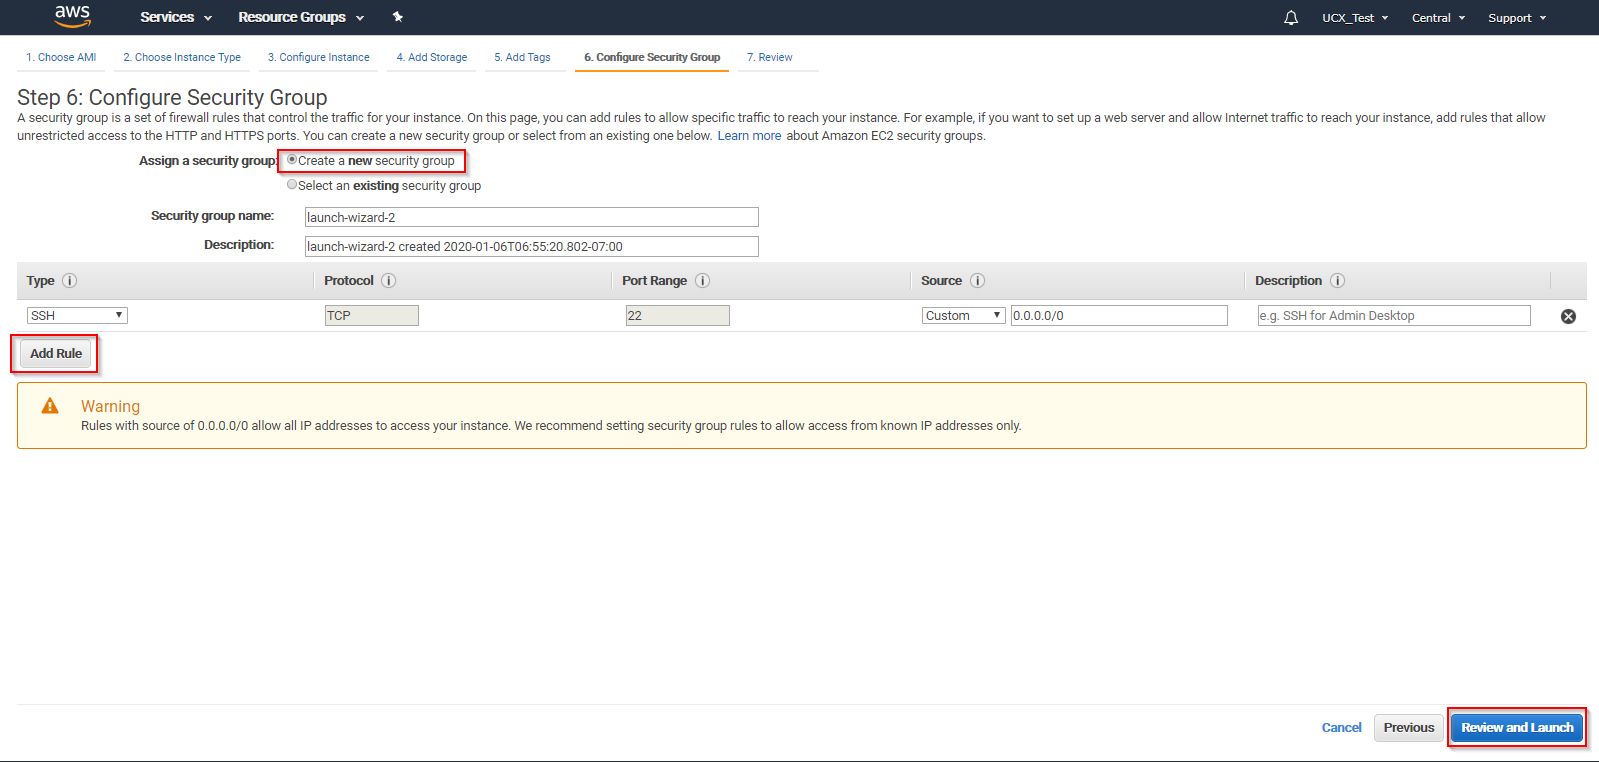
In the Configure Security Group screen, select Create a new security group. Use the Add Rule button to add the rules provided by the E-MetroTel support team in response to your original request for AWS access. (If you have previously created a security group based on E-MetroTel UCx requirements, then you may select that using the Select an existing security group.) Then click Review and Launch.
-
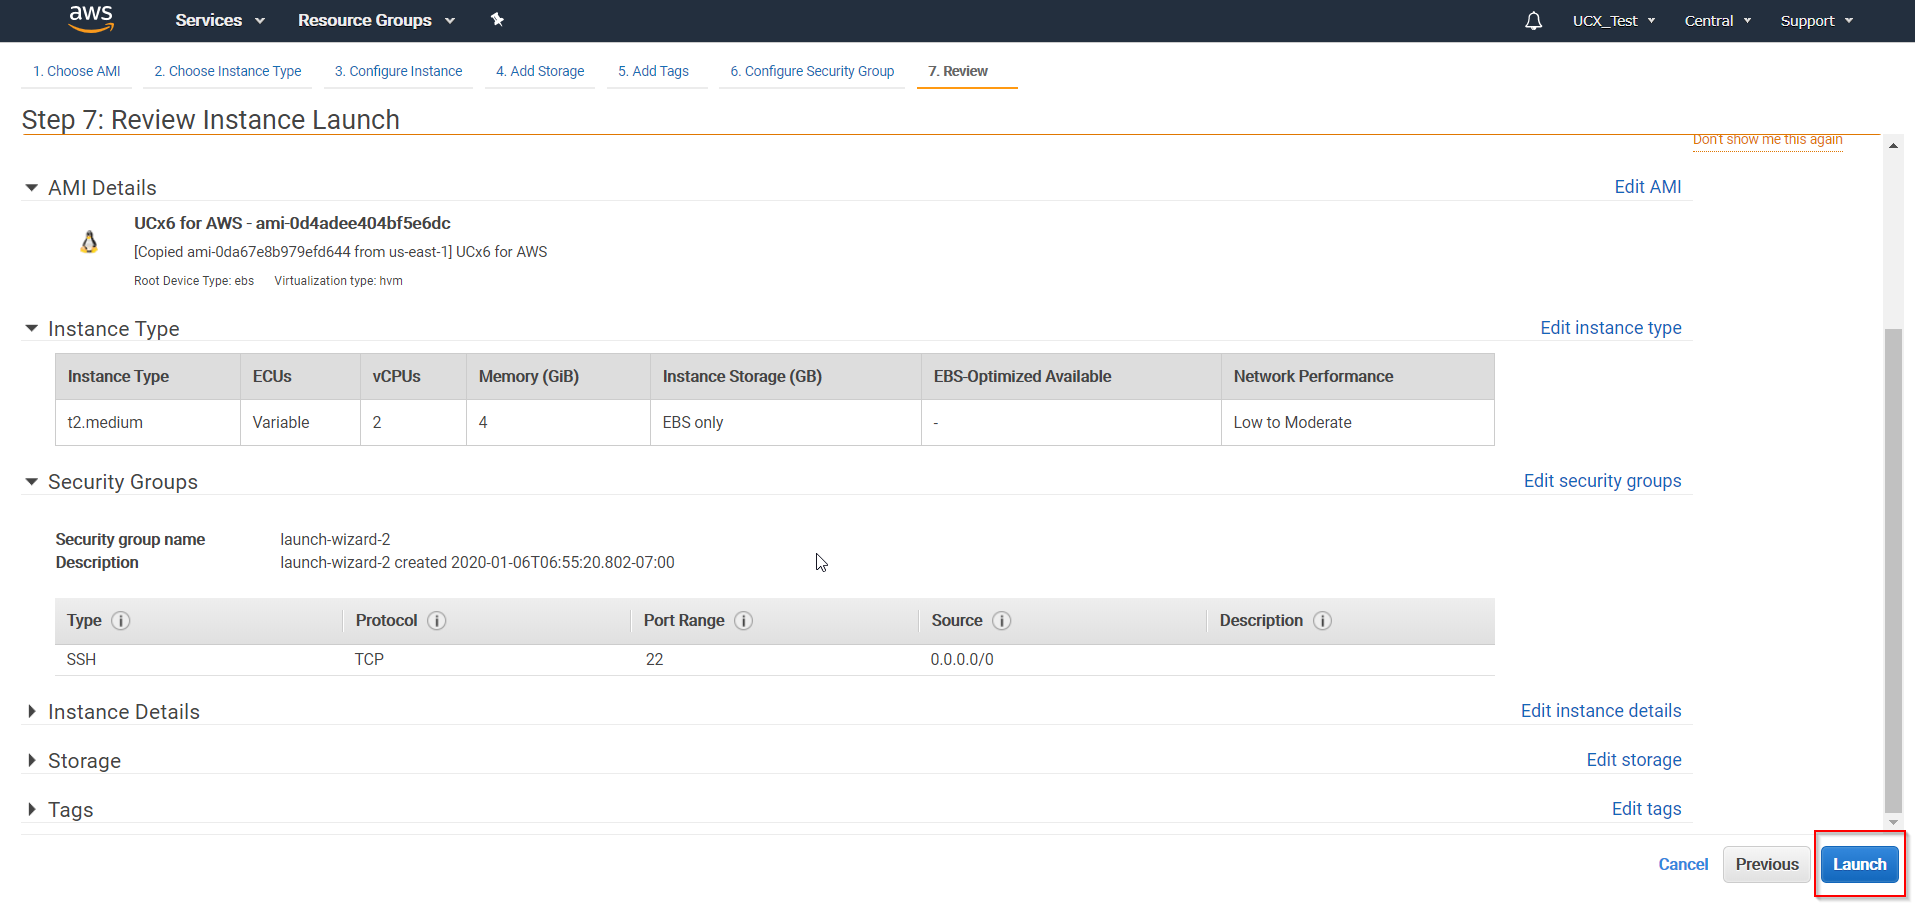
On the Review screen, review any notices or warnings from AWS at the top of the screen as well as the details of your inputs for each of the preceding sections and make adjustments as required. If the details match your expectations, then you may click Launch.
-
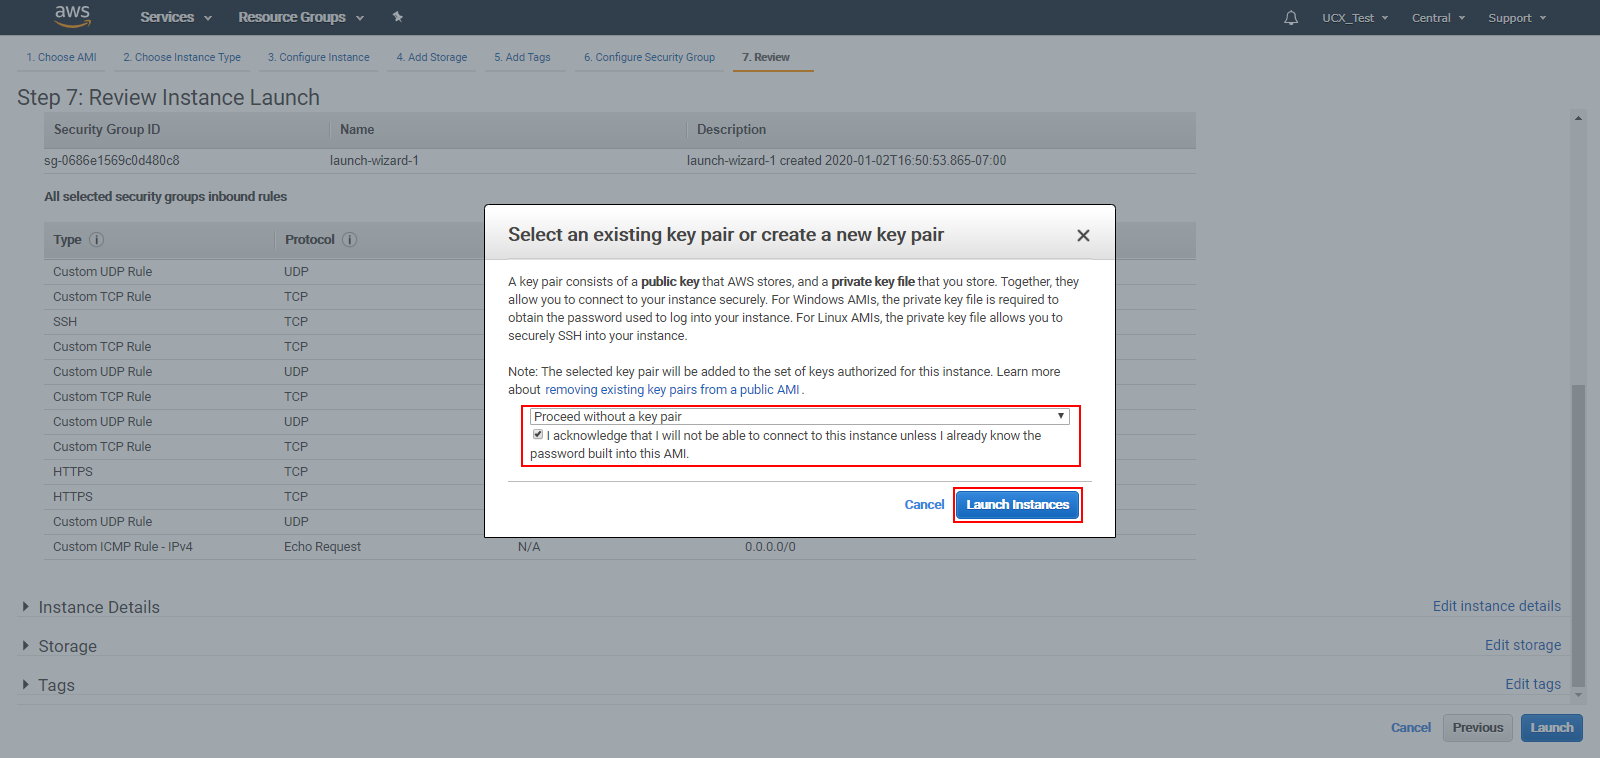
After clicking Launch, you will be required to complete the Select an existing key pair or create a new key pair dialog box. A security key is not necessary for the UCx instance, so you may proceed by selecting Proceed without a key pair. Once you have selected the acknowledgement check box you may click the Launch Instances button.
-
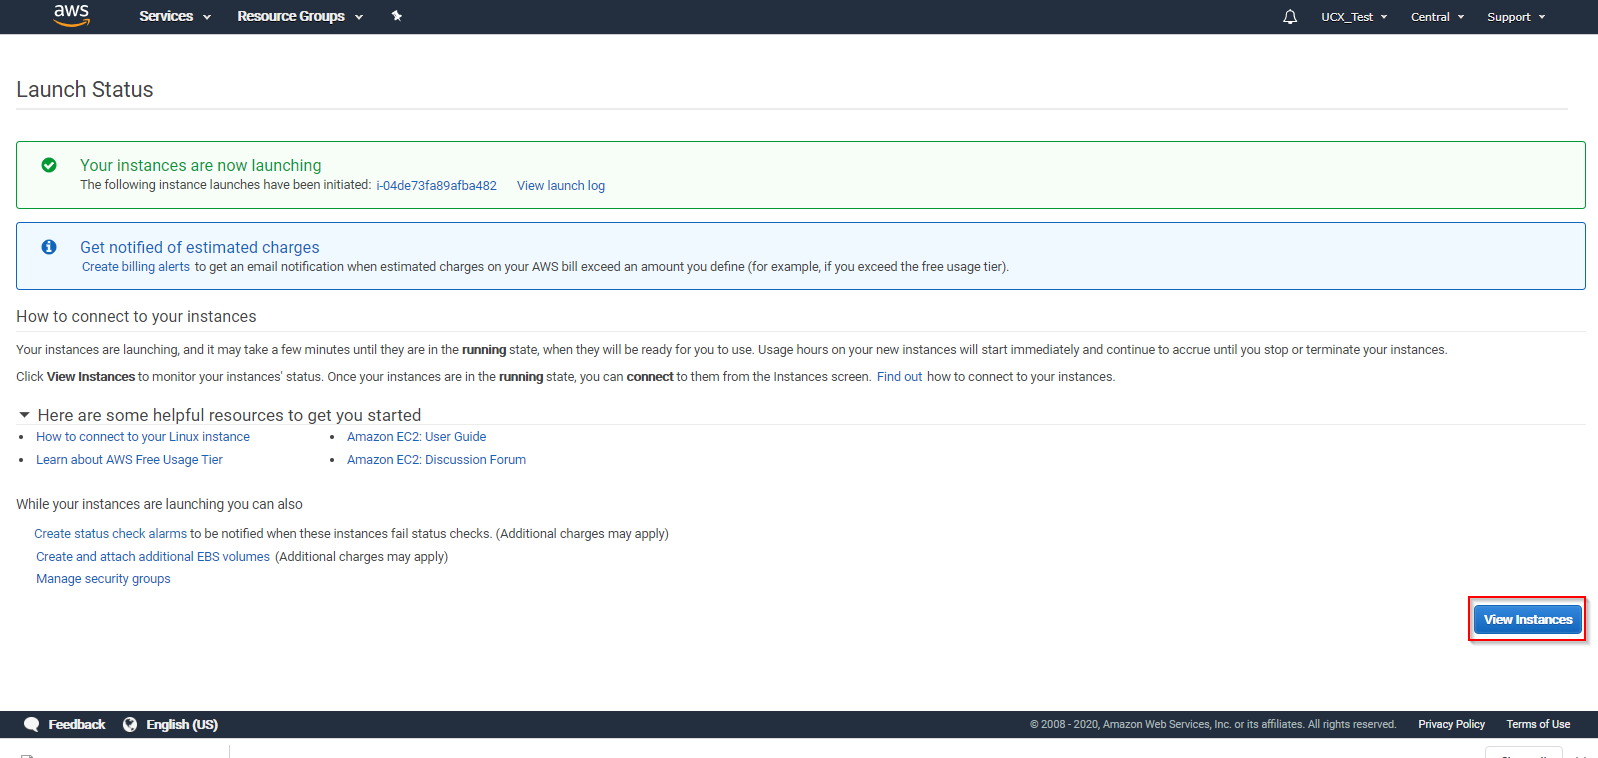
You will be shown the Launch Status screen. Click on View Instances button.
-
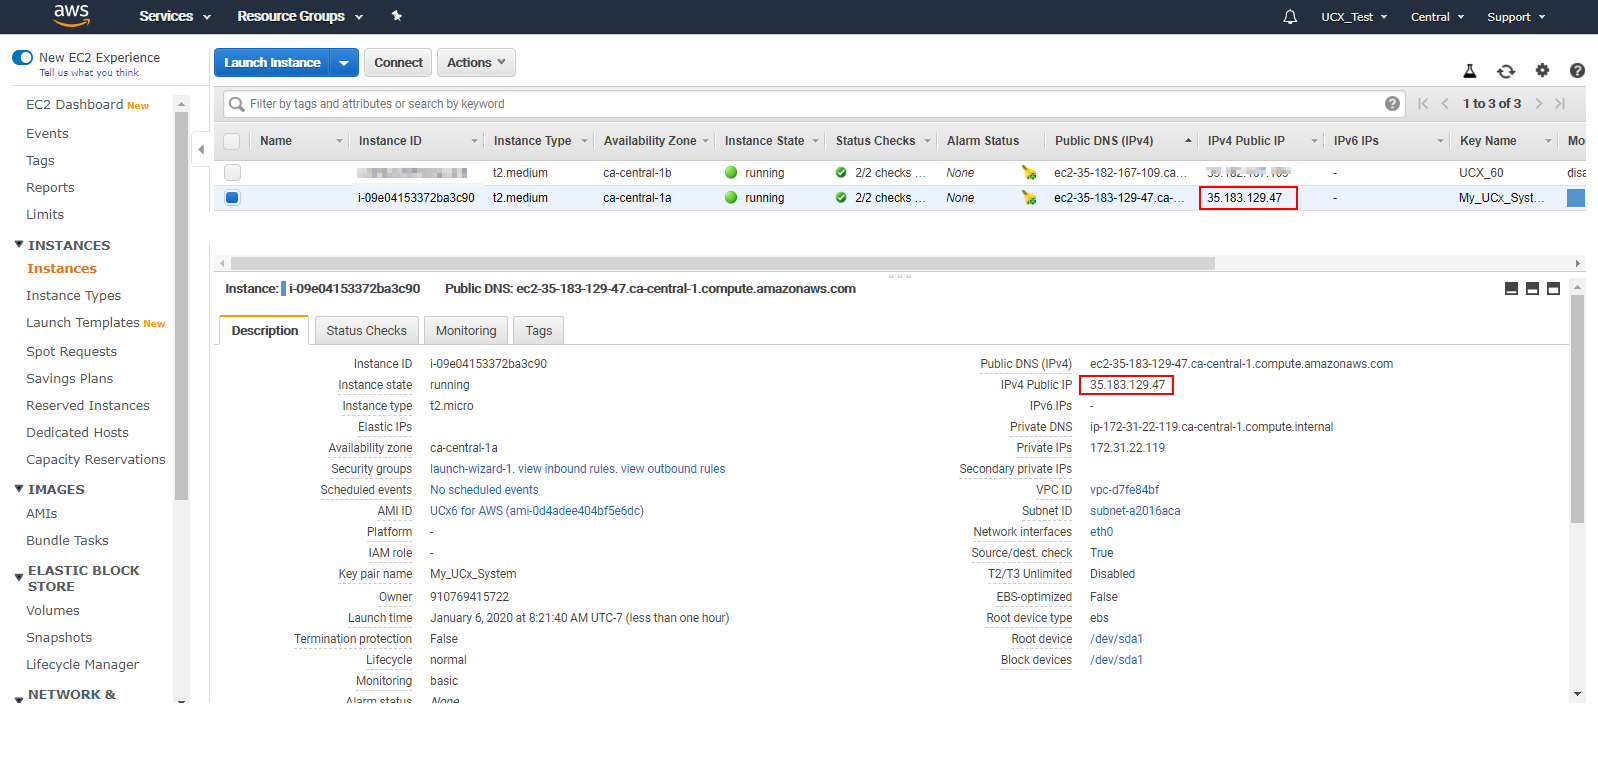
After click the View Instances button, you will be taken to the EC2 Dashboard screen Instances panel, with the newly created instance selected. From here you will be able to see the public IP Address of the system you just created. Note, however, that this IP Address is essentially dynamically and may be re-assigned whenever you restart the system. Proceed to the next step of allocating an Elastic IP address to create a statically assigned address.
Step 4: Allocate an Elastic IP Address
An Amazon Elastic IP Address is a static IPv4 address designed for dynamic cloud computing in the AWS environment. Without an Elastic IP address, the UCx system will get a new public ip address whenever the instance is restarted, requiring significant re-configuration on the UCx and the rest of your network.
You must allocate an Elastic IP Address to your account following AWS Elastic IP Address documentation. Key steps are shown here:
-
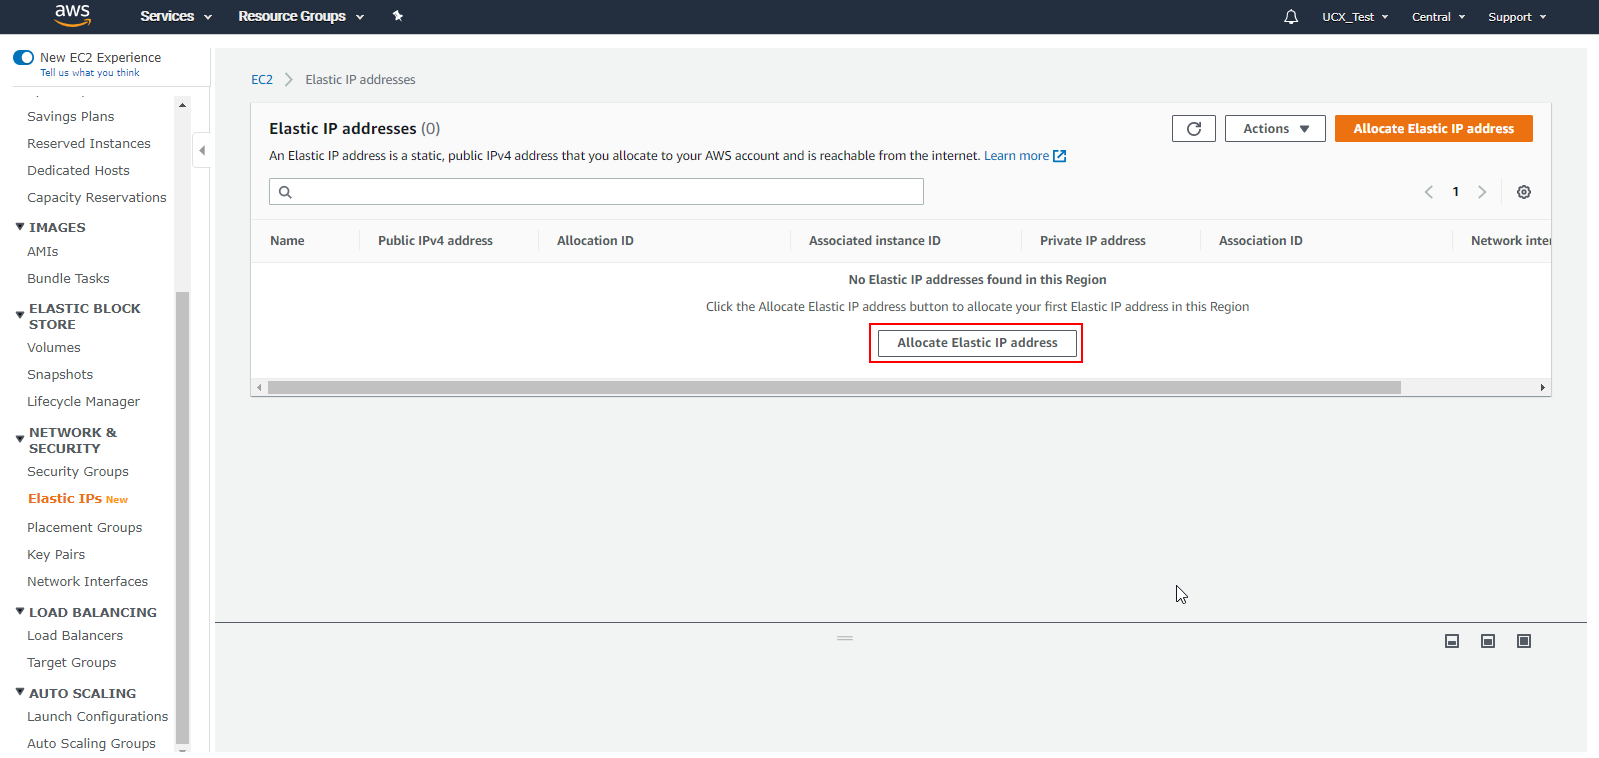
In the EC2 console, select the Network & Security / Elastic IPs panel from the left-hand navigation menu. Click on Allocate Elastic IP Address.
-
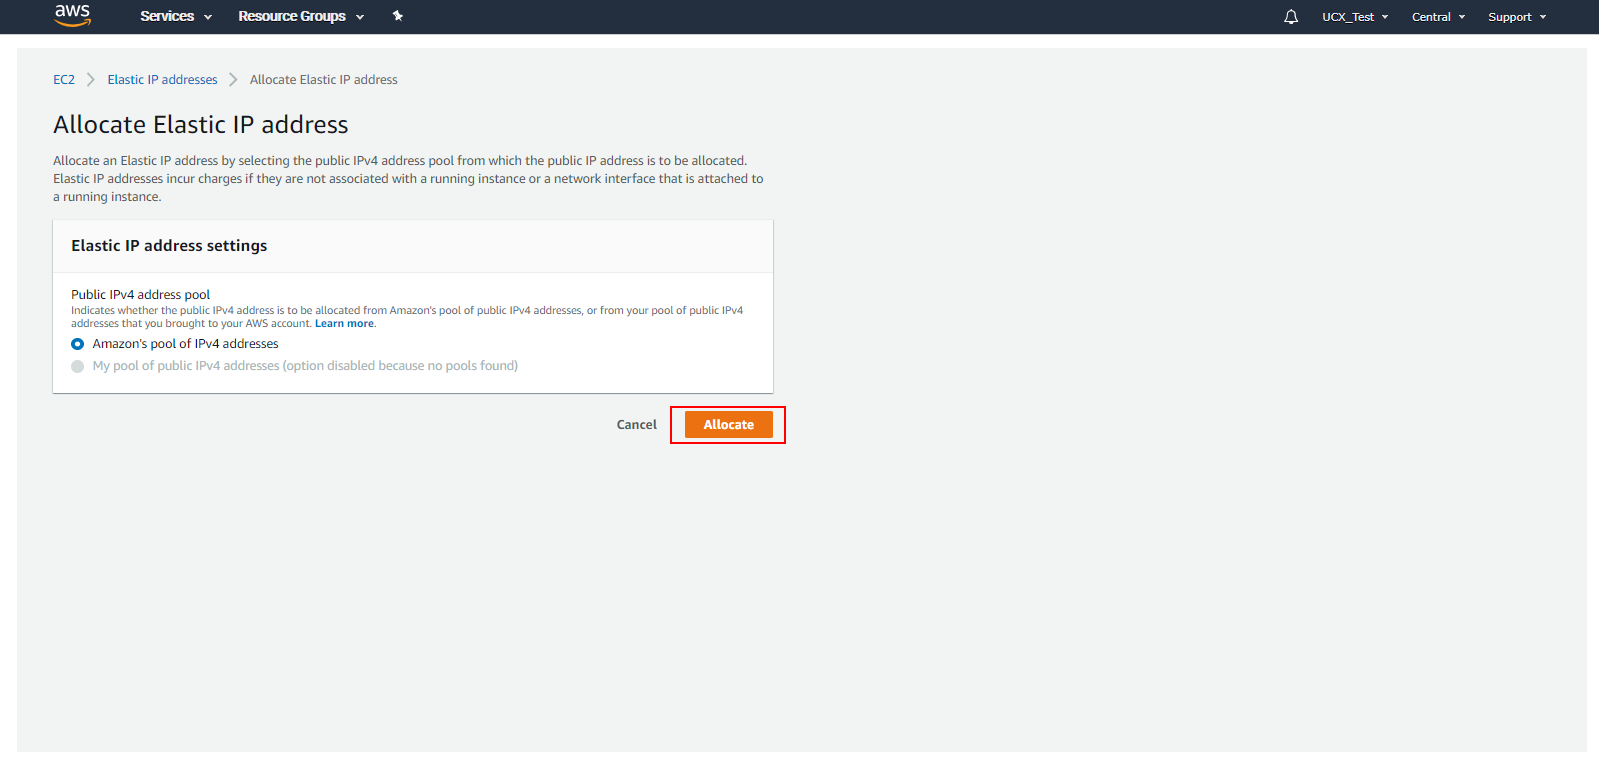
Click on Allocate.
-
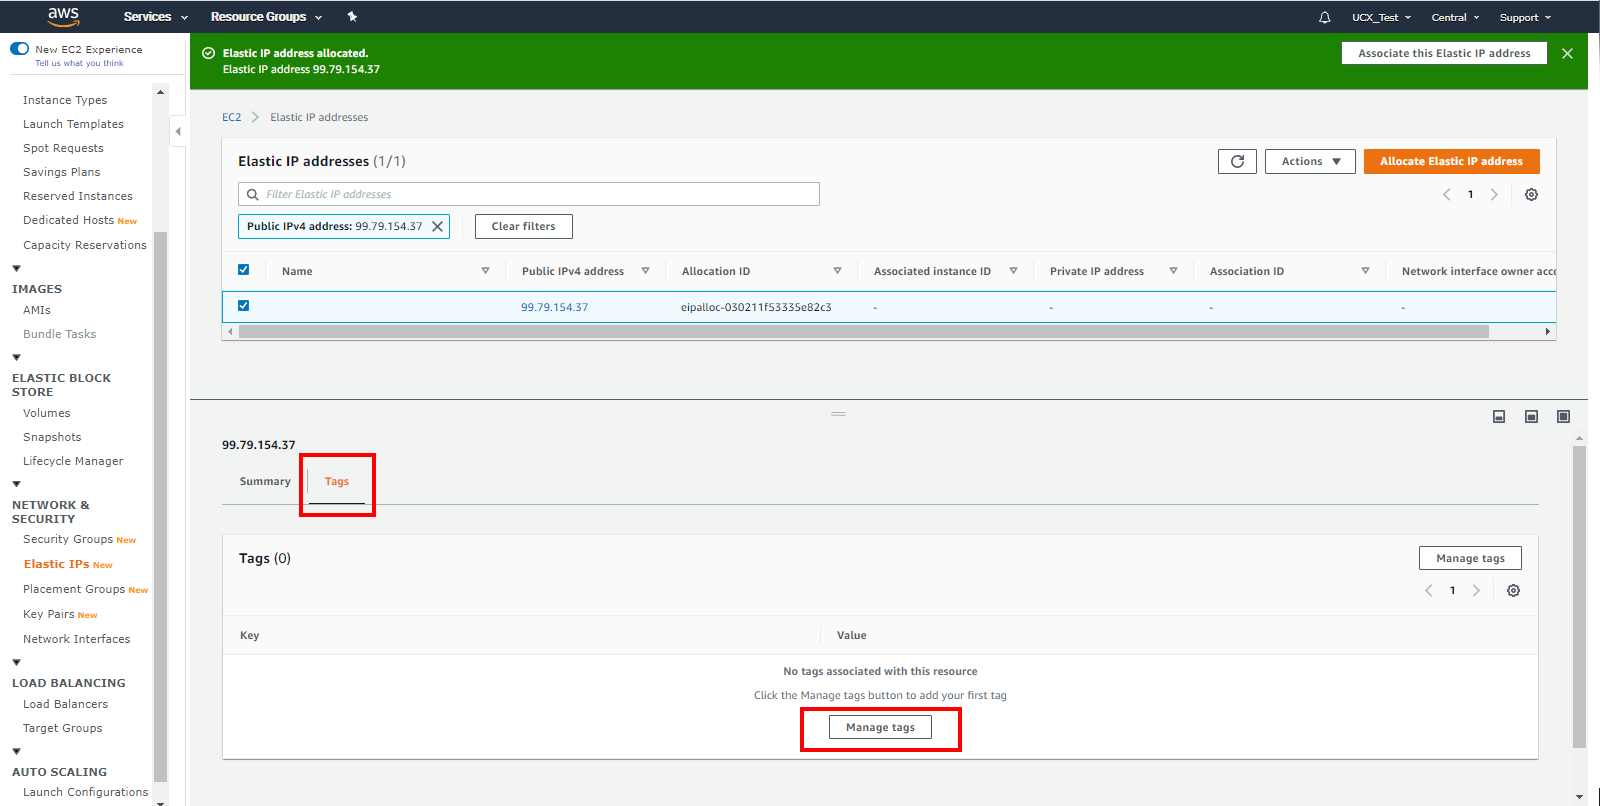
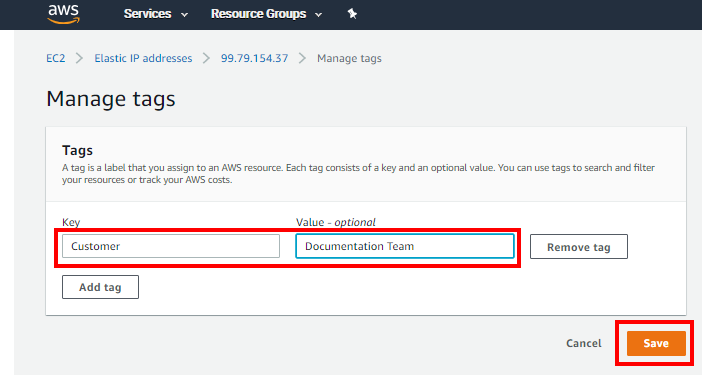
A new Elastic (static) IP address is created and assigned to your account and is reflected in the Public IPv4 address field shown in the selected list entry. In the lower half of the screen, click on the Tags tab, and then click Manage tags.
-
E-MetroTel recommends using the same Key/Value tag that you assigned to the Instance and Volume in the previous steps (in this example Customer / Documentation Team):
-
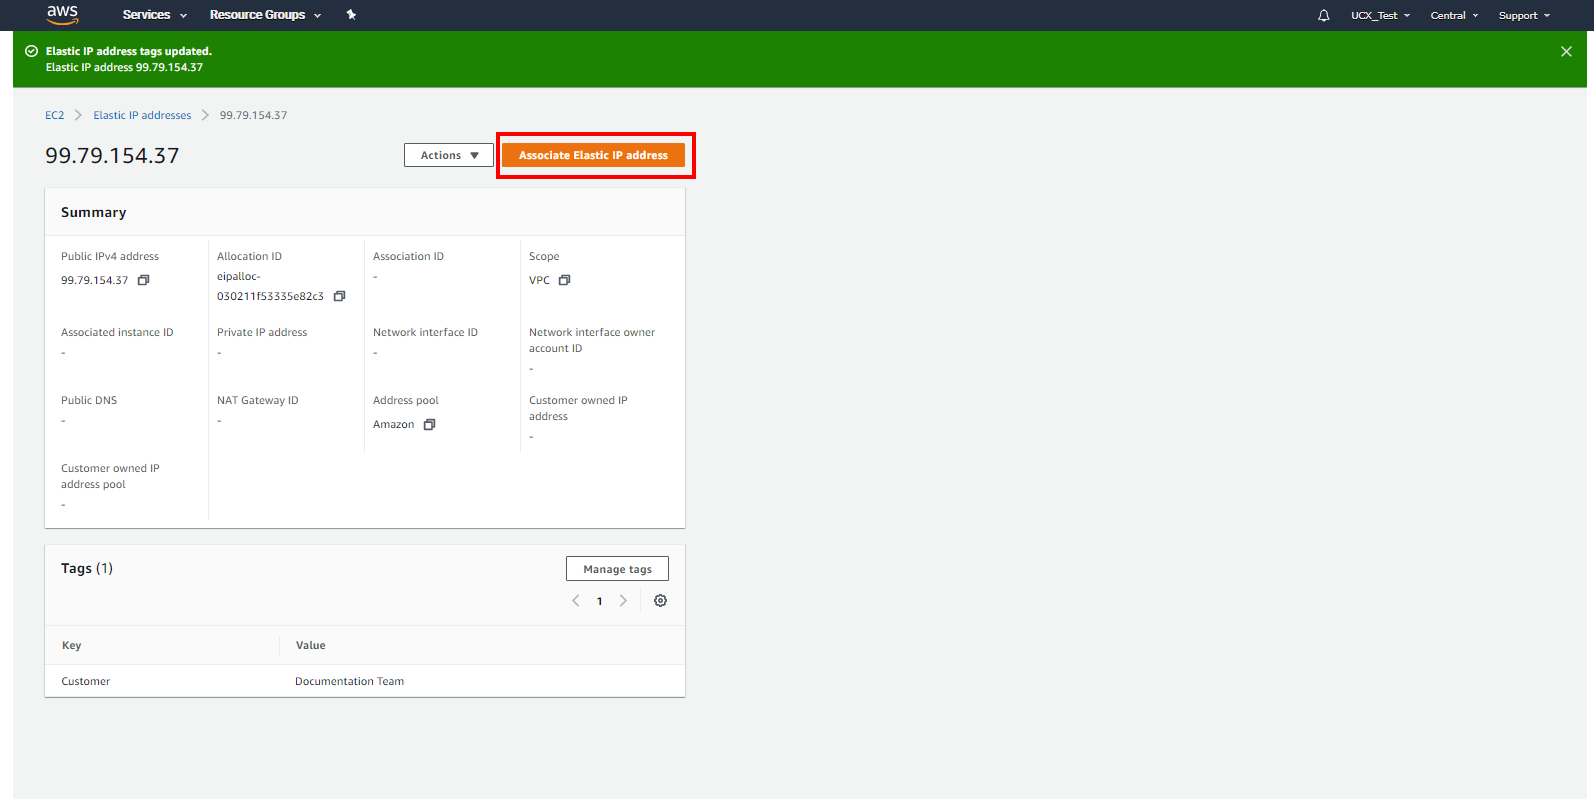
Click on Associate Elastic IP address..
-
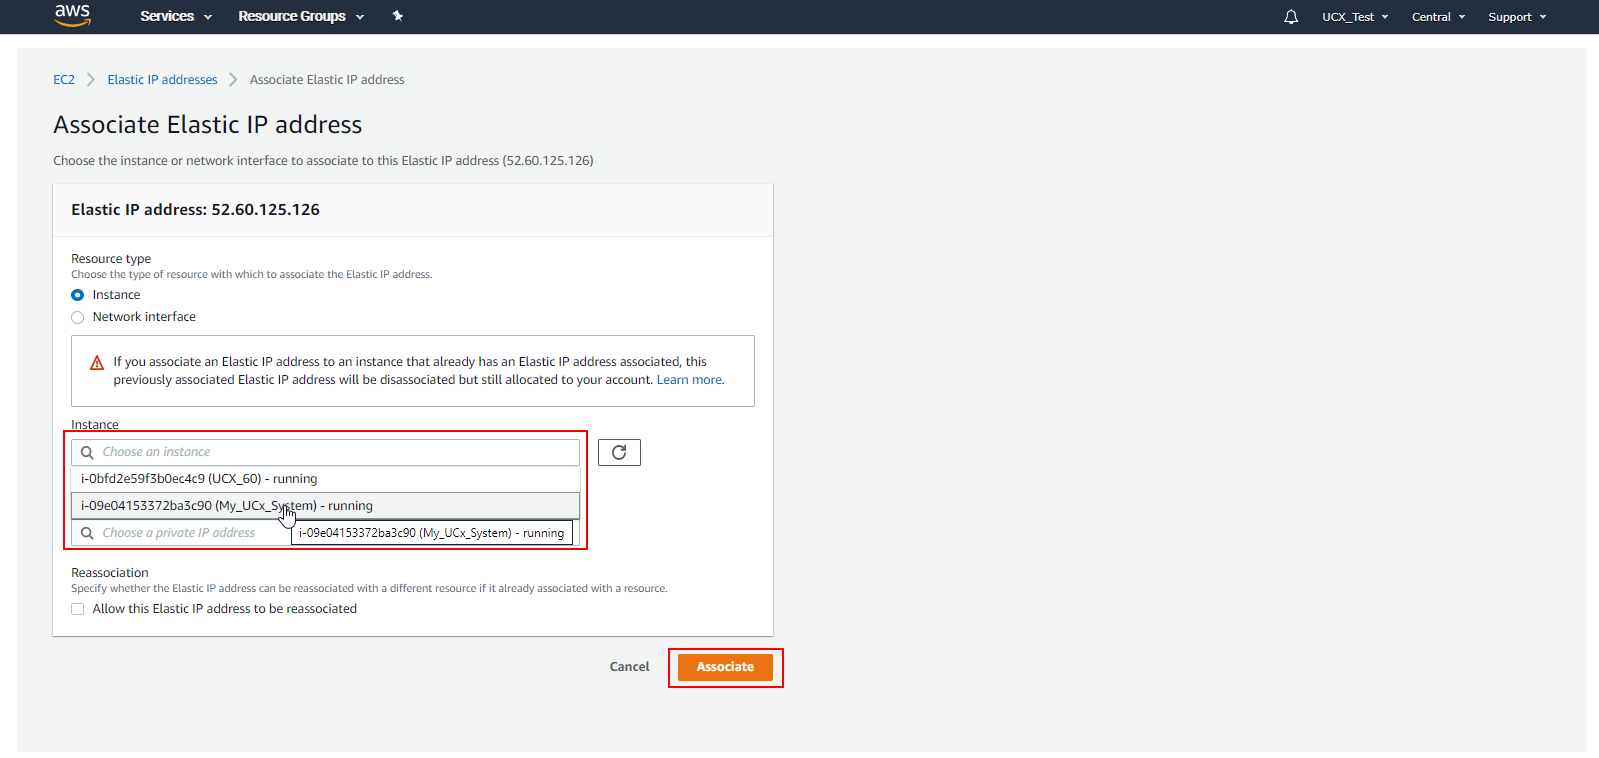
In the Associate Elastic IP address screen, click on the Instance field and select the instance created in Step 4, above and then click Associate.
-
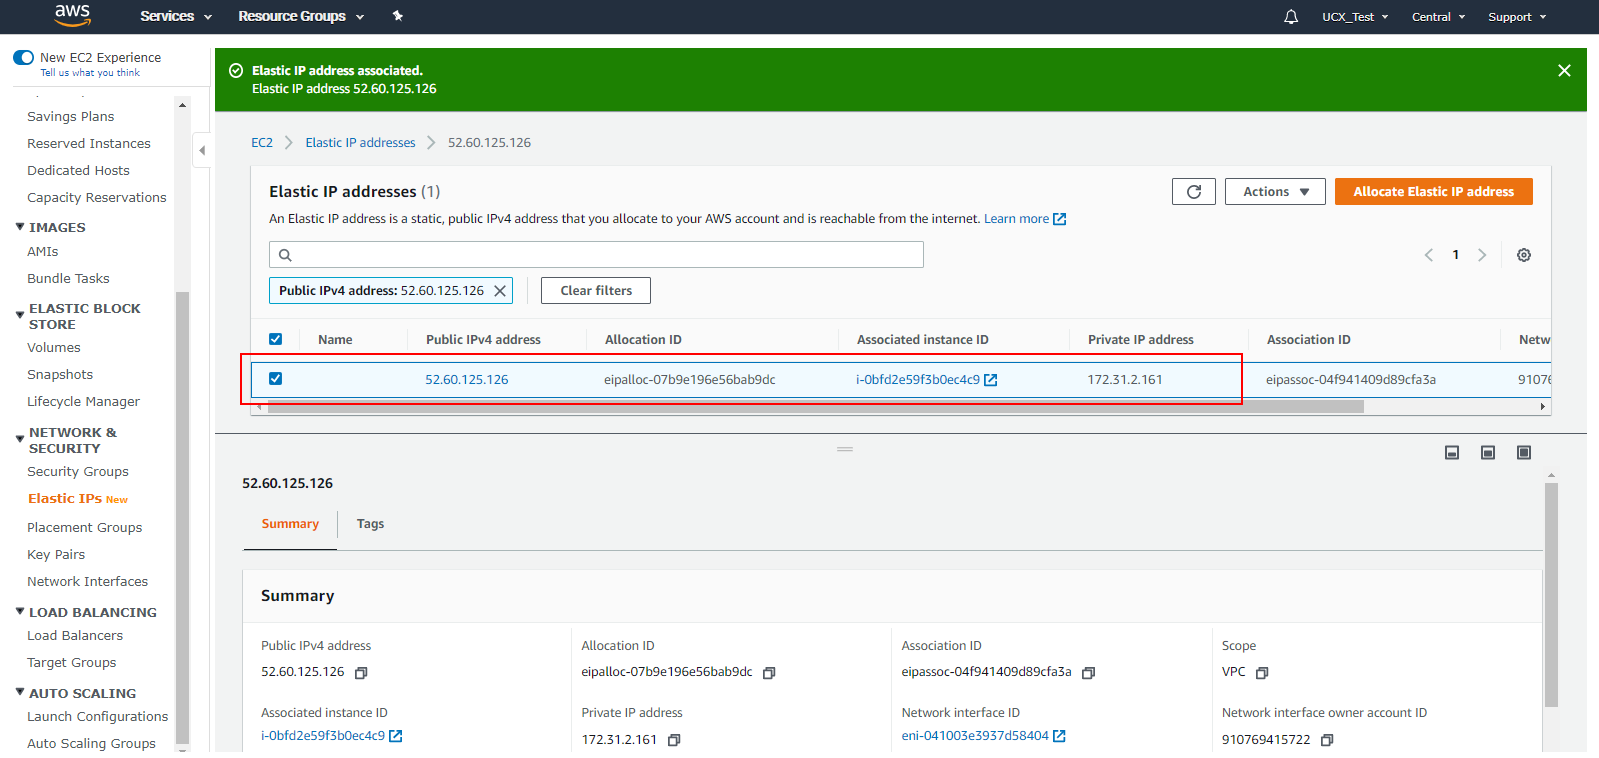
You will now see the Elastic IP Address with its associated Instance ID in the Elastic IPs panel.
Step 5: Access, Update, and License your New UCx System
-
You are now able to launch a browser connection to the IP Address listed using https://<yourElasticIPaddress> from the previous step, at which point you will see the standard UCx login page. You may be presented with the NET::ERR_CERT_AUTHORITY_INVALID warning message as your browser does not recognize the system. An SSL Certificate can be purchased for the system using the Partner Portal..
- Use the standard login credentials for the system,
- After logging in, perform a software update using the standard Software Update procedures
- Go to System --> Licenses-->System Activation page. The system will be prompting for a Serial Number
- Enter the Serial Number provided by the Serial Number Management system into the system Activation page on the UCX.
- Proceed with the system activation as described in System Activation. This process will automatically load the license, extensions and any options previously purchased.