Installation of SSD in BCM50
Overview
If you purchased the UCx Digital Gateway Solid State Drive (SSD), you must install this SSD in the main unit of your BCM50 telephone system.
The UCx Digital Gateway SSD is supported on all BCM50 hardware units from BCM50 R1 up to BCM50 R6 including units with integrated ADSL or Ethernet routers.
Opening the BCM Main Unit
- Before you perform this procedure, attach a grounding strap connected to a grounded metal surface to your wrist.
- Disconnect all cables (including the power cable) from the BCM unit.
- Turn the BCM50 case over to gain access to screws at the bottom of the unit.
- Locate three screw holes marked with A and remove the screws.
- Turn the case back over to its upright position. Collect and save the three screws.
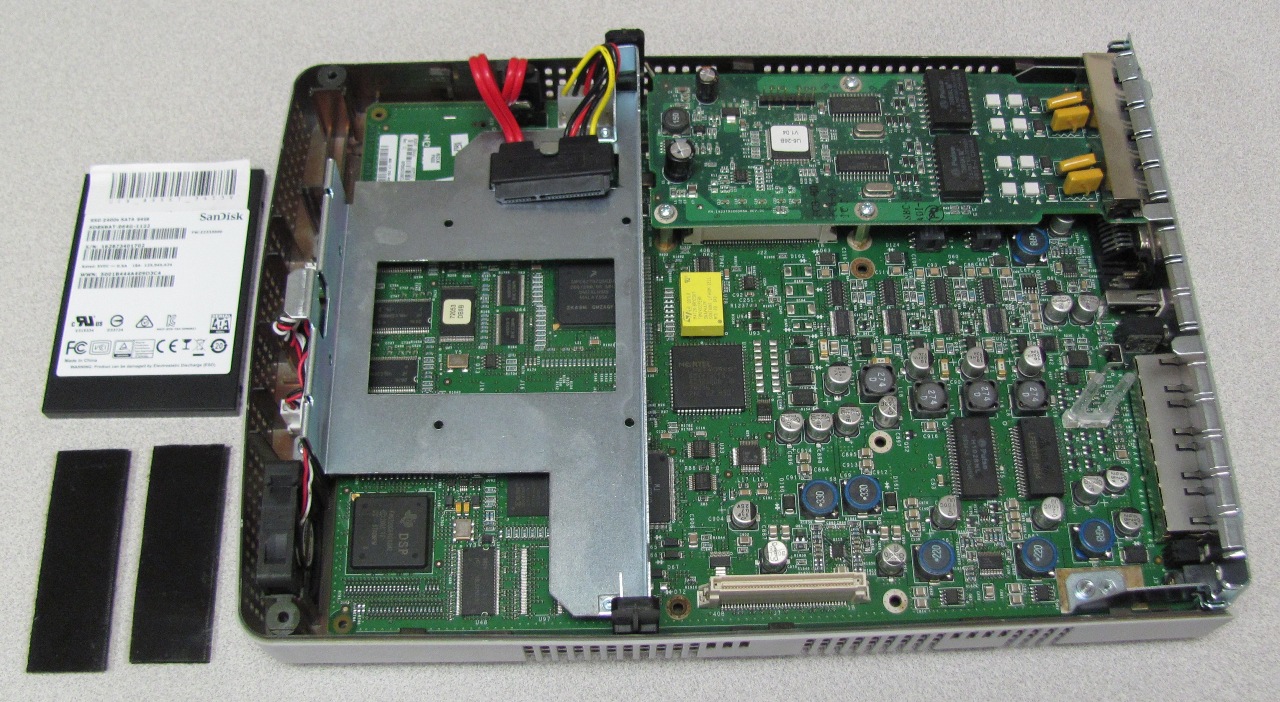
- While facing the BCM front side (the one with connectors), hold the bottom of the case and press on the top of the case with your thumbs. The top of the case will slide to the back by about ¼” as shown in the picture below. After that, lift the top of the case from the BCM unit.

Removing the Hard Drive
Older Style BCM Hard Disk Bracket
- Remove fan wires from the clip(s) on the back of the hard disk bracket.
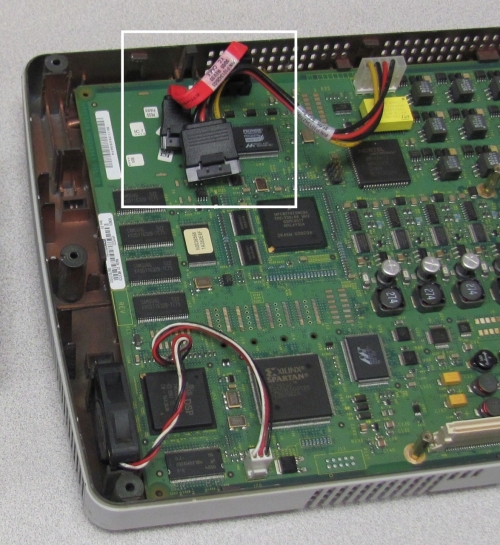
- Disengage the power connector latch gently with a flat screwdriver and disconnect the hard disk power cable from the main board.
- Press the latch on the red SATA data cable and disconnect the cable from the main board.
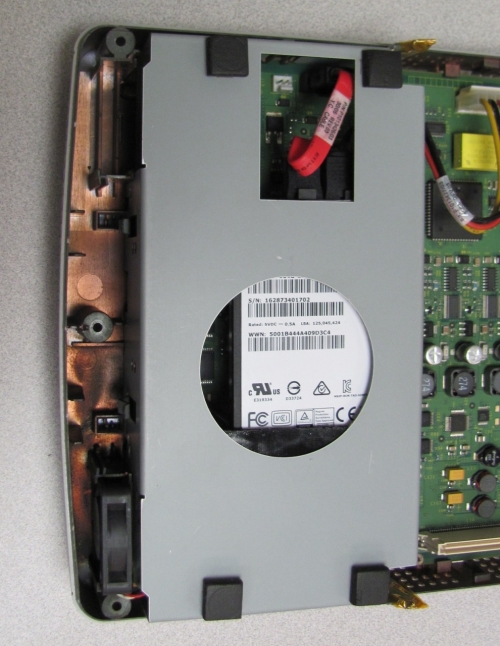
- Lift the hard disk bracket from the case and place it on a static-free surface.
- Remove four screws that secure the hard drive to the bracket and remove the hard drive from the bracket.
- Remove the power cable and the SATA data cable (or the combined SATA power and data cable) from the hard disk connectors.

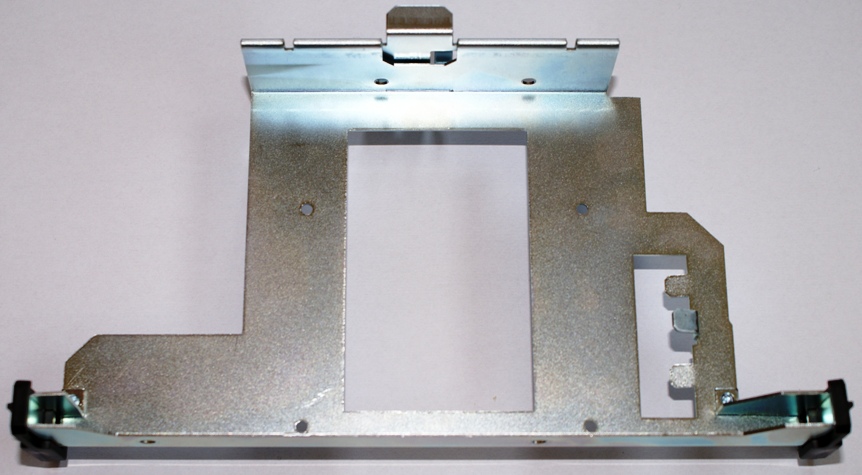
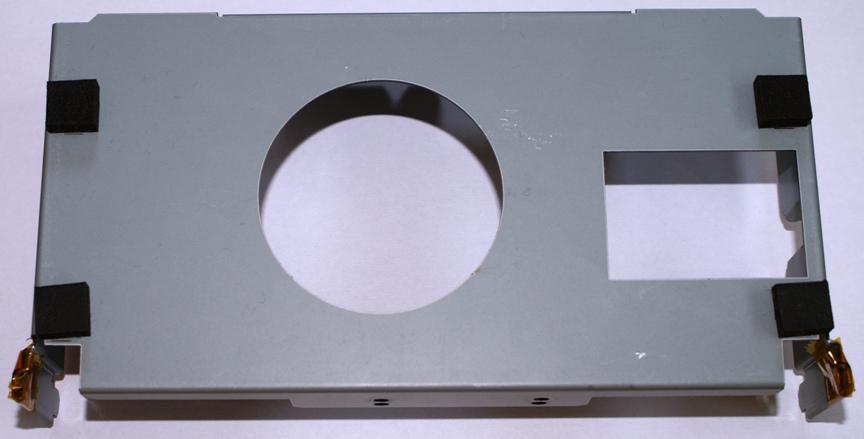
Newer Style BCM Hard Disk Bracket
- Disengage the power connector latch gently with a flat screwdriver and disconnect the hard disk power cable from the main board.
- Press the latch on the red SATA data cable and disconnect the cable from the main board.
- Remove four screws that secure the hard drive to the bracket and remove the hard drive from the bracket.
- Remove the power cable and the SATA data cable (or the combined SATA power and data cable) from the hard disk connectors.
Installing the Solid State Drive
-
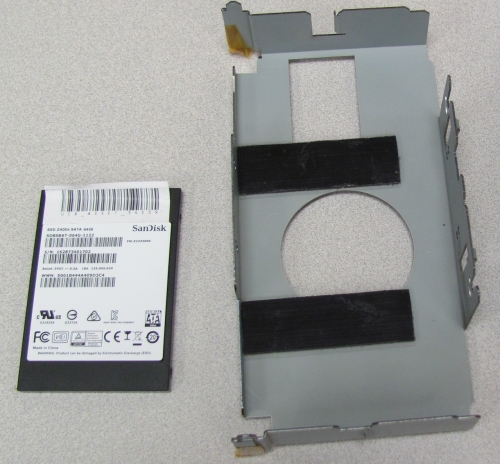
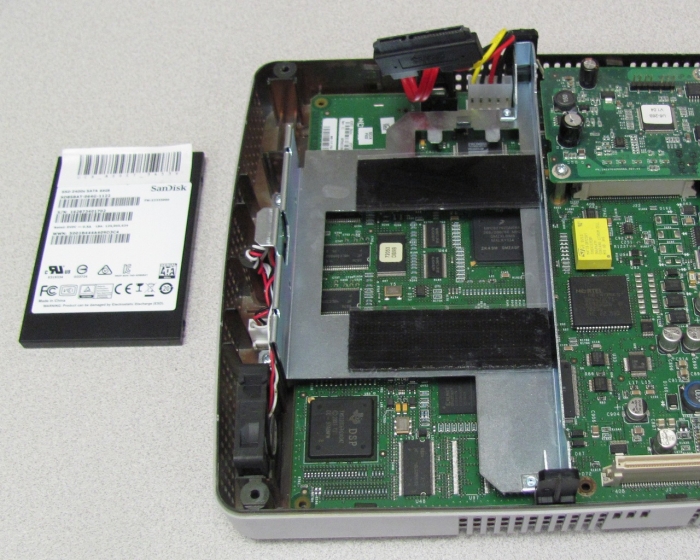
Glue one side of the Velcro strips to the bracket as shown in the picture below. Glue the other side of the Velcro strips to the SSD.
-
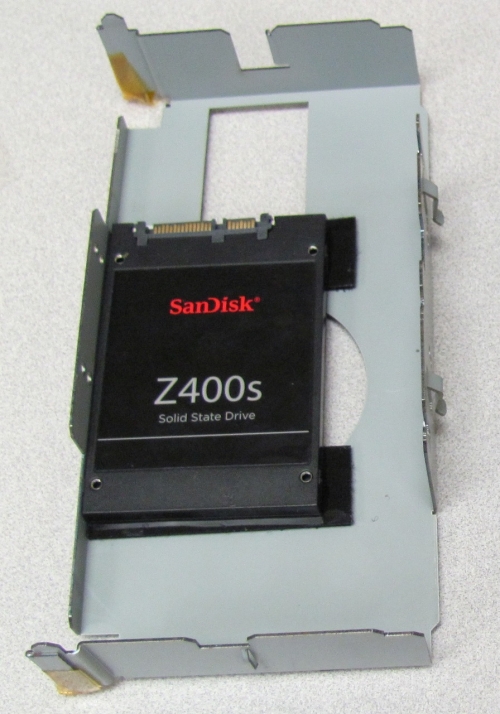
Press the SSD firmly onto the Velcro strips on the metal drive bracket as shown in the picture below.
-
Make sure the notch on the SATA power cable is properly aligned with the notch on the corresponding SSD connector and connect the power cable to the SSD. Then make sure the notch on the SATA data cable is properly aligned with the notch on the corresponding SSD connector and connect the data cable to the SSD.
-
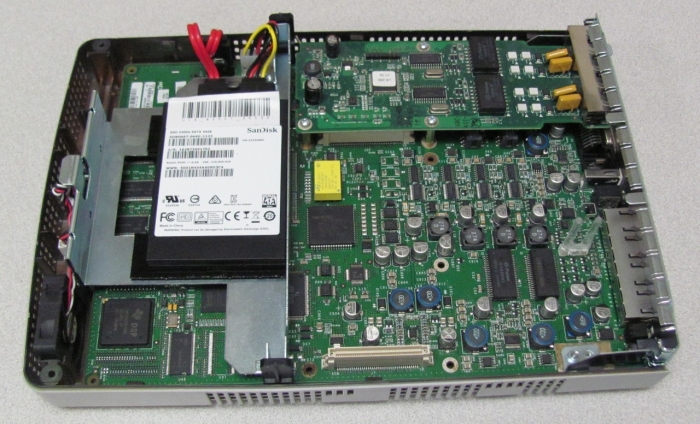
Insert the hard disk bracket with the SSD back into the BCM case (make sure that fan wires are properly routed through the cutout in the bracket).
Note: Some BCM systems were shipped with two fans, but typically there is only one fan installed. If you have a single fan, it should be installed in the far left corner when facing the BCM front side with connectors.
- Reconnect the red SATA data cable and the power cable to the main board.
- Place fan wires back into the clip(s) on the hard disk bracket while making sure there is no slack.


Newer Style BCM Hard Disk Bracket
-
Glue one side of the Velcro strips to the bracket as shown in the picture below. Glue the other side of the Velcro strips to the SSD.
-
Press the SSD firmly onto the Velcro strips on the metal drive bracket as shown in the picture below.
-
If you have the combined SATA power and data cable, use the proper orientation and connect the cable to the SSD.
If you have two separate cables, first make sure the notch on the SATA power cable is properly aligned with the notch on the corresponding SSD connector and connect the power cable to the SSD. Then make sure the notch on the SATA data cable is properly aligned with the notch on the corresponding SSD connector and connect the data cable to the SSD. - Reconnect the red SATA data cable and the power cable to the main board.


Closing the BCM Main Unit
- While facing the BCM front side (the one with connectors), place the top of the BCM case onto the unit with side edges aligned and with the front side positioned back by about ¼”.
- Slide the top of the case to the front until it snaps into place.
- Turn the BCM50 case over to gain access to screw holes at the bottom of the unit.
- Insert the three screws you removed from the case into screw holes marked with A and tighten the screws.
- Turn the case back over to its upright position.
Appendix
Older style BCM hard disk bracket
Newer style BCM hard disk bracket