

You are here
Documentation
- InfinityOne Omnichannel (Beta)
- InfinityOne
- Infinity Video Server (Beta)
- InfinityOne Work at Home
- Galaxy Mini
- Galaxy Mini - Table of Contents
- Galaxy Mini - Overview
- Galaxy Mini - Server Hardware
- Galaxy Mini - Supported Phones and Devices
- Galaxy Mini - Front and Rear Panel Interfaces
- Galaxy Mini - FXO/FXS Module Installation
- Galaxy Mini - Connecting the Server to the Network
- Galaxy Mini - Activating and Licensing
- Galaxy Expand
- Galaxy Expand - Table of Contents
- Galaxy Expand - Platform and Hardware Overview
- Galaxy Expand - Module Installation
- Galaxy Expand - Initial Configuration
- Galaxy Expand - Reference Architecture
- Galaxy Expand - Common Configuration
- Galaxy Expand - Standalone UCX Server Configuration
- Galaxy Expand - High Availability UCX Configuration
- Galaxy Expand - Local Gateway (Expansion Chassis) Configuration
- Galaxy Expand - Remote Gateway Configuration
- Galaxy Expand - Survivable Remote Gateway Configuration
- Galaxy Express
- Galaxy Modular Hardware
- Galaxy Analog Cards
- Getting Started with Galaxy Analog Cards
- Galaxy Analog Gateways - IAD Firmware
- Galaxy Analog Cards - Original Firmware
- Galaxy PRI-1 Card
- Galaxy Analog Cards
- Servers and Gateways
- Introduction
- Planning
- Quick Start
- UCX Virtual Machine
- UCX Server
- UCX Web-based Configuration Utility
- System
- Fax
- PBX
- Reports
- Accessories
- My Extension
- Security
- Support
- Survivable Remote Gateway (SRG)
- High Availability (HARC)
- UCX Digital Station Module (DSM16)
- UCX M1/CS1000 Media Gateway
- Digital Gateway
- External Gateways and Devices
- SIP PSTN Trunks
- SIP Trunks
- How-To Guides
- UCX Applications
- UCX Features
- Answer DN Behavior
- Background Music
- Busy Lamp Field (BLF)
- Global BLF key label change
- Parking Lot Monitoring Solutions
- Call Transfer and Recall
- Call Monitoring
- Call Recording Options
- Dial System Fax
- Dictation Service
- Distinctive ring tones
- Fax to Email
- Group Pickup
- Hotline UCX Configuration
- Hotdesking
- Language prompts
- Long Tones
- Ring Again (Call back)
- Shared Call Appearances
- Set Based Configuration
- UCX MADN Emulation Solutions
- Unified Messaging for M1/CS1000 Users
- User Portal
- Voicemail and VmX Locater
- Voicemail Escalation
- Voicemail Message Indicator
- ZapBarge
- Telephones
- Installation Guides
- Product Specifications
- General Information
- Product Bulletins
- Product Notices
- InfinityOne Package Update Required
- UCX 6.0 End-of-Support
- UCX 7.0 and InfinityOne 4.0 General Availability
- VPN Security Update Required
- Email Relay Using Gmail Account Fails Due to Bad Credentials
- InfinityOne Release 2.x End-of-Life
- InfinityOne Android App General Availabililty
- E-MetroTel not affected by Log4j vulnerability
- Web-based GUI Security Enhancements
- User Portal Security Update
- Simplified UCX Configuration for Remote InfinityOne Softphones
- InfinityOne Release 3.0 Server General Availability
- Availability of Connection Sharing
- Availability of Automated Cleanup
- Availability of IP Block List Feature
- InfinityOne Release 2.0 Availability
- Digital Station Module (DSM16) Availability
- UCX Software Updates
- Quotations and Ordering
- Nortel Legacy
- Support and Troubleshooting
- Partner Onboarding
- E-MetroTel Business Practices
- Recurring Services Payment Policy
- Product Licensing
- Extension Provisioning Services
- Subscription Services
- E-MetroTel SIP Trunk E911 Registration
- Reseller Responsibilities
- Software Subscription and Warranty Transfer Request
- Return Material Authorization (RMA) Policy
- Acceptable Use Policy
- E-MetroTel Beta Trial Policy
- E-MetroTel Training Expectations
- 9-1-1 Services Agreement (Canada)
- References
Install FXO Interface Card in the UCx20
Step One: Getting the UCx20 ready for card installation
Power down the UCx20 and unplug all cables from the box.
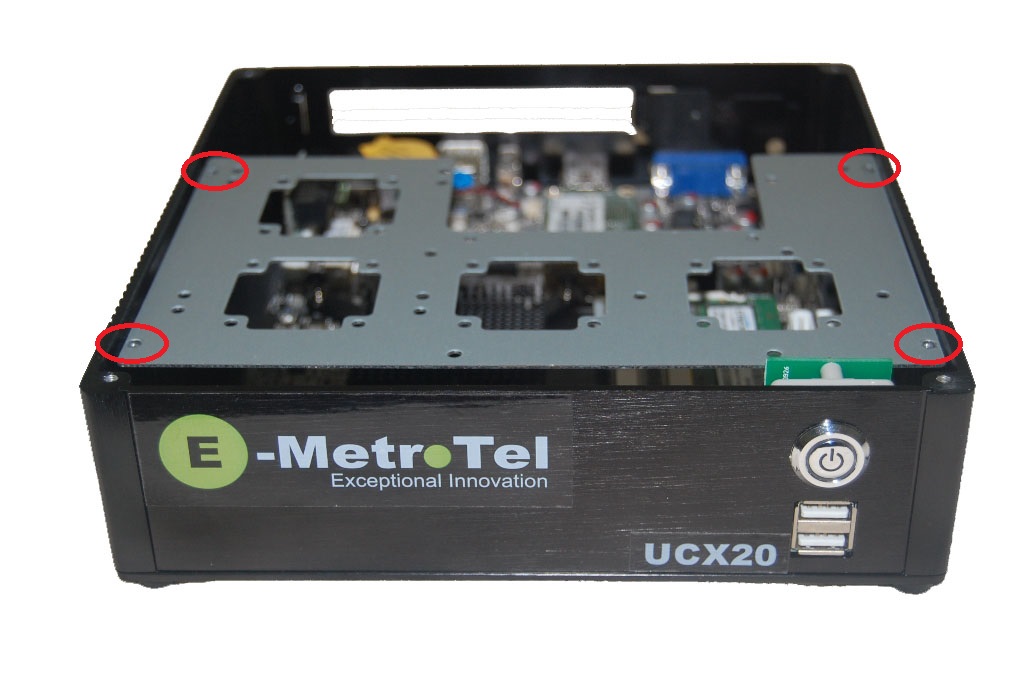
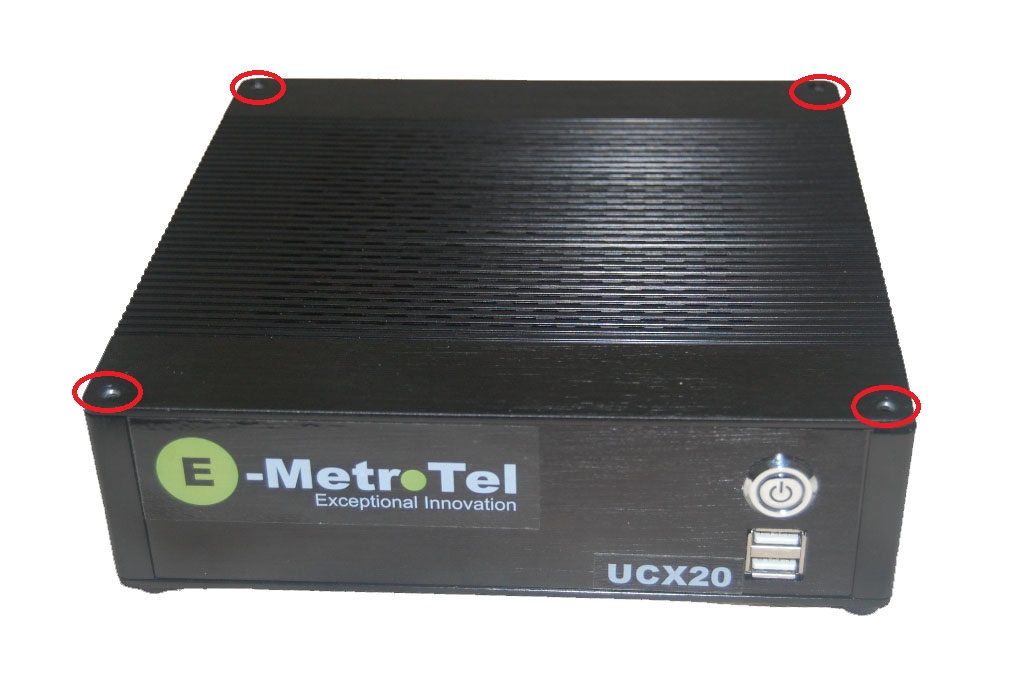
Remove the top cover from the UCx20 by removing 4 screws located at the 4 corners.

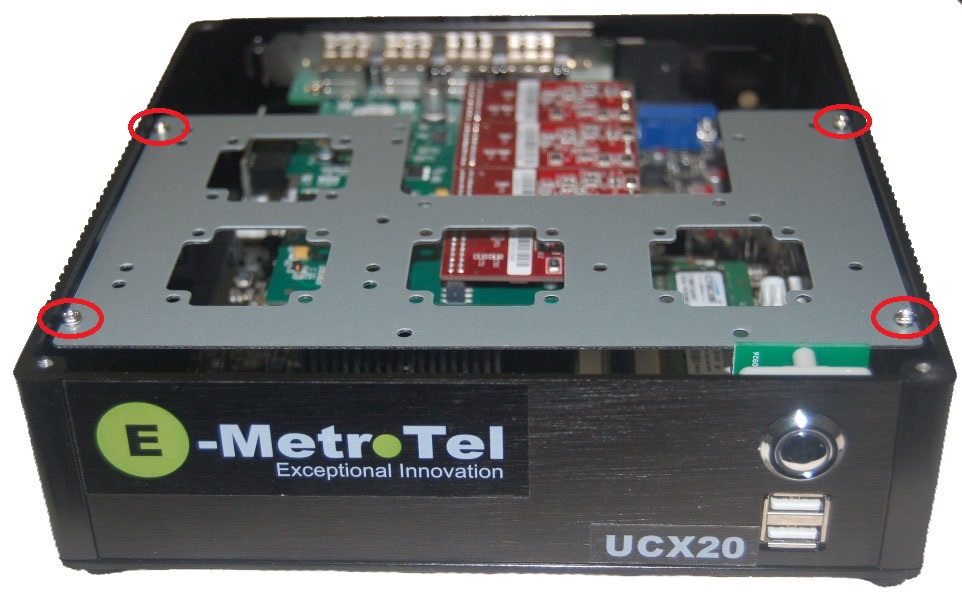
Remove the metallic plate holding the hard drive by removing 4 silver screws located in the 4 corners of the plate.
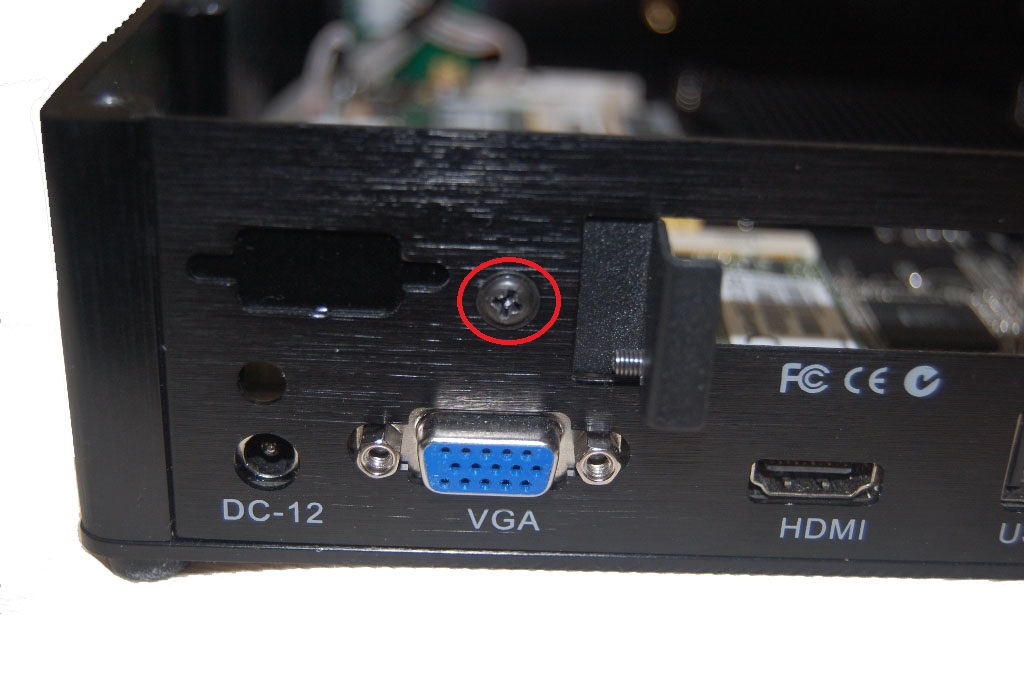
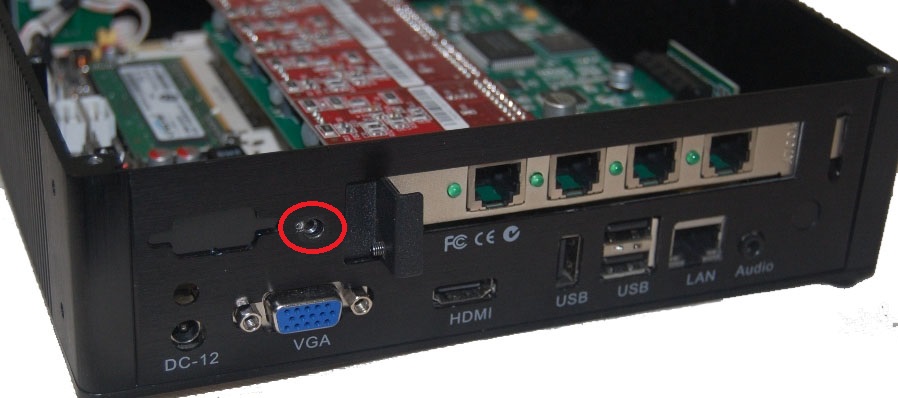
Remove the black cover plate by removing a single screw from the back of the UCx20.
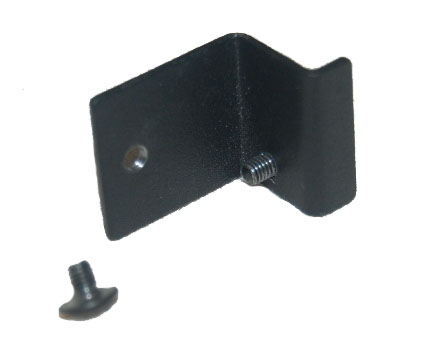
The cover plate has an end bracket (Ear) attached, keep this Ear and the 2 screws.
The UCx20 is now ready for the next step.
Step Two: Installing the FXO card
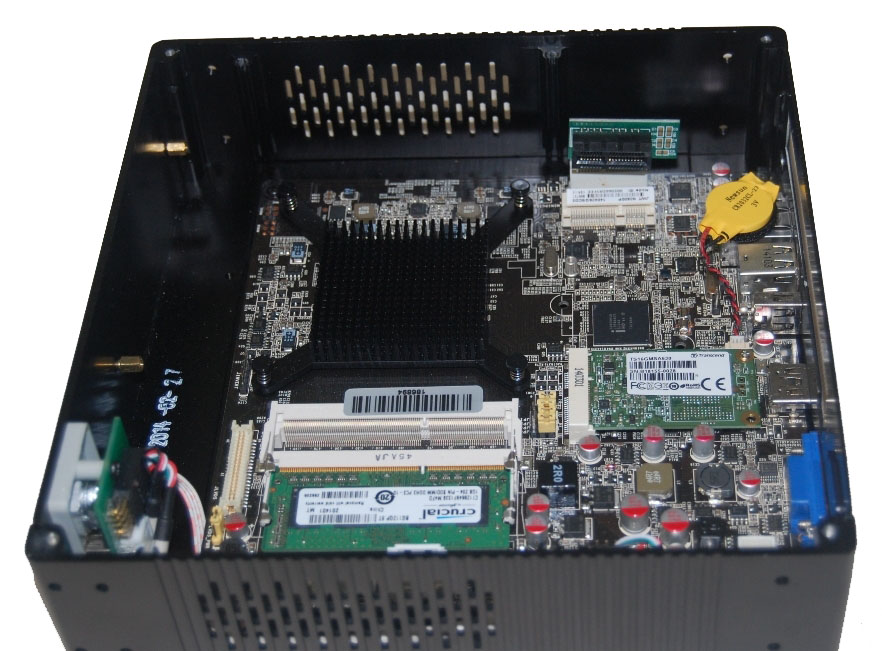
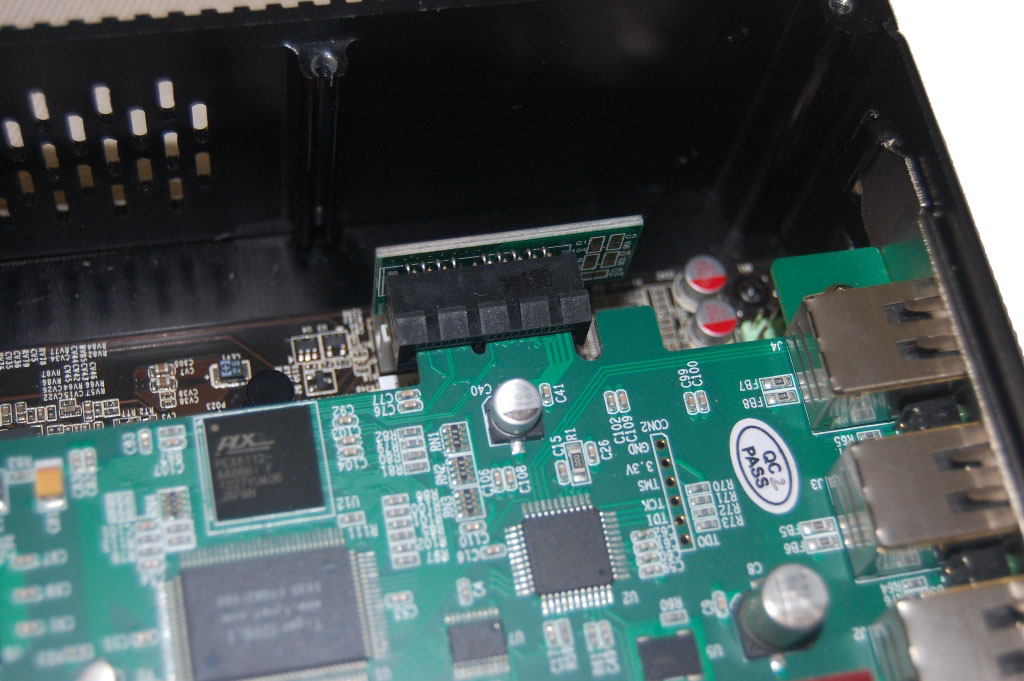
If a Riser is not already installed, then first connect the Riser to the card slot on the motherboard. The Riser extends the Card Slot on the motherboard.
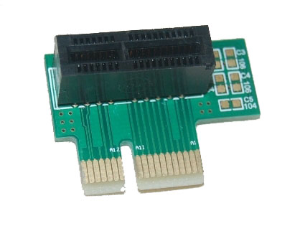
In the UCx20 box, look for the Card Slot on the motherboard.
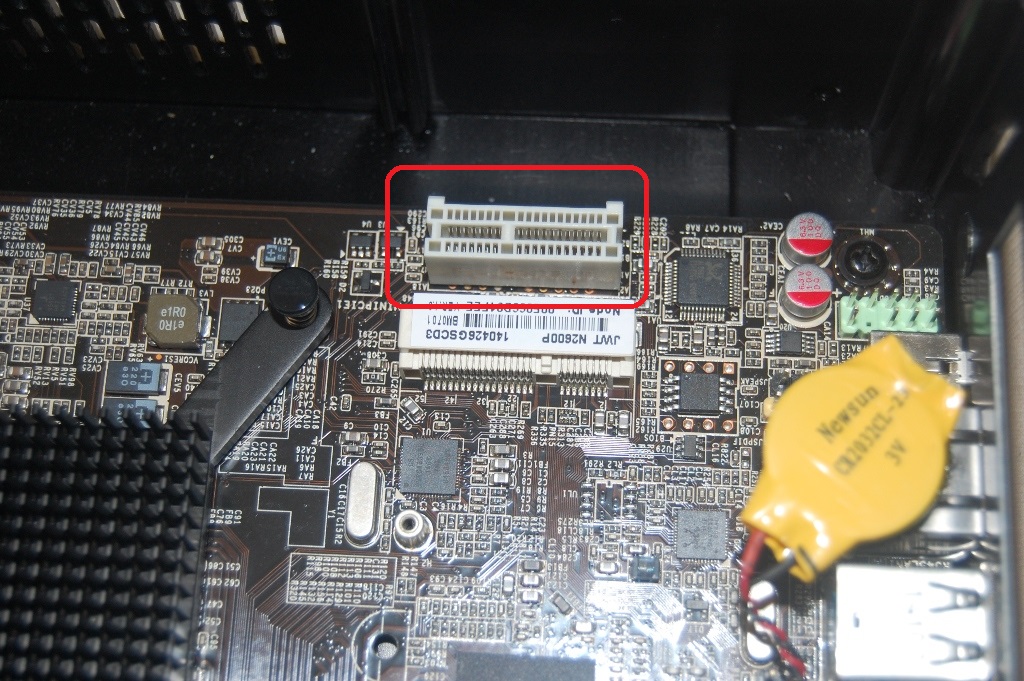
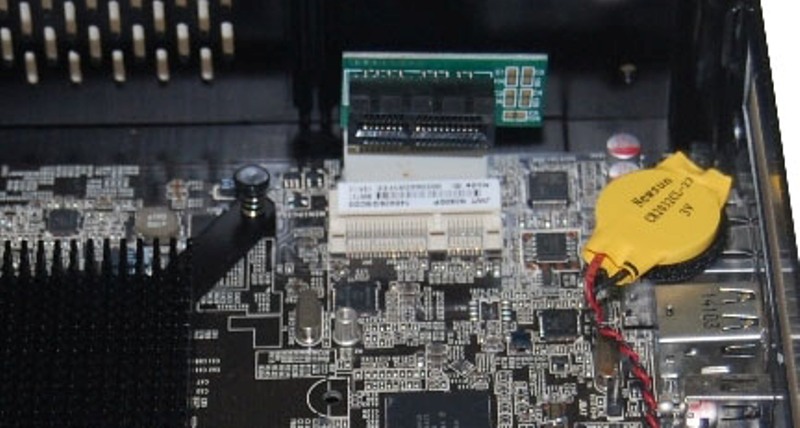
Insert the Riser into the Card Slot on the motherboard.
Fit the Interface card into the UCx20 box as shown below. At this point, the gold contacts on the interface card is perfectly lined up with the Card Slot on the Riser.
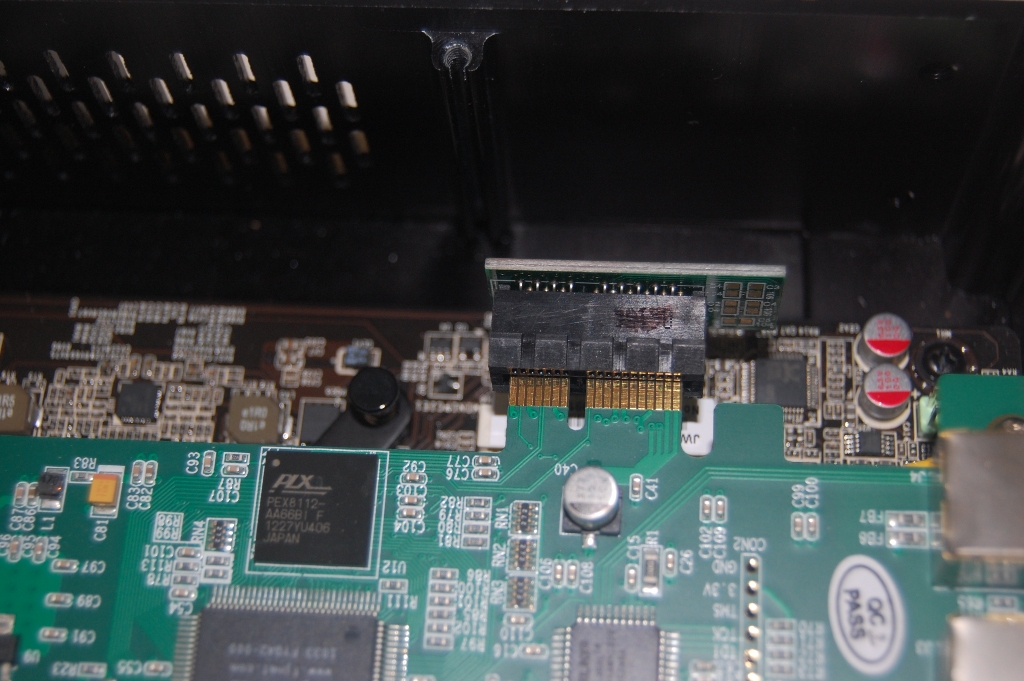
Carefully push the gold contacts on the Interface card into the Card Slot on the Riser.
Insert the Ear and secure it to the card, then secure the Ear to the UCx box by applying the screw as shown below.
Place the hard drive metallic plate back into the UCx box and secure with the original 4 silver screws.
Place the top cover back onto the UCx box and secure with the original 4 black screws.
Power up the UCx server and the new Interface Card will be automatically detected by the system. See PSTN Cards page for details on how to enable and configure the card.