Infinity 2500 Hospitality IP Phone Quick Start Guide
Introduction
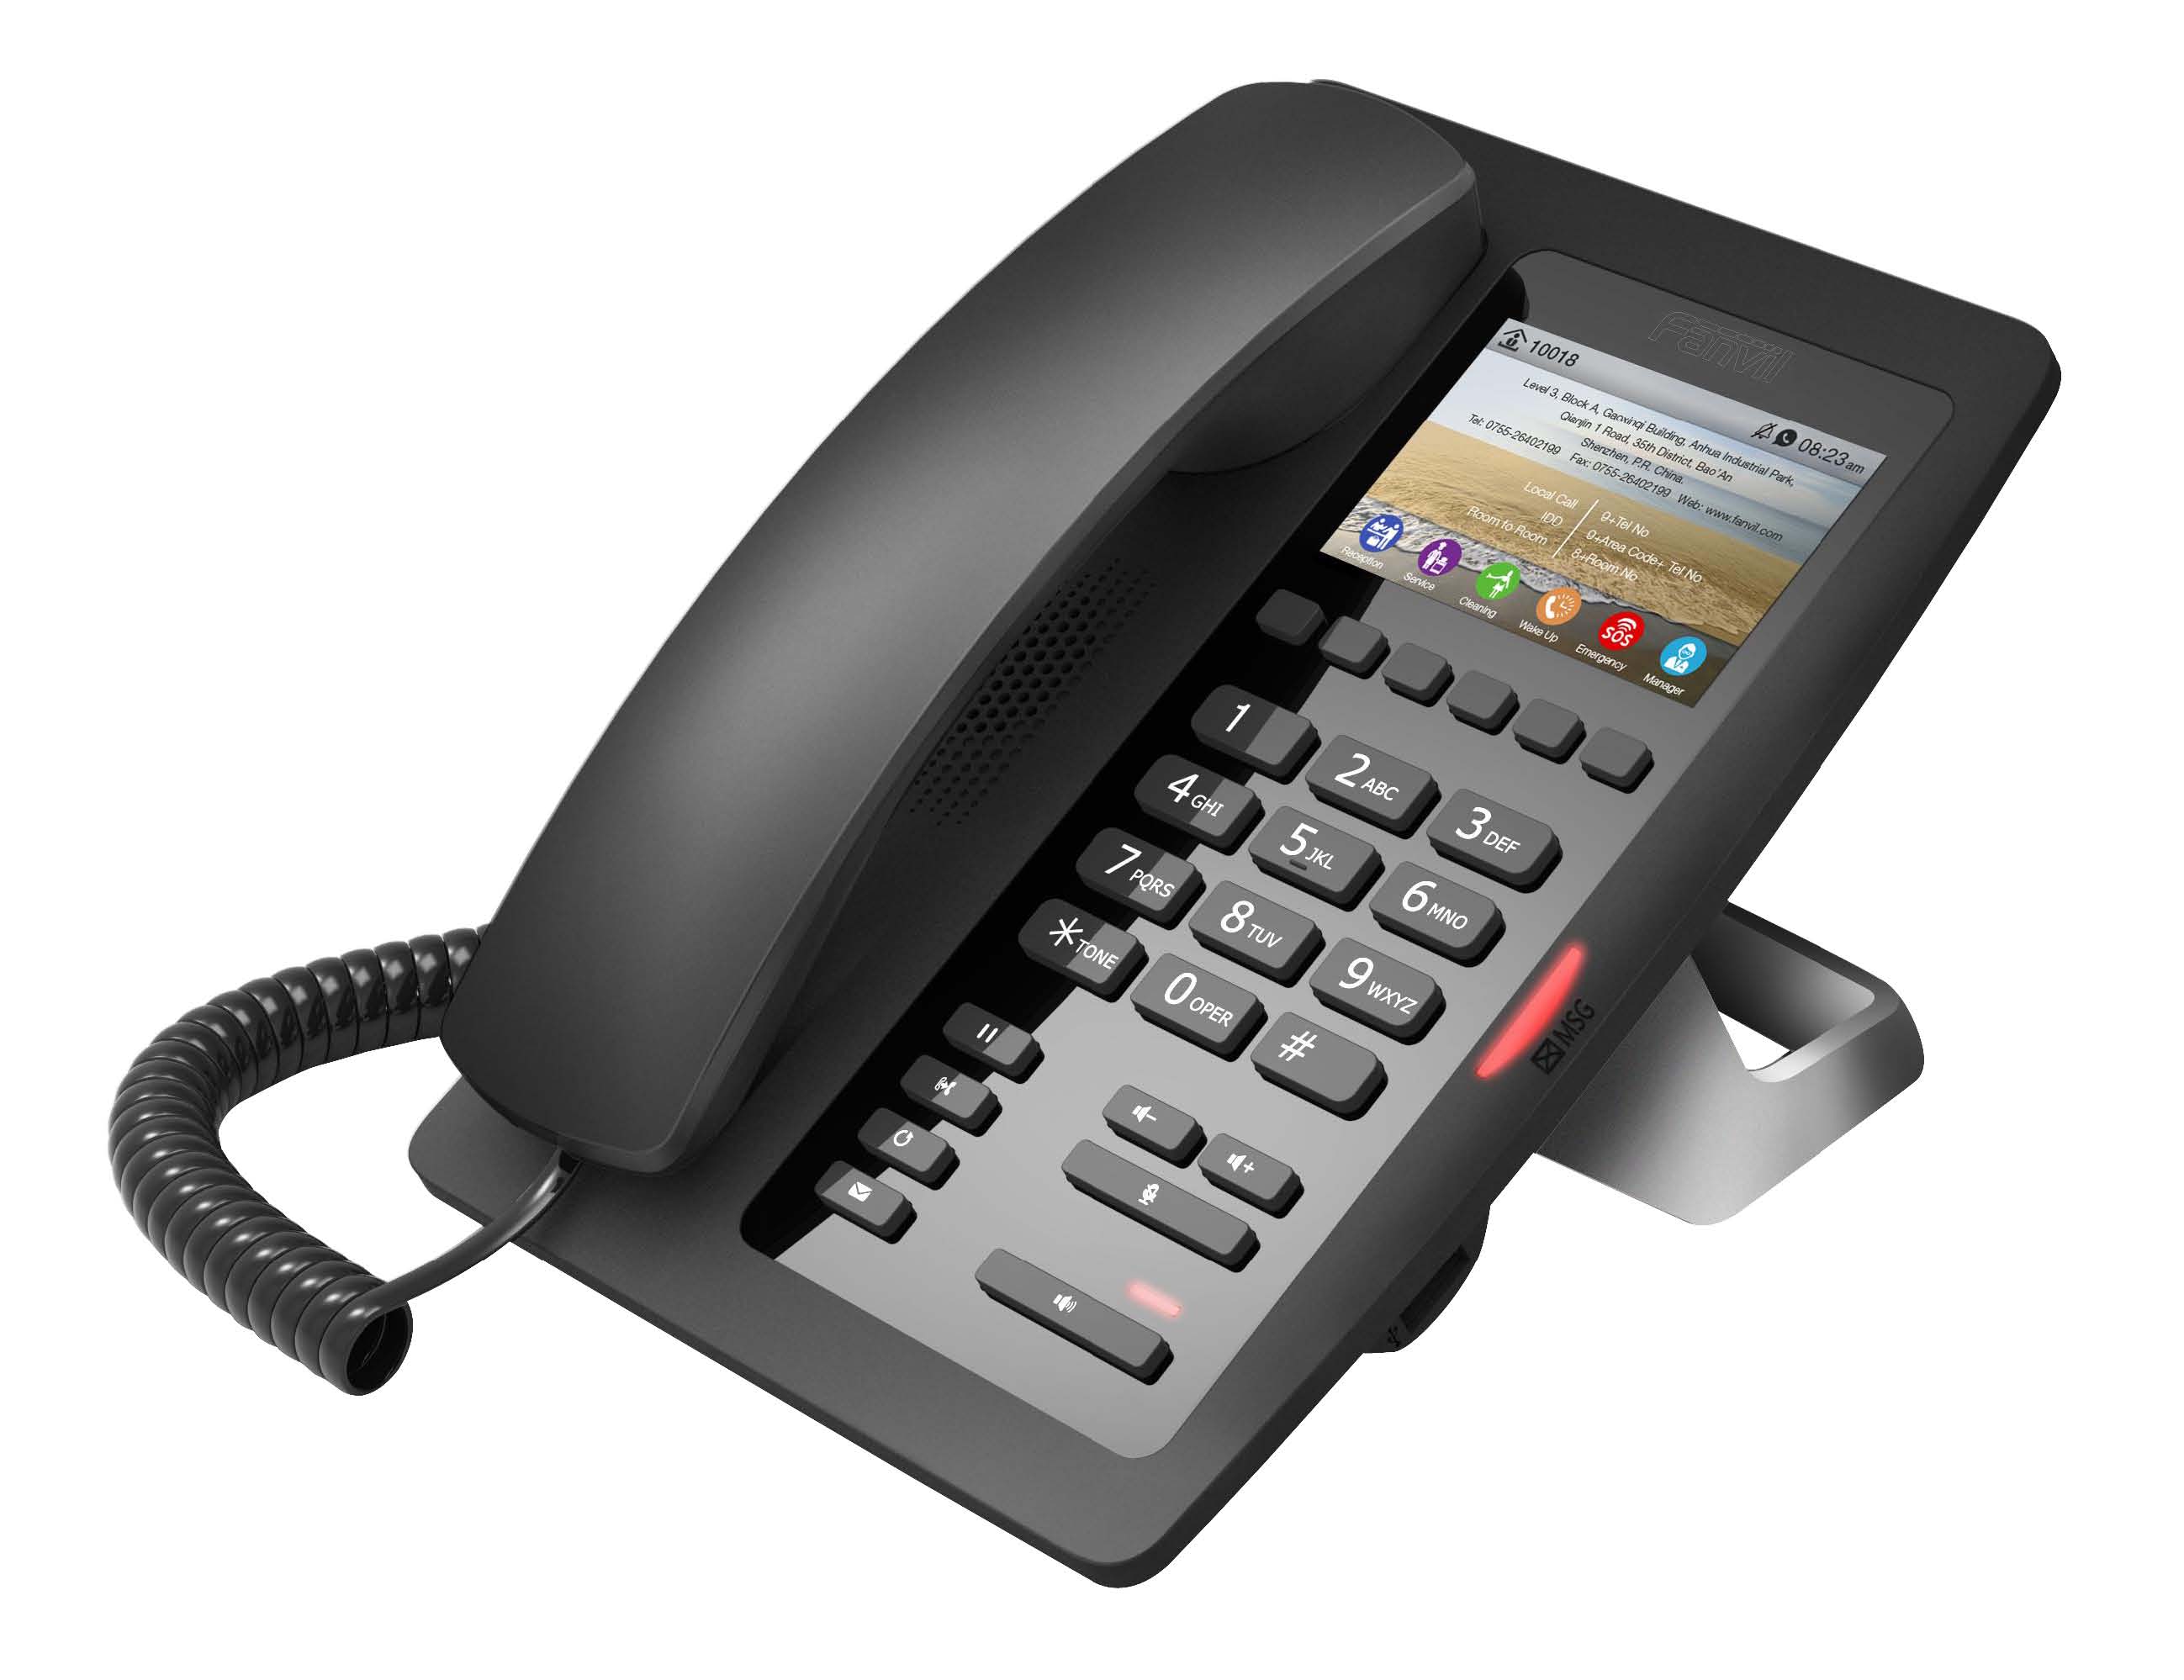
The Infinity 2500 IP Phone is the new Infinity phone designed for hotels. Its stylish, contemporary appearance, excellent voice quality and powerful functionality along with matching integrated communications platforms can replace traditional phones and become a new generation of intelligent terminal equipment.
The Infinity 2500 hotel IP phone will look great in any hotel room and will support most application requirements in addition to its excellent call quality. It provides powerful telephony features by combining the communications platform and features such as call transfer, hotline, voice mail, call hold and more.
The phone supports 6 programmable keys which can be customized according to the hotel's needs. For example, they can be programmed as service hotlines (e.g. housekeeping, ticketing, switchboard, food and beverage, etc.) or hotel special features (e.g. alarm clock, voice mail, etc.). In addition, it has a USB port for charging mobile phones.
The Infinity 2500 has a 3.5’ color display screen, which can provide a great customer experience for the hotel user.
Safety Instructions
Please read the following safety notices before installing or using this unit. They are crucial for the safe and reliable operation of the device.
- Please use the external power supply that is included in the package. Other power supply may cause damage to the phone, affect the behavior or induce noise.
- Before using the external power supply in the package, please check the home power voltage. Inaccurate power voltage may cause fire and damage.
- Please do not damage the power cord. If power cord or plug is impaired, do not use it, it may cause fire or electric shock.
- Do not drop, knock or shake the phone. Rough handling can break internal circuit boards.
- This phone is design for indoor use. Do not install the device in places where there is direct sunlight. Also do not put the device on carpets or cushions. It may cause fire or breakdown.
- Avoid exposing the phone to high temperature or below 0℃ or high humidity.
- Avoid wetting the unit with any liquid.
- Do not attempt to open it. Non-expert handling of the device could damage it. Consult your authorized dealer for help, or else it may cause fire, electric shock and breakdown.
- Do not use harsh chemicals, cleaning solvents, or strong detergents to clean it. Wipe it with a soft cloth that has been slightly dampened in a mild soap and water solution.
- In the event of lightning, do not touch power plug, it may cause an electric shock.
- Do not install this phone in a poorly ventilated place. Before you work on any equipment, be aware of the hazards involved with electrical circuitry and be familiar with standard practices for preventing accidents.
Installation
Power Supply
The device supports two power supply modes: External power adapter and 802.3af Class 2 Power over Ethernet (PoE) compliant switch.
Using PoE the device can be powered through a single Ethernet cable which is also used for data transmission. By attaching a UPS system to the PoE switch, the device can continue to work during power outages.
If the device is connected to a PoE switch and power adapter at the same time, the power adapter will have priority and device will switch to PoE when there is a power failure on the power adapter. Please use the power adapter supplied and the PoE switch must meet the specifications to ensure a proper working device.
Connections
Connect the Infinity 2500 to PC, Network, Handset and Power adapter as per the diagram below.
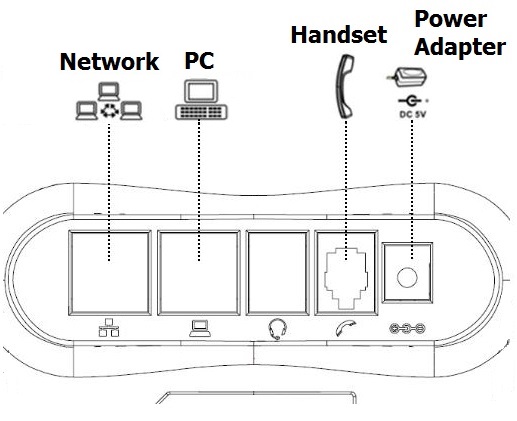
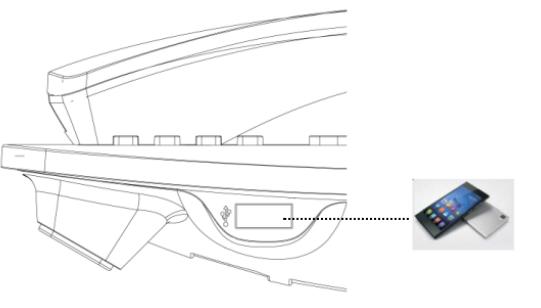
The Infinity 2500 also has a USB port for charging external devices like mobile phones.
Infinity 2500 IP Phone Layout
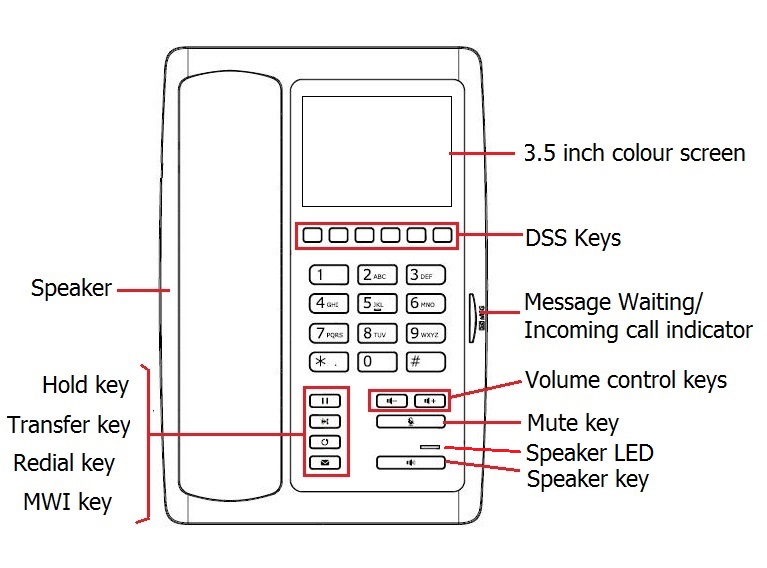
Keys Description
| DSS Keys | Customizable keys |
|---|---|
|
Message Waiting/ Incoming call indicator |
Light flashes when there is an incoming call ringing the telephone and also when there is a message waiting. |
|
Volume control keys |
Press the volume +/- key to increase/decrease the volume level. |
|
Mute key |
Press the mute key to mute the microphone while on a call. Press again to unmute. |
| Speaker LED | Light is ON during hands-free/speaker mode. |
|
Speaker key |
Press the speaker key for hands-free mode. Audio switches to the speaker. |
|
Hold key |
Press the hold key to place a call on hold. |
|
Transfer key |
Press the transfer key to transfer a call. |
|
Redial key |
Press the redial key to redial the last dialed number. |
|
MWI key |
Press the MWI key to retrieve voice messages. |
Screen Icons
|
|
SIP Status. GREEN indicates line is registered. WHITE indicates line is unregistered. |
|
|
Handset mode calling out. |
|
|
Speaker mode calling out. |
|
|
Incoming call |
|
|
Call on hold |
|
|
Call being transferred |
|
|
Active call in Handset mode |
|
|
Active call in Speaker mode |
|
|
Microphone is muted |
Configure SIP Extension on UCx Server
- Login to the UCx Web-based Configuration Utility
- Navigate to PBX - PBX Configuration - Extensions page
-
Add an Extension for a Generic SIP Device with the following basic parameters:
- User Extension (e.g. 511)
- Display Name
- secret
- If the device is connected to a UCx Cloud Server, change the nat field to Yes. Otherwise you can leave it at the default value No.
- Click on Submit to create the extension
- Press the Apply Config bar at the top
Discover IP address of Infinity 2500 IP Phone
Connect the phone to a network that is setup for DHCP. After initialization is complete, perform the following steps to obtain the IP address assigned to the phone:
-
While the phone is in idle mode, long press the ' # ' sign and the screen will display the IP address for a few seconds.
OR - Dial ' # * 111 ' and the phone will voice announce the IP address.
Configure Infinity 2500 IP Phone
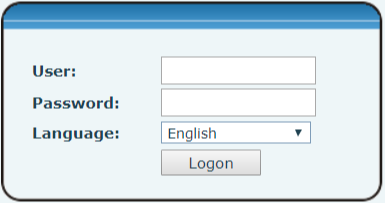
STEP ONE: Access the phone's Web Interface
From a browser, enter the IP address of the phone.
Login to the web interface using the default username admin and default password admin.
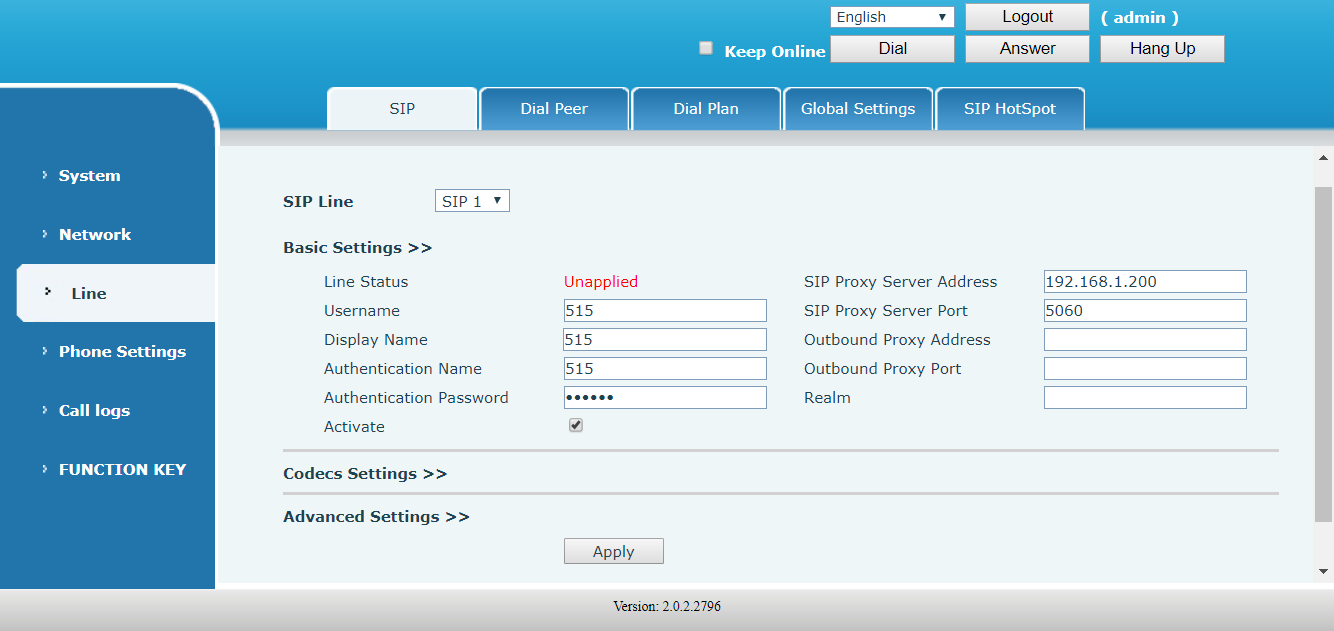
STEP TWO: Configure SIP account
Navigate to Line -> SIP page and perform the following steps:
- SIP Proxy Server Address field, enter IP address of UCx Server
- SIP Proxy Server Port field, enter the port number used by UCx Server (default 5060)
- Username, Display name, Authentication Name fields, enter the SIP extension configured on the UCx Server
- Authentication Password field, enter the secret/password of the SIP extension configured on the UCx Server
- Select the Activate checkbox
-
If the device is connecting to a UCx Cloud Server, append the port number to the end of the UCx Cloud Server IP address (e.g. 192.168.254.5:5960)

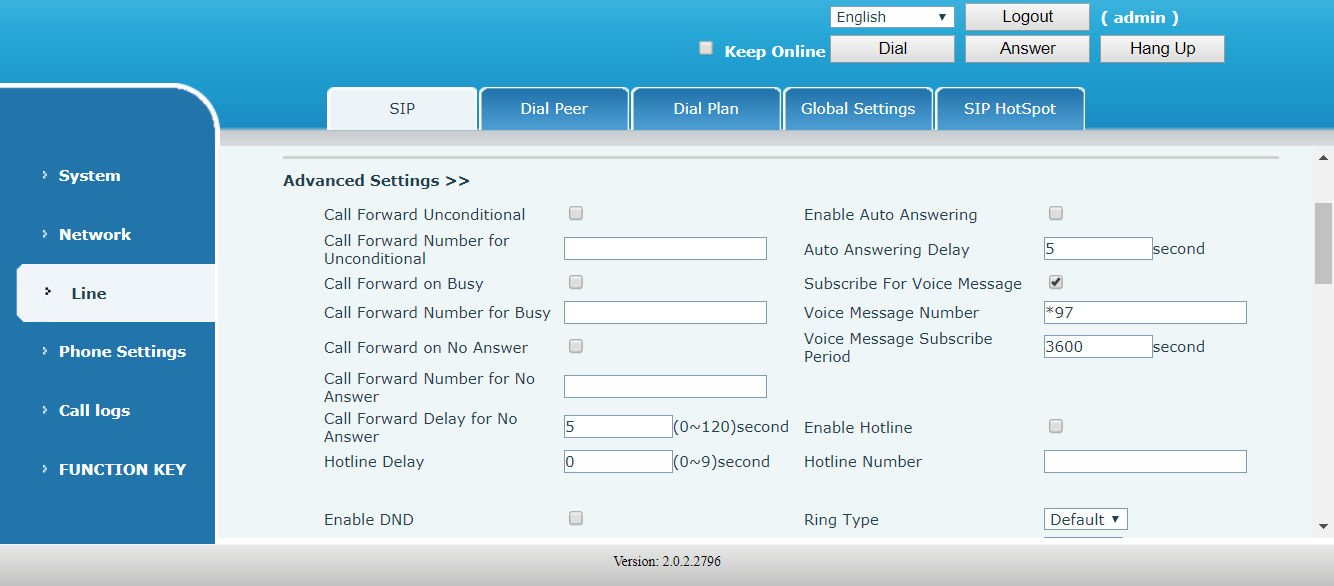
- Scroll down and click to expand the Advanced Settings >> section
-
Enter ' *97 ' for the Voice Message Number field

- Click the Apply button to save the settings
STEP THREE: Configure DSS Keys
Navigate to FUNCTION KEY page and program the DSS keys as desired. The following diagram shows the default settings.
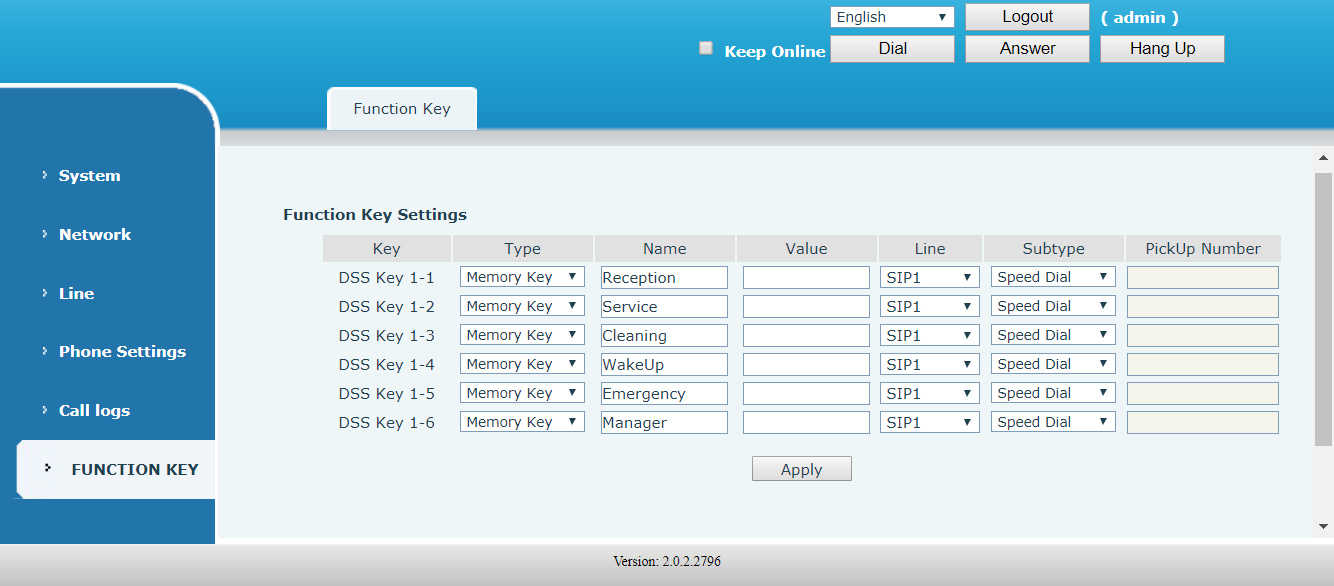
After making the desired changes, click the Apply button to save the settings.
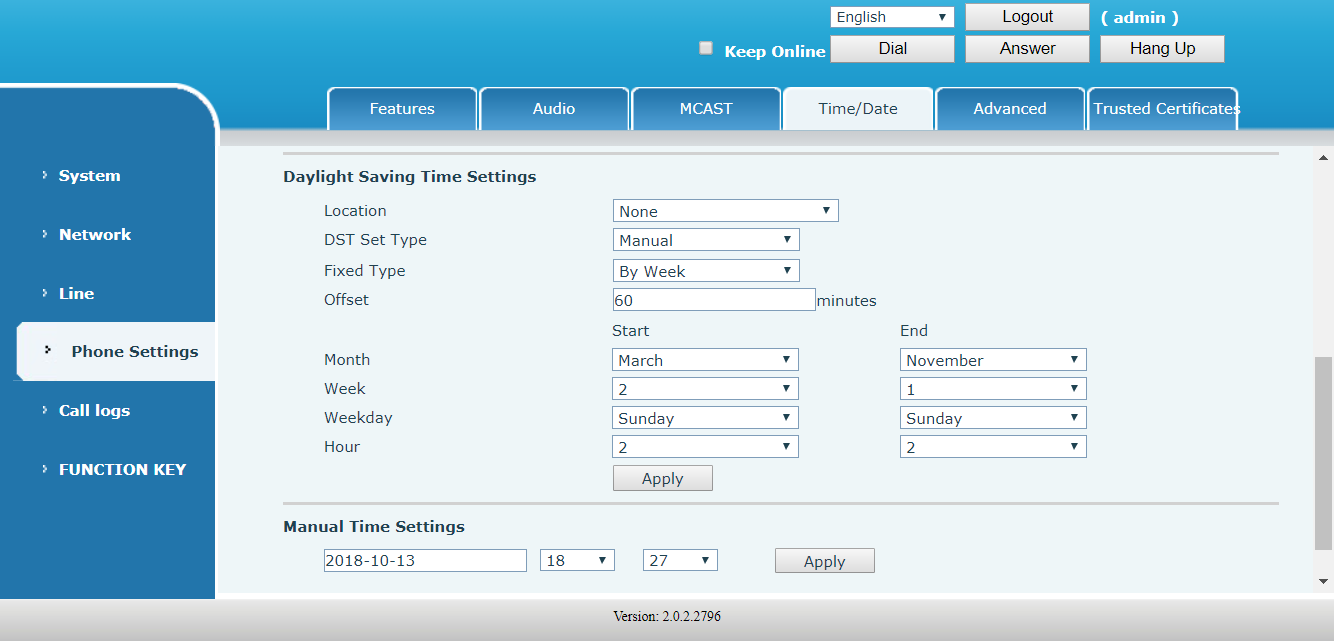
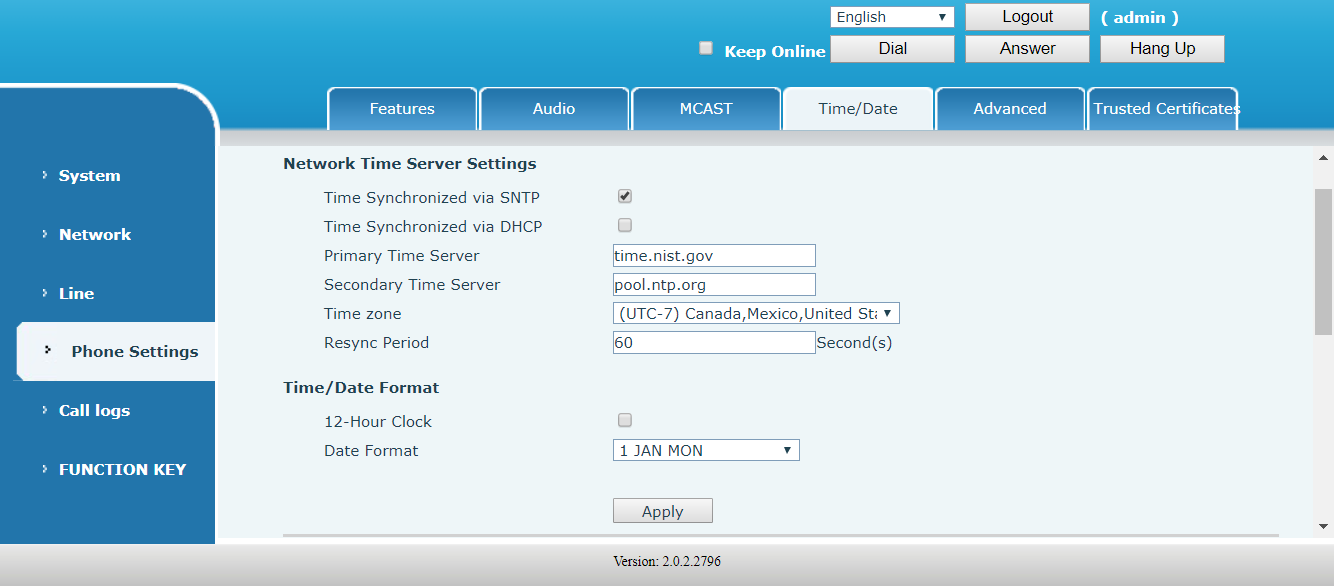
STEP FOUR: Configure Date and Time
Navigate to Phone Settings -> Time/Date page and update the following fields:
- Timezone - Select from the drop-down list
- 12-Hour Clock - Select/deselect checkbox
- Date Format - Select from the drop-down list
Click the Apply button first before scrolling down the page to the other settings.
Scroll down the page and configure the Daylight Saving Time Settings:
- Location - Select from the drop-down list
- DST Set Type - Select from Disabled, Automatic, Manual
The rest of the fields are active only if Manual is selected. Update as required and click the Apply button to save the settings.