

GXW40XX FXS Gateway
Overview
This document describes the steps necessary to get a Grandstream 40XX 4 or 8 port FXS Gateway working with a UCx Server.
Requirements
- Operational UCx Server
- Extensions on the UCx server programmed as SIP devices
- Grandstream 40XX FXS Gateway
- Power Cube for 40XX
- Network Cable
- Analog Telephone
- Ethernet Network with DHCP Server
Step One: Configure SIP Phone on UCx Server
- Open the UCx Web-based Configuration Utility
- From the PBX tab, select PBX Configuration
- From the left side column, select Extensions
- In the drop-down list box, select the device type Generic SIP Device and press the Submit button
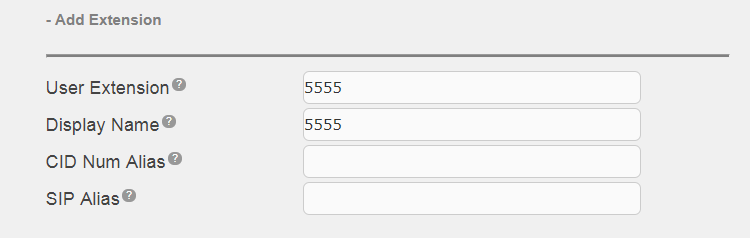
- Enter the extension number of the SIP extension in the User Extension field
- You must enter something in the Display Name field.
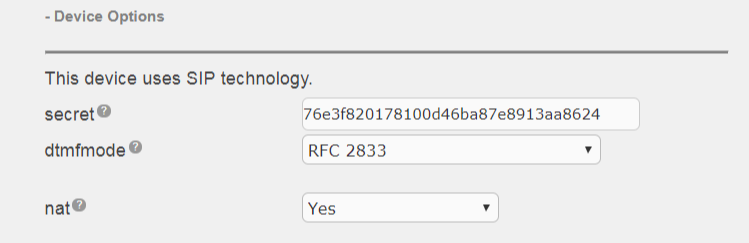
- In the Device Options section, you will need to enter a password in the Secret field.
- Press the Submit button at the bottom of the page and then the Apply Config bar.
Step Two: Install the Hardware
- Plug one end of the Network Cable into the WAN Port on the back of the 40XX device,
- Connect the other end of the network cable to your network.
- Plug the Analog Telephone into the RJ-11 Port 1 on the back of the 40XX device.
- Connect the Power cube to the 40XX device.
- Plug the power cord into an AC wall outlet and allow the system to power up.
Step Three: Determine the IP Address of the 40XX device
- Pick up the handset of the Analog Telephone, wait for dial tone and dial ***.
- Dial 02 to have the device speak the IP address to you and write it down.
- Press the pound key # and then dial 12. Dial 9 to ENABLE WAN access to the GUI.
- Press the pound key # and hang up.
Step Four: Provision the Grandstream 40XX
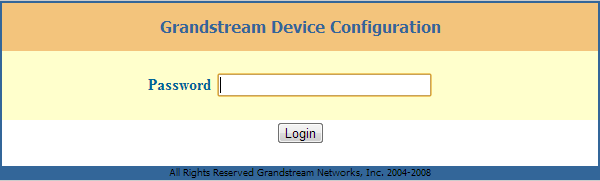
- Open a Web Browser window and connect to the IP Address of the 40XX device.
- Login to the device using the default password of admin.
-
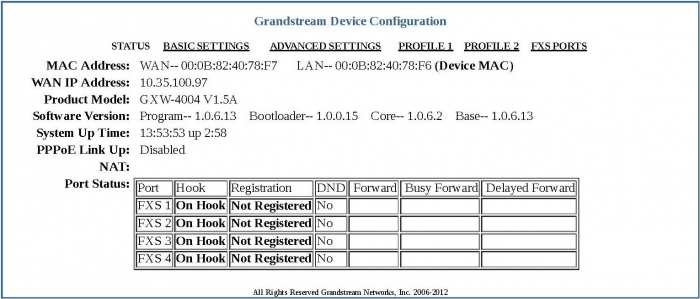
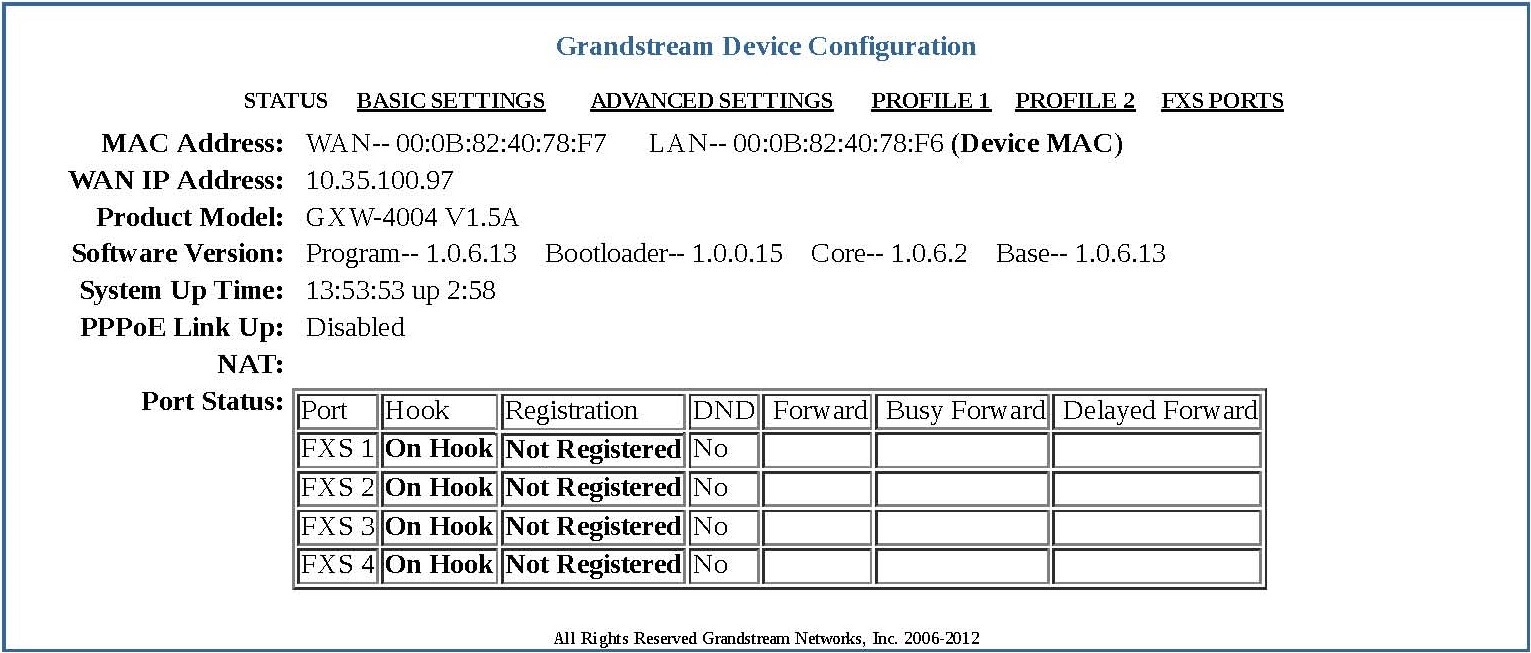
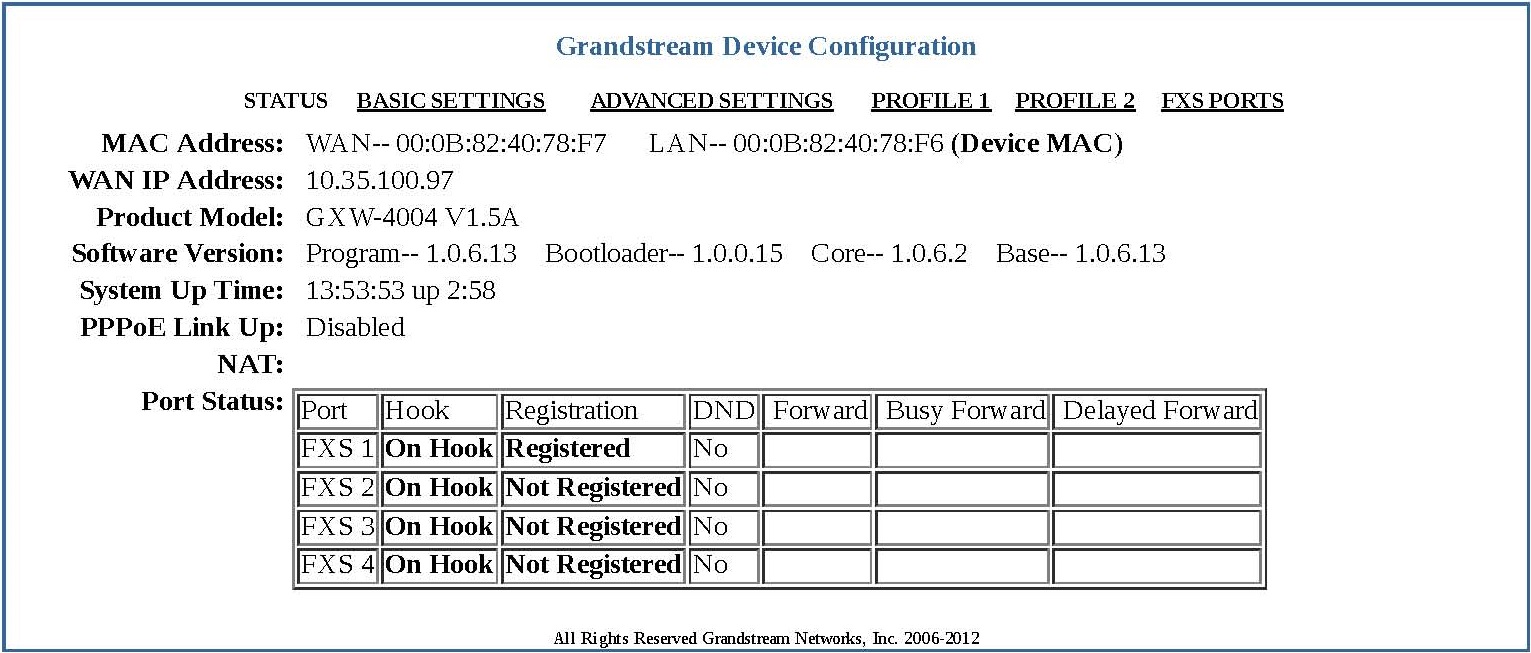
The first screen you see is the Status page and it will show the ports as Not Registered.
-
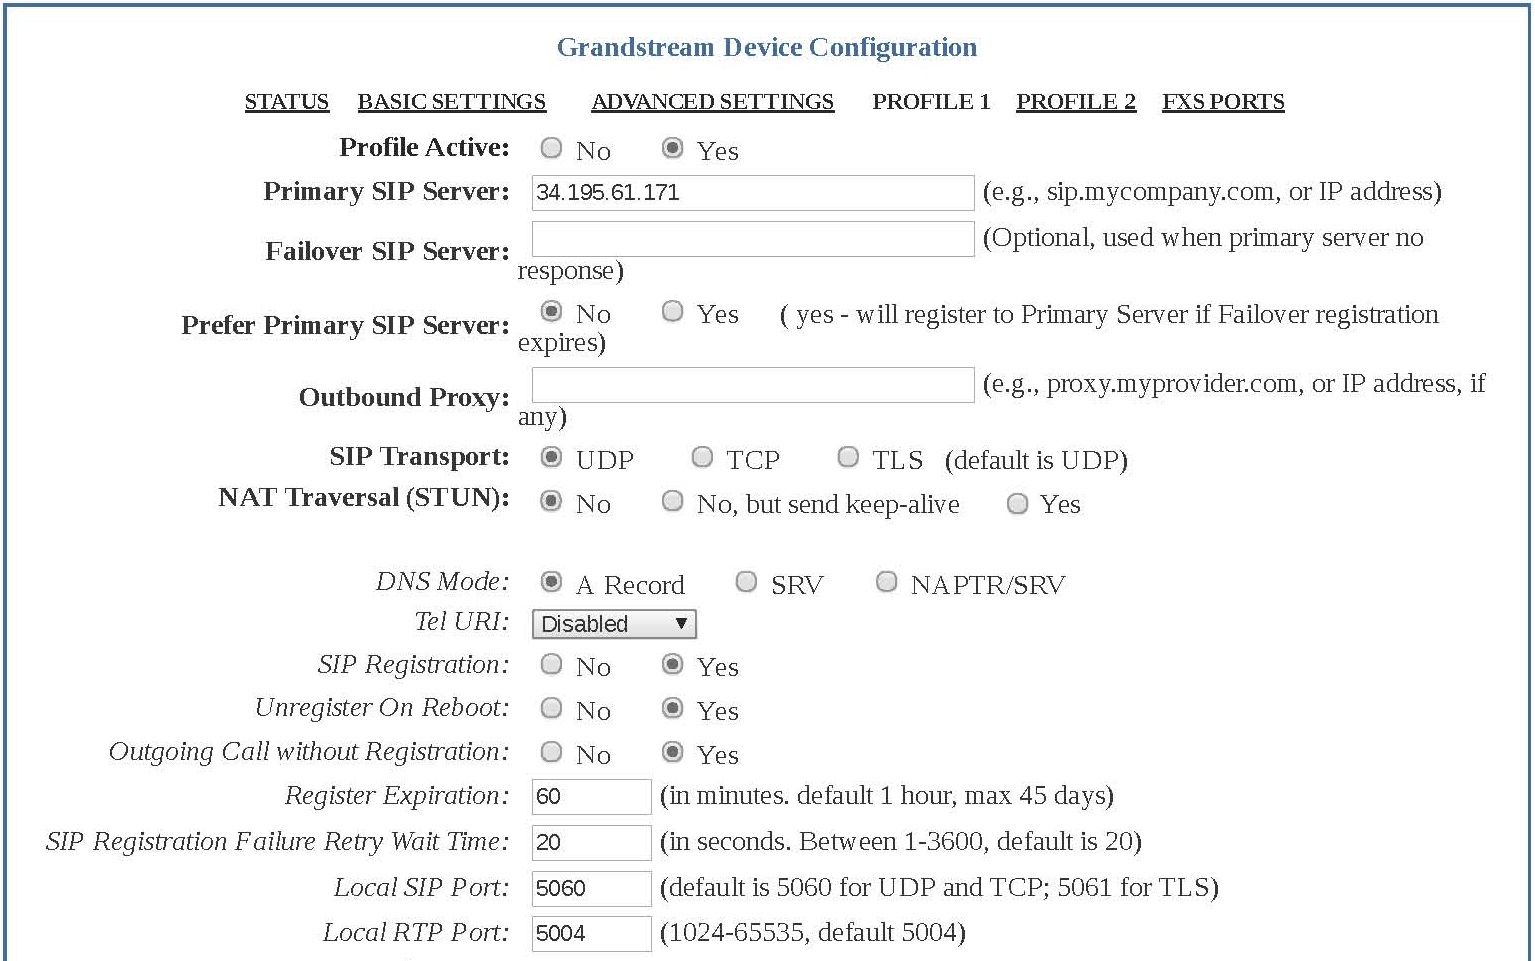
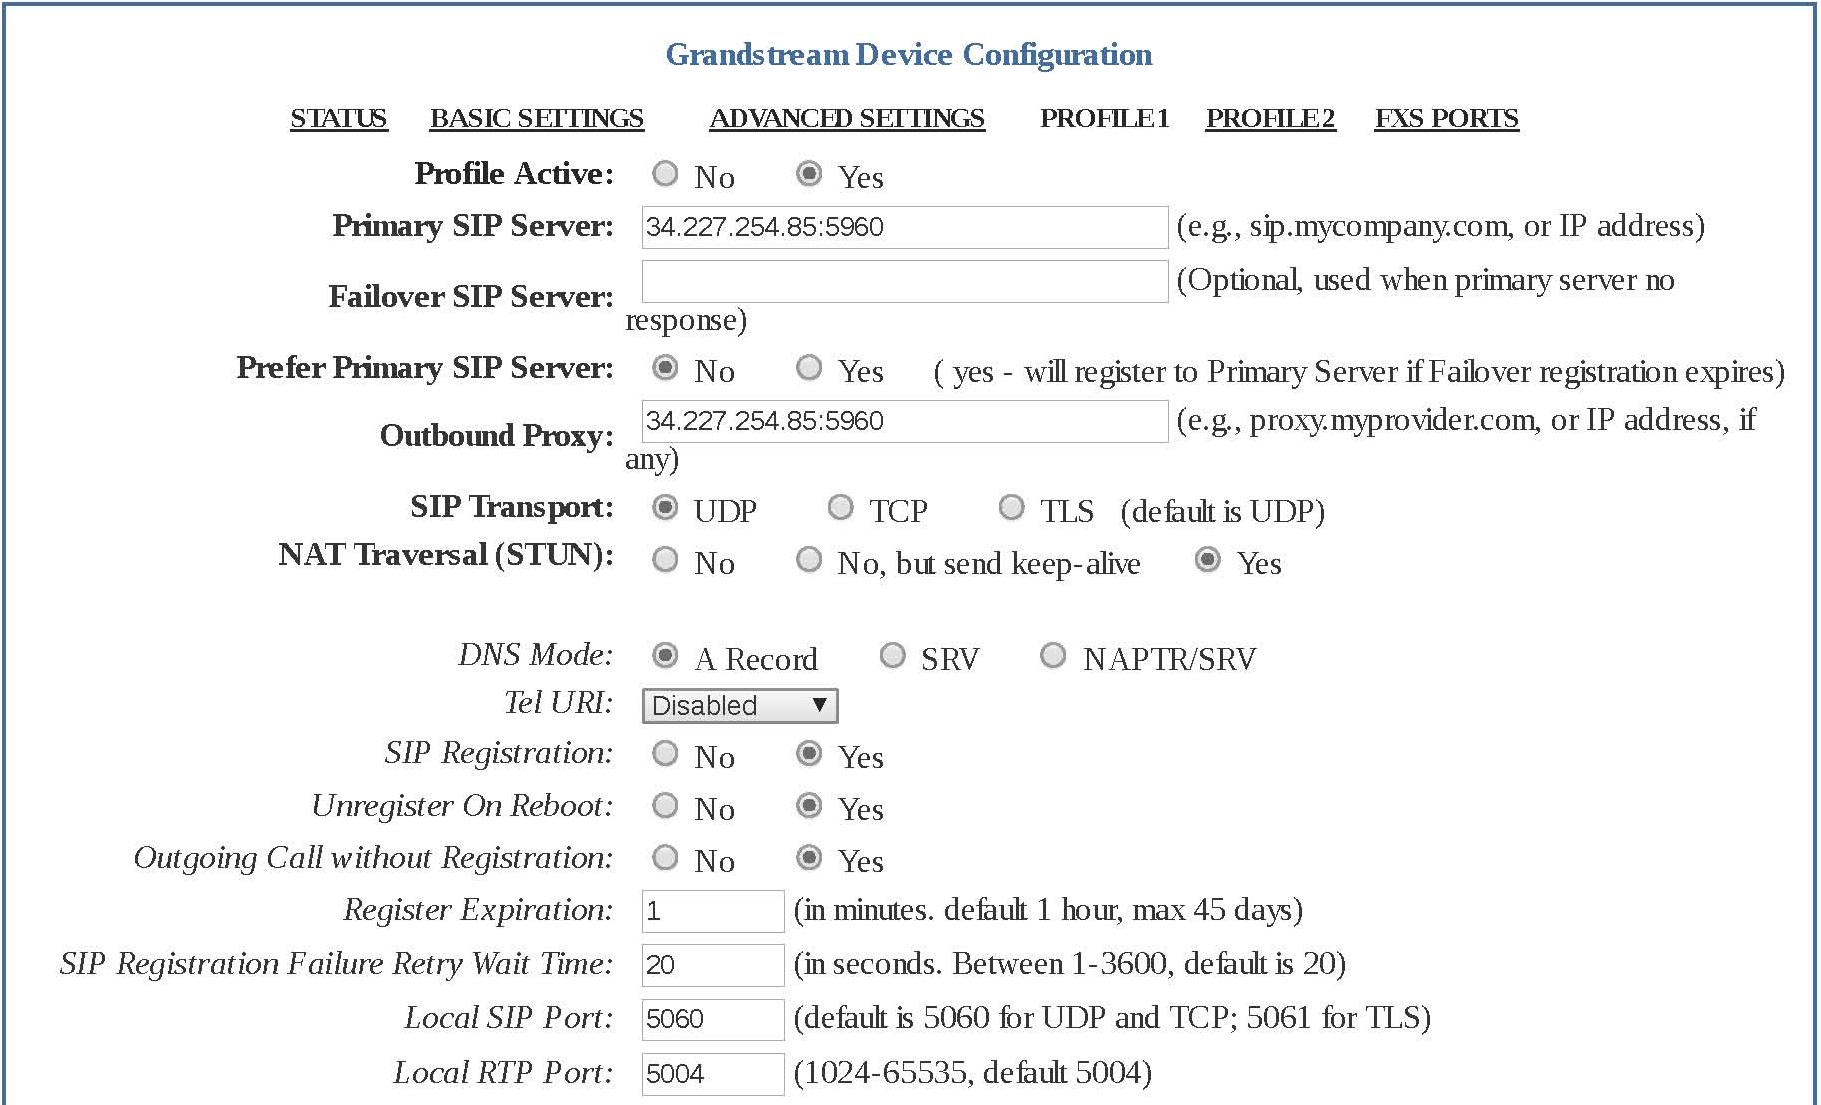
Navigate to the Profile 1 Tab and set the Primary SIP Server and Outbound Proxy Server to the IP address of the UCx server.
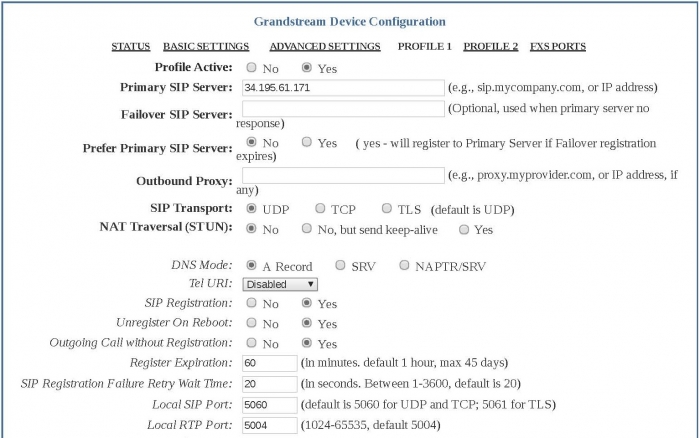

Press the Update button at the bottom of the page to save the changes.
-
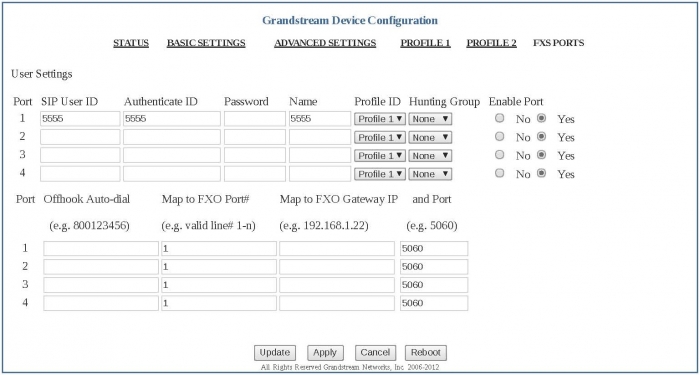
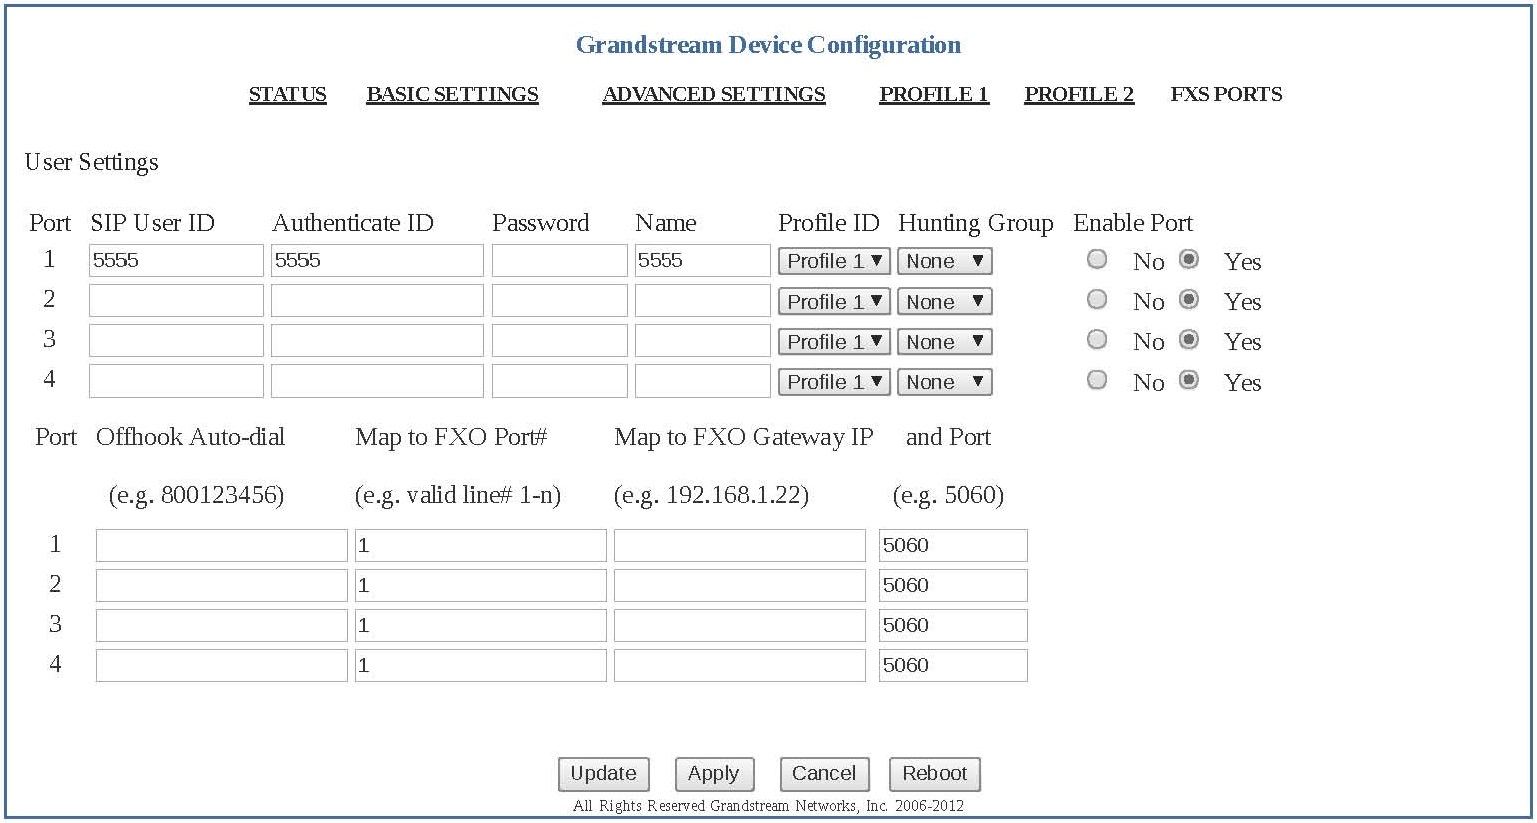
Navigate to the FXS Ports tab and set the SIP User ID to the Extension number, set the Authenticate ID to the Extension number, Set the Password to be the same as the secret of the SIP extension as programmed in the UCx server and set the Name to anything you want. Press the Apply button at the bottom of the page and reboot the device.
-
Login to the device and check the status screen - you should see your port(s) Registered.

Step Five: NAT Settings for UCx Cloud
This step is needed only if the FXS Gateway is connecting to a UCx Cloud Server.
- Open the UCx Web-based Configuration Utility
- From the PBX tab, select PBX Configuration
- From the left side column, select SIP Settings
- Set the NAT field to yes
- Set IP Configuration field to Static IP
- In the External IP field, enter the UCx Cloud Server hostname or IP address
- Under Local Networks, click on the Auto Configure button.
- Press the Submit button at the bottom of the page and then the Apply Config bar.
Step Six: Additional Settings
Dial Plan
A common setting to configure on the FXS Gateway is the Dial Plan. You want to add dial patterns to allow dialing of feature codes, restrict certain dial patterns or use the # key to dial.
- Open a Web Browser window and connect to the IP Address of the 40XX device.
- Login to the device and navigate to the Profile1 tab.
- To use the # key to dial, keep the field 'Use # as Dial Key' at the default value of Yes.
- Under the Dial Plan field, add the desired dial patterns separated by | within the { } brackets.
For example, a common North American dial plan is { ^1900x. | <=213>[2-9]xxxxxx | 1[2-9]xx[2-9]xxxxxx | 011[2-9]x. | [3469]11 | *x+ } where
- ^1900x+ - prevents dialing any number starting with 1900
- <=213>[2-9]xxxxxx - automatically append the area code 213 to any local 7 digit number
- 1[2-9]xx[2-9]xxxxxx - allows long distance dialing to US/Canada with 11 digit numbers
- 011[2-9]x+ - allows international dialing that begins with 011
- [3469]11 - allows emergency and service numbers 311, 411, 611, 911
- *x+ - allows dialing of feature codes that begin with *
