Generating and Installing a Commercially Signed SSL Certificate
Table of Contents
Generate a Certificate Signing Request (CSR)
Example 1: Upload the CSR to your SSL Provider when the SSL Provider is the Same as Your Domain Name Provider
Example 1: Upload the CSR to your SSL Provider when the SSL Provider is the Same as Your Domain Name Provider
Wildcard SSL Certificate Process
Install the Certificate on the UCX
Restart Web Server
Re-installing an SSL Certificate
Install the Certificate on the UCX
Restart Web Server
Re-installing an SSL Certificate
Background
SSL Certificates are typically used to provide a level of security to users by authenticating that a connection has been established to the intended server, protect sensitive data through encryption, and ensure the integrity of the overall transmission. E-MetroTel offers the necessary tools in the UCX Web-based Configuration Utility to support SSL certificates and install them in order to secure connections for UCX applications such as InfinityOne.
Getting Started
In order to be able to meet the security needs of mobile applications, the InfinityOne installation requires an SSL certificate to be installed on the InfinityOne server (i.e. the UCX server). SSLs come in a variety of shapes and sizes, but the base requirement is for a standard, single domain "Domain Validation" (DV) certificate, which is intended to confirm the identity of the InfinityOne server. E-MetroTel UCX systems also support the installation of Wildcard SSL Certificates, which is explained below. Other types of SSL certificates include Organization Validation (OV) and Extended Validation (EV),and others, which tend to be more expensive but offer additional capabilities beyond the minimum requirement for the InfinityOne application and are therefore beyond the scope of this document.
What is a certificate?
An SSL certificate contains the following information:
- The certificate holder's name
- The certificate's serial number and expiration date
- A copy of the certificate holder's public key
- The digital signature of the certificate-issuing authority
A Domain Validation certificate is used to verify that the person applying for the certificate is actually the current owner of that domain name and has the right to manage that domain. Therefore, in order to complete the overall SSL installation process on the UCX, it will be necessary to be able to access your existing Domain Registrar account (if you have one) to map the new subdomain to point to the UCX via DNS records, or, if you do not have a domain name, to purchase one and have the ability to manage that new domain.
If the company installing the InfinityOne application already has a domain name, you can simply create a subdomain that can be used to associate the SSL certificate with the InfinityOne server. For our example, we purchased the domain name "infinityone.app". In many cases typing the company domain name in a browser will take you to the company website. However, we want to be able to uniquely identify the SSL certificate with the InfinityOne functionality, so we created a subdomain in our Domain Registrar account called "ucx.infinityone.app". This allows the internet DNS functionality to be able to identify the IP address associated with the subdomain (ucx.infinityone.app) and create and install an SSL associated with that subdomain. You may need to work with your IT organization in order to establish the subdomain and create and install the SSL certificate. (Note that if the domain name is example.com, then east.example.com and west.example.com would be subdomains.)
Sourcing and Generating a Standard single system Domain Validation (DV) Certificate
SSL certificates can be purchased online from many certificate authorities (providers that can generate SSL certificates) on the internet. Because the process for creating and installing a certificate requires interaction with both the UCX and the certificate authority, E-MetroTel cannot provide instructions for completing the installation for all certificate providers. Instead, we have chosen one certificate authority to provide an example of the overall process. In this case, we have purchased a certificate from GoDaddy.com. We also purchased the domain name from GoDaddy.com which simplified the process to a degree because was simpler to prove you manage that domain and create an SSL if the domain and the SSL are purchased together. However, it is not mandatory to purchase both the domain name and certificate from the same supplier. Our chosen domain was "infinityone.app" and the subdomain name we created was was "ucx.infinityone.app", which is used through the example below. Substitute your domain name or sub-domain name as appropriate.
In order to complete this process for generating and adding a certificate from GoDaddy.com, the following steps are required:
Generate a Certificate Signing Request (CSR)
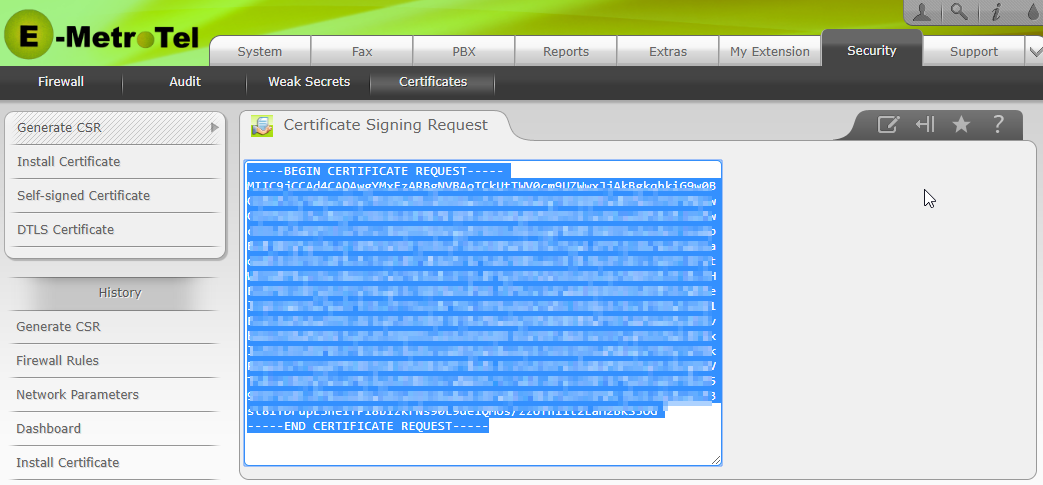
Complete the information on the Generate CSR section of the Certificates page on the Security tab. The fields marked with the * (i.e. a red asterisk) are mandatory. Note that the Common Name field must match the name of Domain name that you are associating with the SSL certificate.

If you are installing a certificate as part of the InfinityOne requirements for Mobile client support you must use this Common Name as the host name when running the InfinityOne Installation Wizard.
When complete, click on the Generate button. The UCX generates a lengthy text field. This is the CSR. Select the entire text field, including the "-----BEGIN" through to the final "REQUEST-----". Copy this text.
Example 1: Upload the CSR to your SSL Provider when the SSL Provider is the Same as Your Domain Name Provider
After you purchase an SSL certificate and activate the SSL credit, you need to request it for the website's domain name (or "common name") you want to secure with the SSL. In this example, we have gone through the process of purchasing a domain (infinityone.app) as well as an SSL certificate credit using GoDaddy.com. After selecting the purchased credit and clicking "Set up", GoDaddy requires input to be able to identify the Primary Domain. For the case of the UCX, this identification is achieved by inputting the CSR generated in the previous step. Click on "Input a CSR" and then paste the text copied from the UCX.
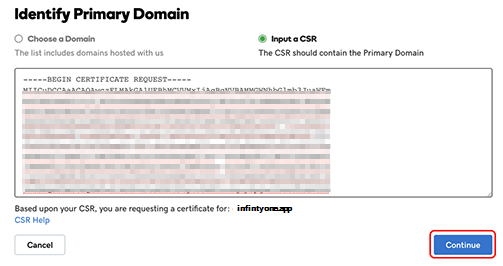
Click on Continue to progress to the next step.
Prove you own the domain
GoDaddy now requires validation that you own the domain associated with the CSR. In this example, there is no email associated with any of the suggested addresses, so "Make a change to the website or add a TXT record to the DNS" was selected. Your choice will depend on your particular circumstances.
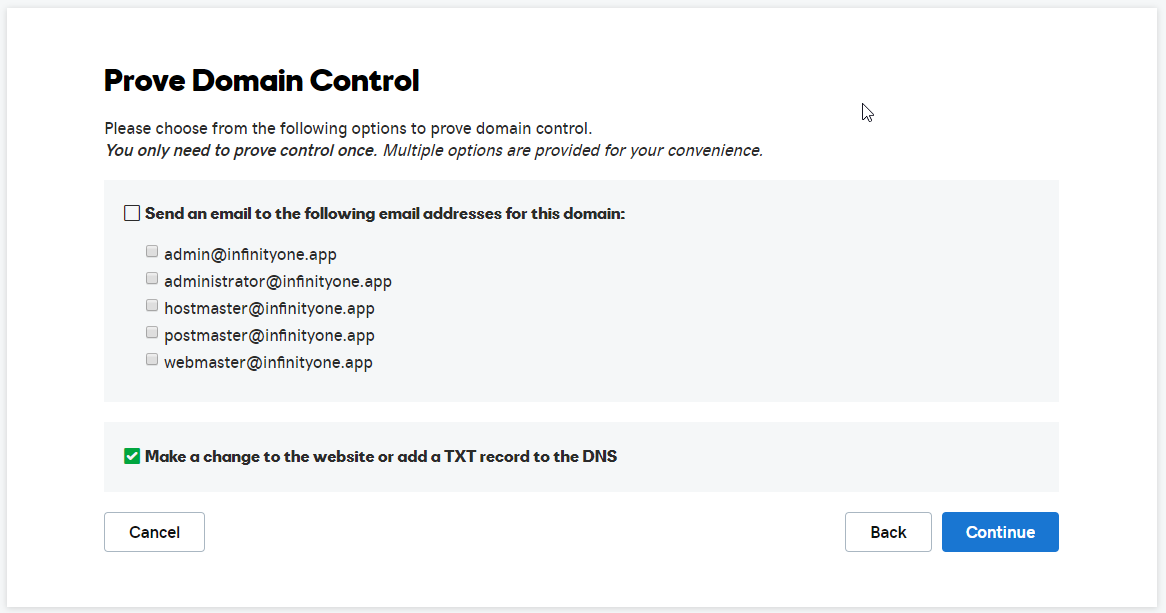
Agree (after reading) to the Subscriber Agreement and click "Continue"

In this scenario, there were no additional steps necessary, as the domain and the SSL certificate were purchased from the same account and GoDaddy responded with a confirmation of "Complete Domain Control", below. If you are working with an SSL certificate not issued by the same organization that manages your domain, then you will need to follow their instructions for proving that you have authority for that domain. As an example, they may have you make specific changes to the DNS records that they can verify through a DNS query.

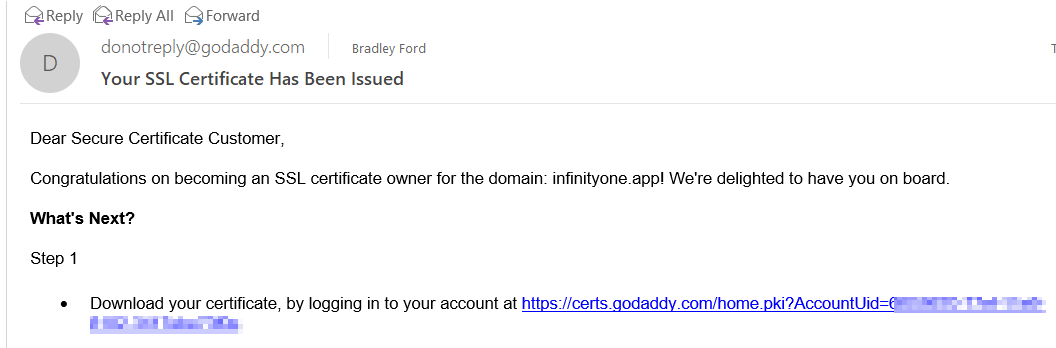
GoDaddy sends an email confirmation. Ignore the Steps 2 and 3, as these are based on being able to add files directly to the web server, whereas for the UCX these must be uploaded using the Web-based Configuration Utility.
Checking the account page shows the SSL certificate issued against the "infinityone.app" domain.

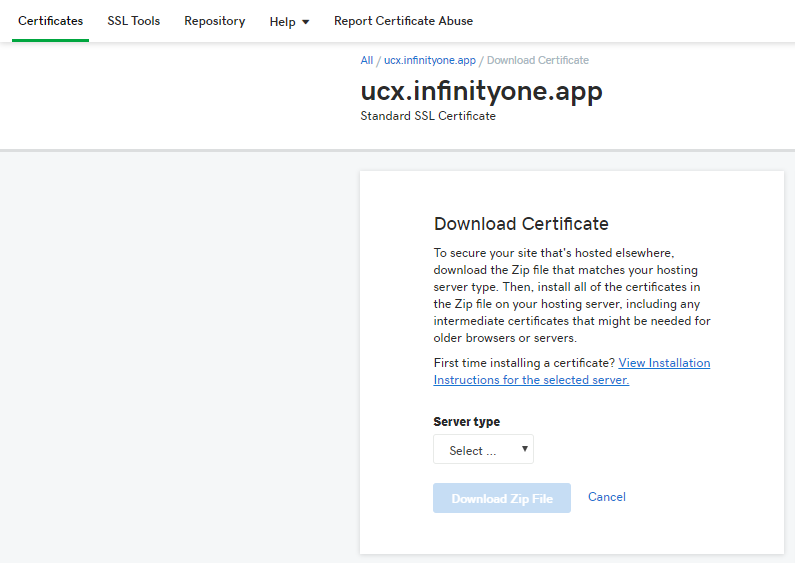
Download the Certificate
On the GoDaddy Certificates web page, select "Download".

Select the Server type as "Other"
Note that Chrome or other browsers may temporarily prevent the zipped file from downloading:

Select "Keep" and record the file location where the certificate file was downloaded.
Example 2: Upload the CSR to your SSL Provider when the SSL Provider is NOT Your Domain Name Provider
In this example, the SSL was purchased from a different provider than where the domain name is managed. This adds the extra step of having to prove Domain Name ownership to the SSL provider prior to issuance of an SSL. From a UCX perspective, the basic steps of purchase a certificate, generating a CSR, and uploading the CSR are the same as the previous example.
However, after successfully uploading the CSR to the SSL provider site, you will need to follow the instructions for proving domain ownership. The options for proving domain ownership typically include either sending an email to the domain owner, creating a unique CNAME Record within the Domain Name provider account DNS settings, or placing a file on the server that is the target host for the SSL when it is inside the domain. Any of these methods are valid, but the first two require coordination with the party responsible for the Domain Name management, which in many cases is not the same as the party responsible for installing the UCX. When this is the case, the simplest method is to choose to download a file and install it on the UCX.
Prove you own the Domain
-
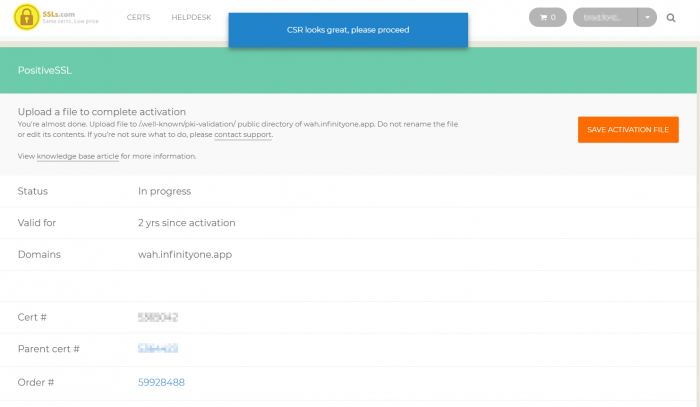
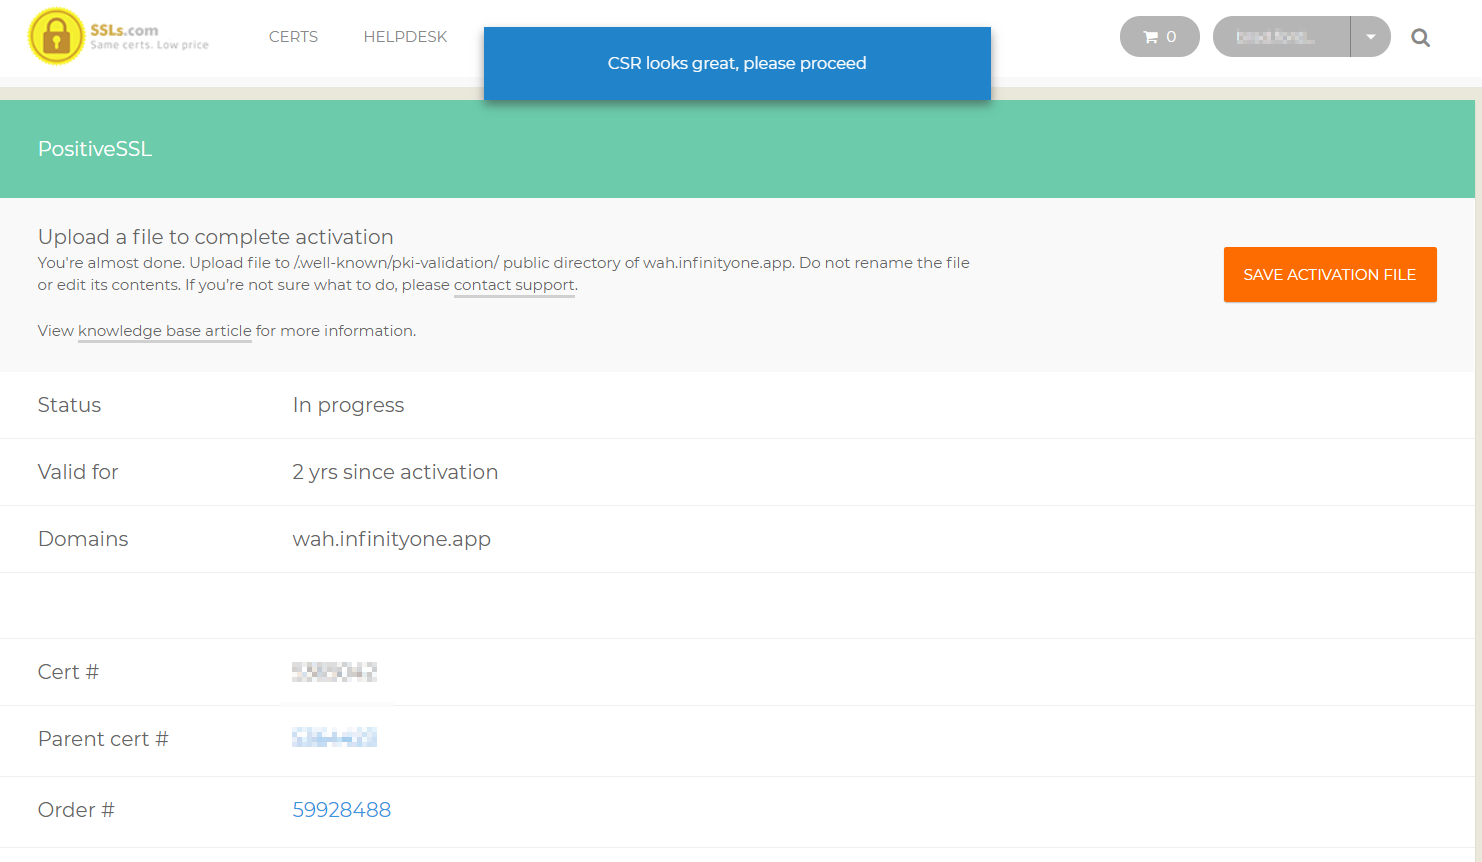
Once you have selected the option of installing a file on the UCX, the provider will provide the ability to download a file:
-
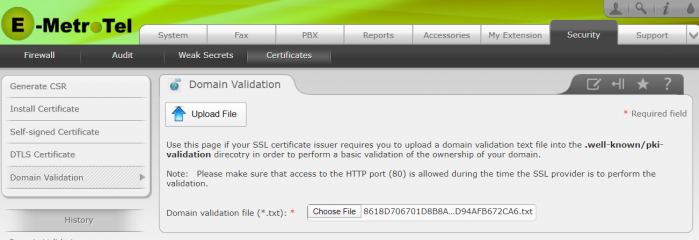
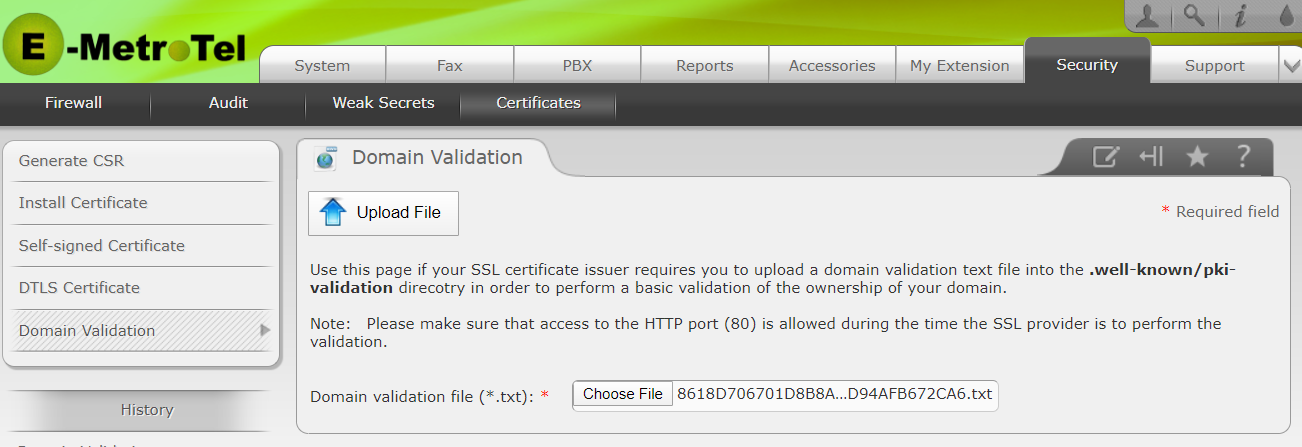
On the UCX, go to Security-->Certificates-->Domain Validation

-
Use the Choose File button to select the ".txt" file you just downloaded, then click Upload File
-
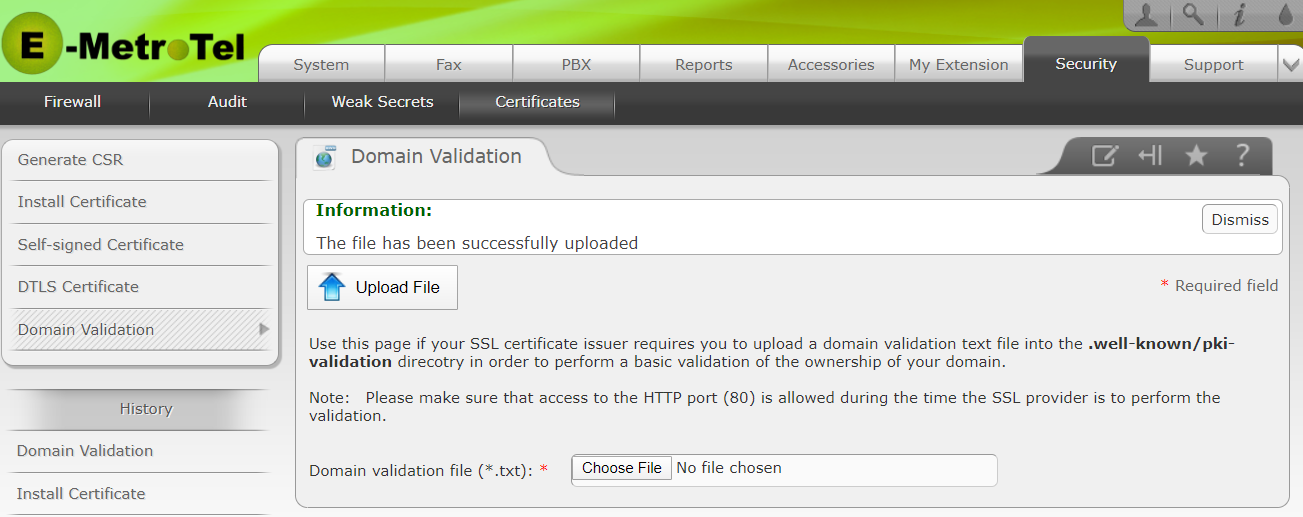
Once the File has been successfully uploaded, the SSL provider system will verify that there system is able to read the file remotely (through TCP Port 80).
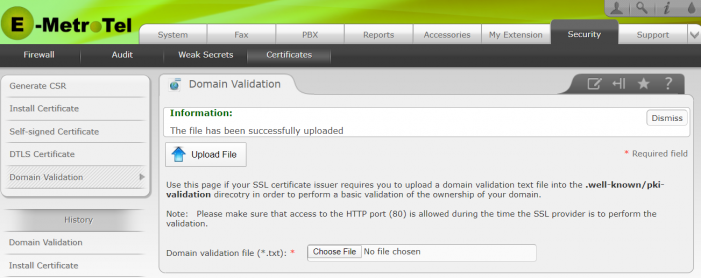
- The SSL provider will then alert you that the SSL certificate file is ready to send.

Download the Certificate
- Follow the SSL provider's instructions to download the certificate file (usually zipped).
- If there is a separate certificate bundle file, it must be included downloaded and added to the zipped file.
- Proceed to Install the Certificate on the UCX.
Wildcard SSL Certificate Process
The SSL Wildcard certificate allows a single certificate that can be applied to a domain and all of its subdomains. In the case of the Wildcard SSL, all sites use a common private key, which will be required to be installed on the UCX as part of this process, so there is no requirement to generate a Certificate Signing Request (CSR) from the UCX.
The following process must be followed to prepare the Wildcard SSL for upload:
- Purchase your Wildcard SSL certificate from a commercial SSL provider such as GoDaddy, SSLS, etc.
- When instructed, download the two files to your PC. one is a private key file (you must save this as it is only generated one time) and the other file is a domain Validation text file that you will install on the UCX server to validate your domain name. Your UCX server must have port 80 opened and accessible via the public internet for this process to succeed.
- Login to the UCX server WebGUI
- Navigate to the Security/Certificates/Domain Validation page.
- Click the Choose file button and select the validation file that you downloaded, then press the Upload File button.
- You will need to wait until the authority that sold the domain can validate the domain. They do this by requesting a download of the file using the GET http method through port 80.
- You will receive an email with a .zip file in it when the domain is validated. This zip file will include two files, possibly three. One file is a .crt bundle file, the second file is the domain_name.crt file. Both of these files must be using the file extension .crt. A third file, the private key file downloaded in Step 2, will be required to be added to this .zip file. If the private key is stored in a ZIP file, extract the key. Add the private key file to the .zip bundle file. The private key file must be in the format of a .txt or .key file extension.
- Now that the required ZIP file containing the certificate (*.crt), the certificate bundle (*.crt), and the private key (*.txt or *.key) has been prepared it is ready to install in the UCX server,
Install the Certificate on the UCX
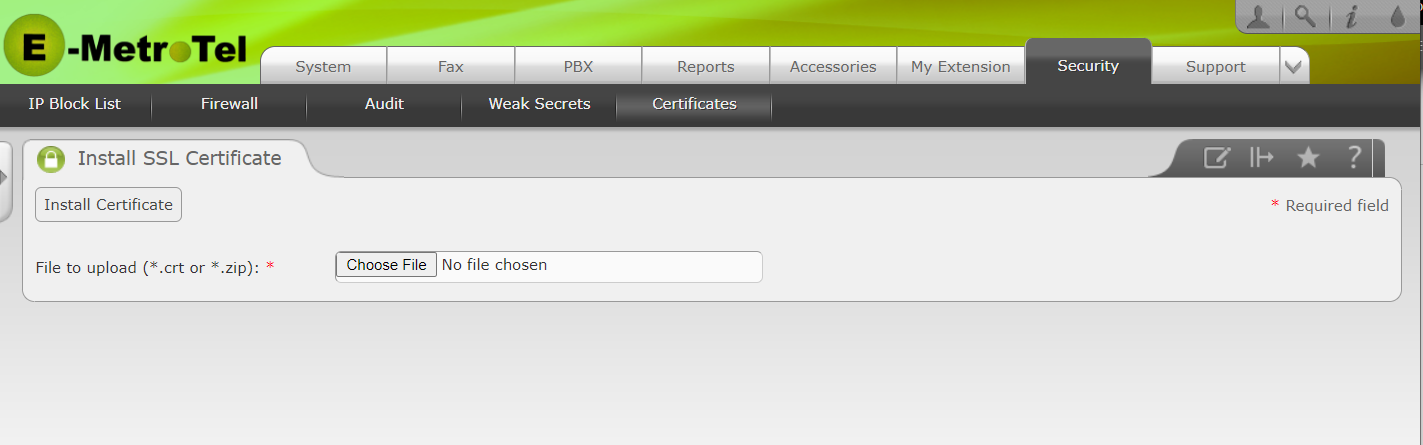
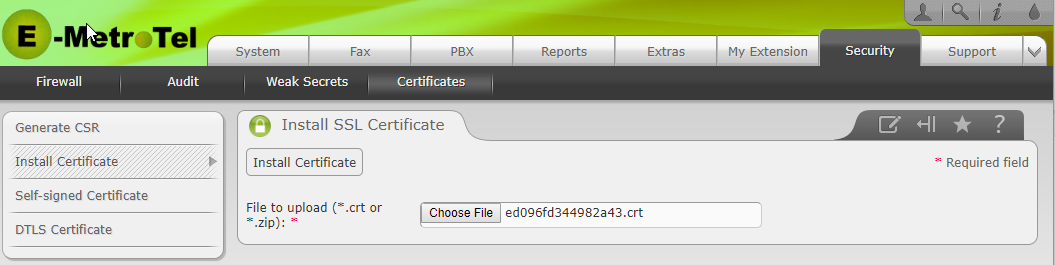
Click on the Install Certificate section of the Certificates page on the Security tab. Click on Choose File, and select the compressed .zip" file from the previous steps (this will contain any intermediate certificates as well which are required to ensure the certificate is properly trusted). Click on Install Certificate.
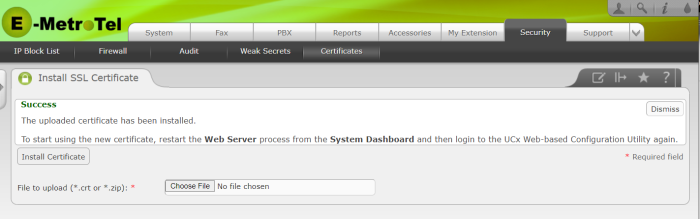
Success Message
Once the file has uploaded, you will see a Success message in the Install SSL Certificate window. Follow the instructions provided to restart the Web Server.

Restart Web Server
On the Dashboard page in the System tab, click on the drop-down arrow on the Web Server line item in the Processes Status box, and select Restart process.

At this point, the SSL installation process is complete. You can verify the operation by opening the UCX Web-based Configuration Utility from any browser, and it will no longer provide a security warning prior to presenting the login screen.
If you have purchased an SSL from E-MetroTel, our installation process performs all required steps to this point including restarting the Web Server.
Re-installing an SSL Certificate (after it expires)
Most commercial SSL certificates have a validity period of one year. If you are renewing your SSL certificate with no changes in the actual data associated with the SSL parameters, you may be able to simply re-install the certificate. This may be dependent on the SSL provider you are using.
-
After downloading the new SSL certificate zipped file from your SSL provider, try selecting the downloaded file from the Choose File button on the Security / Certificates / Install Certificates page, or drag and dropped the zipped file to this page.

-
Once it appears as the chosen file, click the Install Certificate button
- Restart the Web Server to start using the new certificate.