

DSM16 - Call Server
The Device Configuration tab is used to set defaults appropriate for the types of devices being supported via the DSM16 connection.
Device Configuration tab - DSM16P Card
The DSM16P Card supports either Norstar/BCM or M1/CS1000 style digital sets. Therefore, the Device Configuration tab settings controls whether the card is to be used with Norstar/BCM sets, M1/CS1000 sets, or Avaya Digital sets (was called IP Office in previous version). To adjust any of these settings:
- Open the DSM16p Web-based Configuration Utility
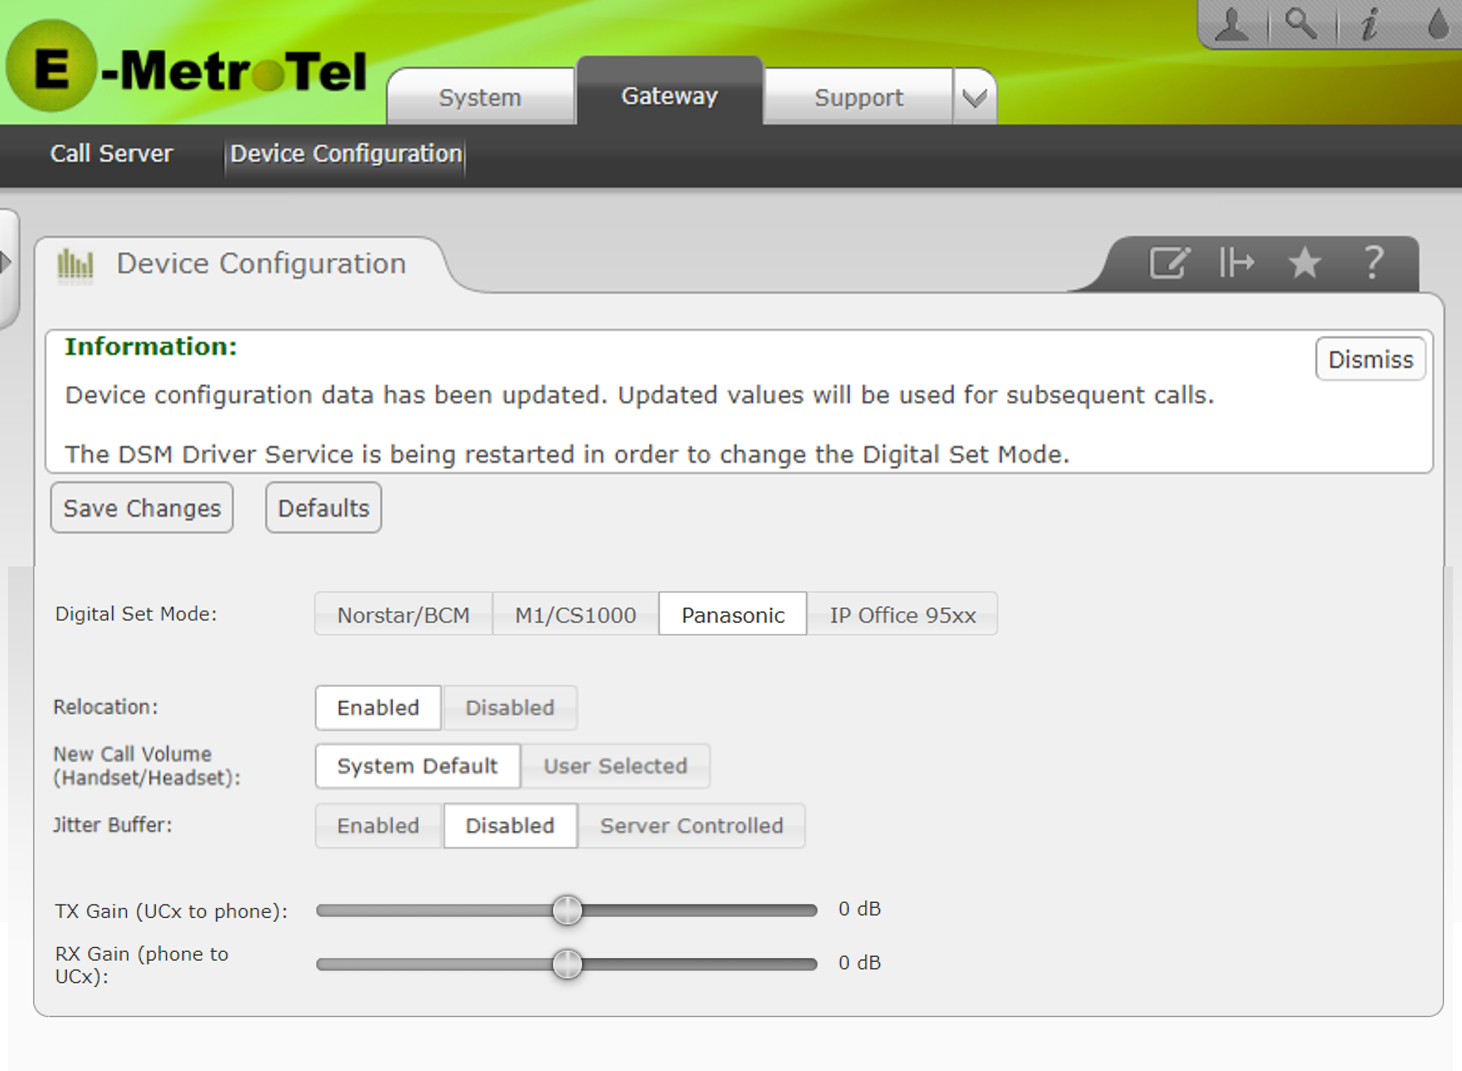
- From the Gateway tab, select Device Configuration and adjust the settings as required
- Once you have made the desired changes, press Save Changes

| Property | Value | Description |
|
Digital Set Mode
|
Norstar/BCM or M1/CS1000 or Panasonic or AVAYA |
You can configure the DSM16P Card for supporting Norstar/BCM, M1/CS1000, Panasonic or Avaya IP Office compatible digital sets. You cannot mix the types of sets on a single card. (The Panasonic and Avaya settings are not supported on the older DSM16 Module)
Default Setting: Norstar/BCM |
|
Relocation
|
Enabled or Disabled
|
Controls whether the sets retain their programming when changed to a different port or if the programming stays associated with the port itself.
|
|
New Call Volume
|
System Default or User Selected |
Controls whether a new call is presented at the system default volumes or at the last settings as adjusted by the user |
|
Jitter Buffer
|
Enabled or Disabled or Server Controlled |
Controls whether the Jitter Buffer is permanently on or off, or if the UCX should decide when to use it.
|
|
TX Gain (UCX to phone) |
-15 dB to +15 dB (Default: 0 db) |
Controls the level of the audio as sent from the UCX to the digital phone. (Drag slider or click at a location on slider to set value.) |
|
RX Gain (phone to UCX) |
-15 dB to +15 dB (Default: 0 db) |
Controls the level of the audio as sent from the digital phone to the UCX. (Drag slider or click at a location on slider to set value.) |
When you switch from a lower power configuration to one requiring higher power, you will see the following type of warning.
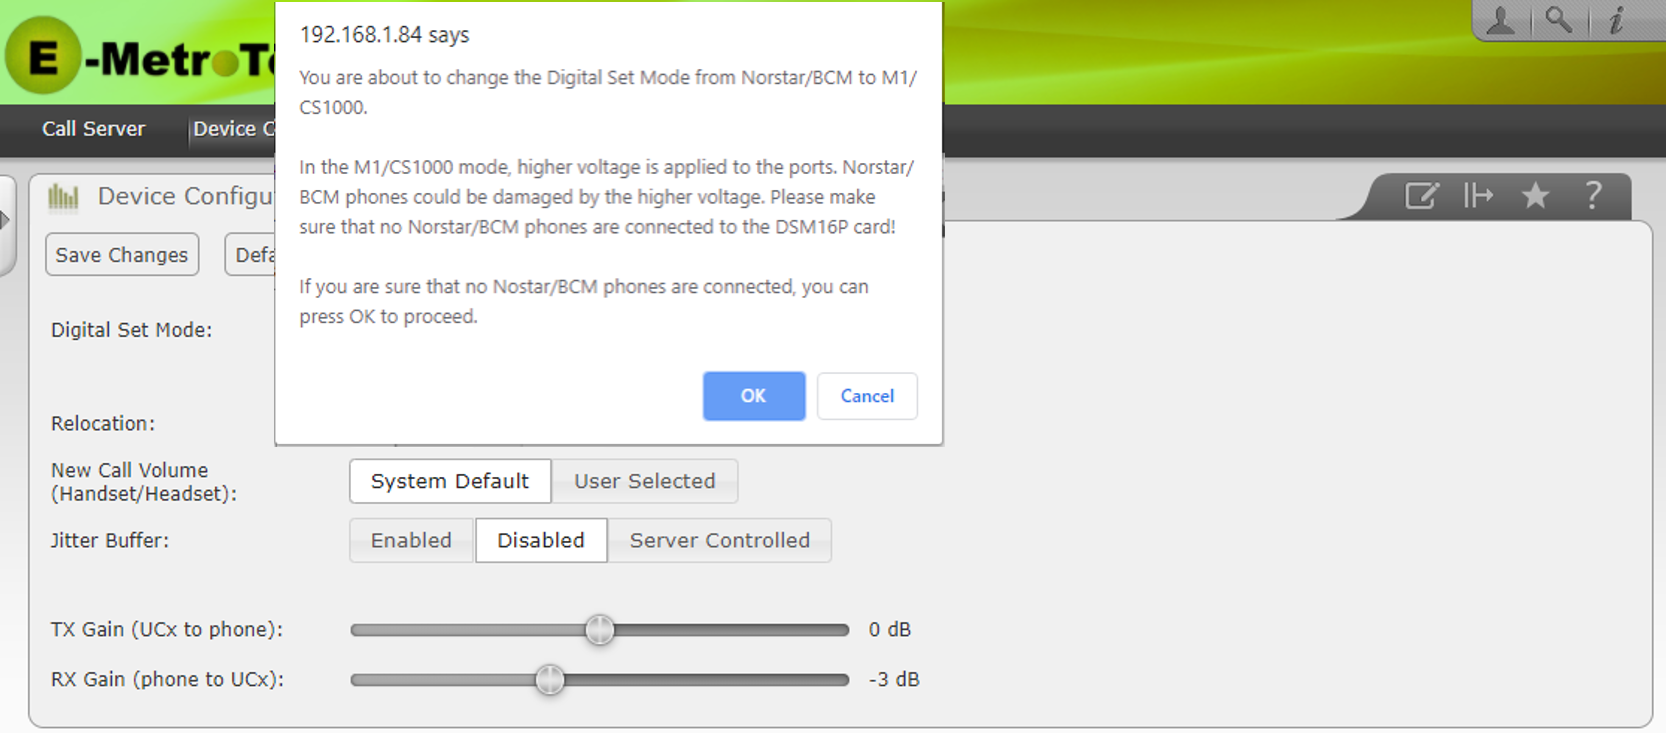
Once you have ensured that all lower voltage sets have been disconnected, press OK.
Locating the DSM16p card
The DSM16P card may be one of many in a single or multiple Galaxy Expand chassis or even in one or more Galaxy Express chassis. It is possible to determine which card corresponds with the particular IP address to which you are logged in, by using the Identify button on the Device Configuration page.
-
Click on the Identify button.

-
You will be notified that the status LED will begin flashing an alternating red and green for a period of 10 seconds.

- Observe which of the DSM16 cards displays the flashing LED. If the DSM16P card is in a remote location, have someone local to the chassis verify the flashing pattern.