

Convert Cisco 6921/6941/6961 Phone from SCCP (Skinny Call Control Protocol) to SIP protocol
Introduction
This page describes the steps to convert a Cisco 69x1 phone from the SCCP (Skinny Call Control Protocol) to SIP protocol. The instructions include preparation of the configuration files to provision the phone.
Prerequisites
- Cisco 69x1 Telephone with Power supply (or POE port)
- A Cisco ID with access to software downloads
- Connection to a network with an active DHCP server
- UCx server configured and connected to the same network as the Cisco phone
- A file transfer client software installed on your computer (e.g. WinSCP)
STEP ONE: Configure SIP extension on UCx
- Log into the UCx Web-based Configuration Utility
- Navigate to the PBX - Extensions page
- Create a SIP extension (see Adding a SIP Extension)
- In the Device options section, set NAT to no
- Save and apply the changes
STEP TWO: Obtain SIP Firmware
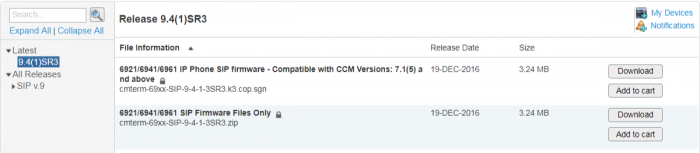
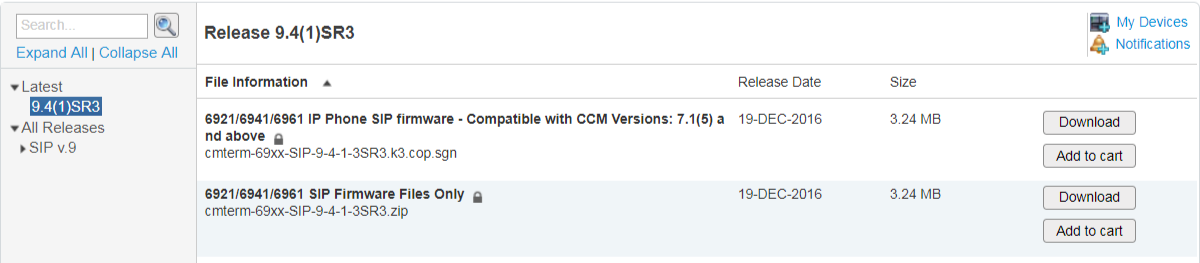
Download SIP software
- Visit the cisco software download page (https://software.cisco.com/download/navigator.html?mdfid=282601278)
- Select your product Unified IP Phone 69x1
- Select the software type Session Initiation Protocol (SIP) Software
- Select the latest 9.x software version (successfully tested with firmware version SIP69xx.9-4-1-3SR3)
-
Download the SIP Firmware Files Only
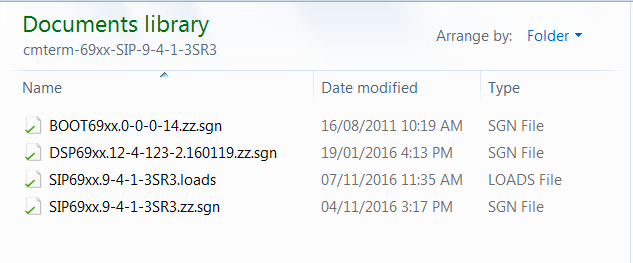
- Extract the downloaded zip file to a new folder and label the folder the same as the software load (e,g. SIP69xx.9-4-1-3SR3)
-
The contents extracted will look something like this.
STEP THREE: Prepare Configuration files
There are several configuration files that you will need to prepare:
- SEPxxxxxxxxx.cnf.xml
- XMLDefault.cnf.xml
- Dialplan.xml
You can download the template files that we have provided at the bottom of this page. Place these files in the same folder as the software files that you extracted above. Change the file extension of the files as follows:
- SEPxxxxxxxxx.cnf_.txt to SEPxxxxxxxxx.cnf.xml
- XMLDefault.cnf_.txt to XMLDefault.cnf.xml
XMLDefault.cnf.xml
There is the default configuration that will be used if the device does not find the specific SEPXXXXXXXXXXXX.cnf.xml file. The device can determine the firmware version from this file. Make sure the load information matches the firmware load you downloaded. Replace the tag #UCXIPADDRESS with the IP address of your UCx Server.
<Default>
<callManagerGroup>
<members>
<member priority="0">
<callManager>
<ports>
<ethernetPhonePort>2000</ethernetPhonePort>
</ports>
<processNodeName>#UCXIPADDRESS</processNodeName>
</callManager>
</member>
</members>
</callManagerGroup>
<loadInformation495 model="Cisco 6921">SIP69xx.9-4-1-3SR3</loadInformation495>
<loadInformation496 model="Cisco 6941">SIP69xx.9-4-1-3SR3</loadInformation496>
<loadInformation497 model="Cisco 6961">SIP69xx.9-4-1-3SR3</loadInformation497>
</Default>
SEPXXXXXXXXXXXX.cnf.xml
This XML configuration file is specific to one device, and the XXXXXXXXXXXX part of the name is the MAC address of the device.The file must be renamed to match the MAC address of your phone exactly. For example, if the MAC address of the phone is "00260B5DCB52", then the file must be renamed to "SEP00260B5DCB52.cnf.xml". (Note the name must be in UPPERCASE.)
You also need to edit the provided template file and replace the tags highlighted in BOLD below. Make sure the loadinformation tag matches the firmware load you have downloaded.
...
<callManager>
<ports>
<ethernetPhonePort>2000</ethernetPhonePort>
<sipPort>5060</sipPort>
<securedSipPort>5061</securedSipPort>
</ports>
<processNodeName>#UCXIPADDRESS</processNodeName> <!-- IP address of your UCx server -->
</callManager>
...
<phoneLabel>#EXTENSION</phoneLabel>
...
<sipLines>
<line button="1">
<featureID>9</featureID>
<featureLabel>#KEYLABEL</featureLabel> <!-- Any label you want for the key -->
<proxy>#UCXIPADDRESS</proxy> <!-- IP address of your UCx server -->
<port>5060</port>
<name>#EXTENSION</name> <!-- Extension number for the phone -->
<displayName>#EXTENSIONDISPLAYNAME</displayName> <!-- Display name for the extension -->
<autoAnswer>
<autoAnswerEnabled>2</autoAnswerEnabled>
</autoAnswer>
<callWaiting>3</callWaiting>
<authName>#EXTENSION</authName> <!-- Extension number for the phone -->
<authPassword>#EXTENSIONSECRET</authPassword> <!-- Secret for this extension -->
<sharedLine>false</sharedLine>
<messageWaitingLampPolicy>1</messageWaitingLampPolicy>
<messagesNumber>*97</messagesNumber>
<ringSettingIdle>4</ringSettingIdle>
<ringSettingActive>5</ringSettingActive>
<contact>#EXTENSION</contact>
...
<loadInformation>SIP69xx.9-4-1-3SR3</loadInformation> <!-- This must match exactly the name of the firmware loads file that you downloaded without the .loads extension -->
Dialplan.xml
This file defines the dialing patterns for the phones in the system. You should modify the example below to match the dialplan for your system.
<DIALTEMPLATE>
<TEMPLATE MATCH="6.." TIMEOUT="0"/><!-- Internal extensions 600 to 699. Dial immediately. -->
<TEMPLATE MATCH="9,1.........." TIMEOUT="0"/><!-- Dial 8 give secondary dialtone, then 1+10 digits. Dial immediately -->
<TEMPLATE MATCH="\*97" TIMEOUT="0"/><!-- *97 for voicemail. Dial immediately. -->
<TEMPLATE MATCH="*#" TIMEOUT="0" REWRITE="%1"/><!-- Dial immediately after pressing #. Do not send the # sign. -->
<TEMPLATE MATCH="*" TIMEOUT="5"/> <!-- Anything else, wait 5 seconds then dial. -->
</DIALTEMPLATE>
STEP FOUR: Place files on TFTP Server
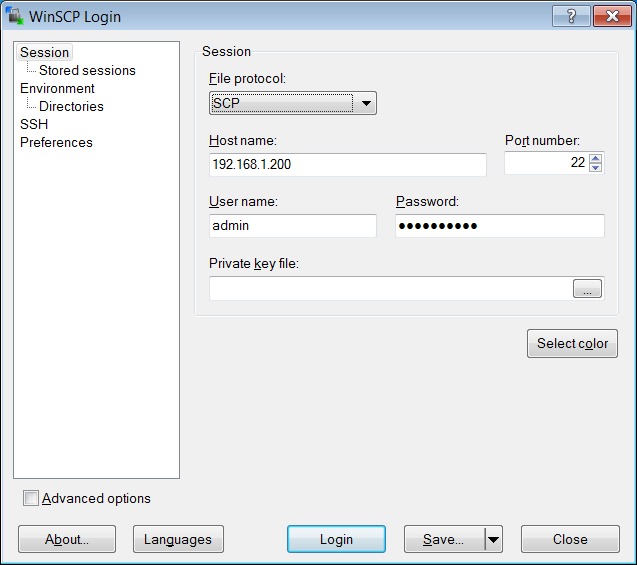
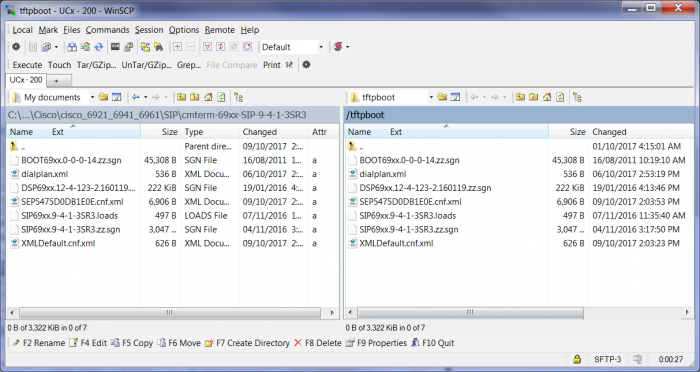
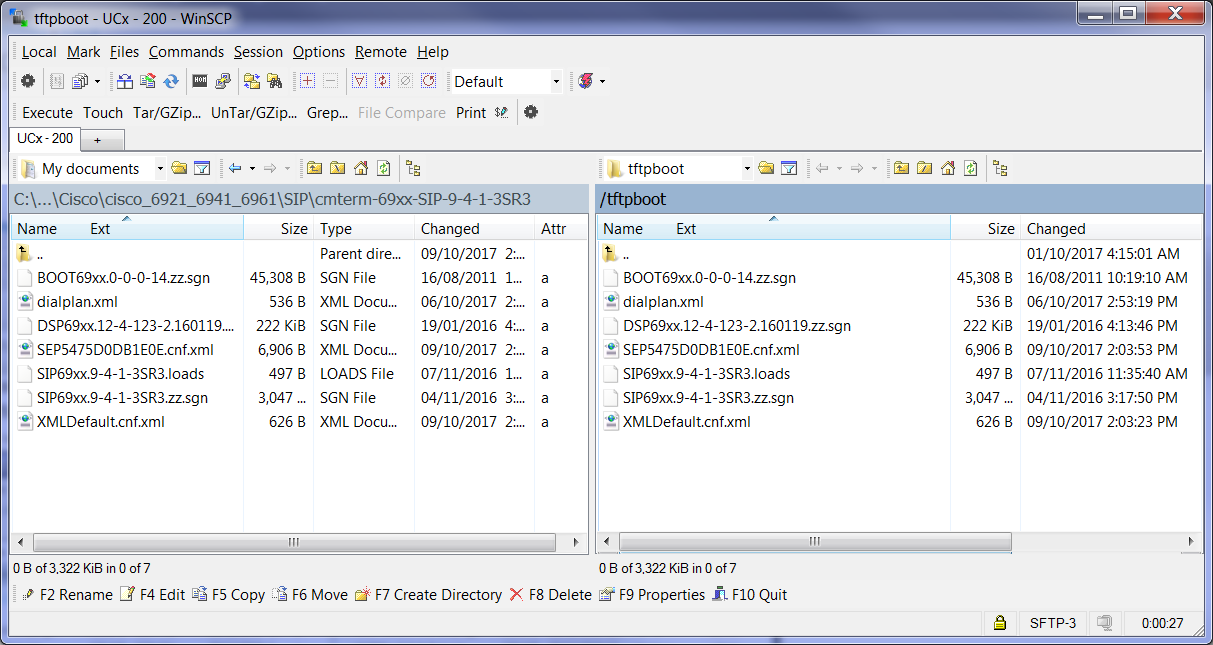
- Open the file transfer client (e.g. WinSCP)
-
Create a session to connect to the UCx server using the IP address of the UCx and the admin account
- On the left side window, navigate to the folder containing the extracted files
- On the right side window, navigate to the /tftpboot directory
- Drag all the files from the left window to the /tftpboot directory on the right window
-
The session windows will look something like this:
- Close and exit the file transfer session
STEP FIVE: Install SIP Firmware and Provision phone
Erase the configuration
Erasing the configuration is optional. If you are unsure of what was previously configured on the phone, you can erase the configuration.
To erase all the configuration:
- Press the Applications button and choose Admin Settings > Reset Settings > All.
Alternatively, you can perform a factory reset following these steps:
- While powering up the phone, press and hold #.
- When the light on the mute button and handset light strip turns off and all other lights (line button, headset button, speakerphone button and select button) stay green, press 123456789*0# in sequence.
- When you press 1, the lights on the line buttons turn red. The light on the select button flash when a button is pressed.
- If you press the buttons out of sequence, the lights on the line button, headset button, speakerphone button, and select button turn green. You will need to start over and press 123456789*0# in sequence again.
- After you press these buttons, the phone goes through the factory reset process.
- Do not power down the phone until it completes the factory reset process, and the main screen appears.
Enable Alternate TFTP
- Press the Settings key.
- Navigate to Admin Settings -> Network Setup -> IPv4 Setup.
- Press the down arrow to Alternate TFTP.
- Press Edit and change the value to Yes.
- Exit and go to the next field TFTP Server 1.
- Press Edit and enter the value to the IP address of the UCx Server.
- Press Validate and confirm the changes by pressing Save.
- On the phone display, you will see the firmware files being retrieved.
- Once the firmware files have been installed, the phone will reset itself.
- When the phone comes back up, it should have SIP firmware installed and also provisioned as per the configuration files.