

Configure Gateway to operate with UCx in Failover mode
Prerequisites
You must be able to login to the G100 Gateway and the UCx Servers as an administrator to successfully complete the instructions on this page.
The default IP address of the Digium gateway is 192.168.69.1.
The default IP address of the E-MetroTel UCx server is 192.168.1.200.
The following references provide additional information on the Digium gateway:
- https://www.digium.com/sites/digium/files/voip-gateways-user-manual.pdf
- http://wiki.freepbx.org/display/FOP/Digium+GX00+Gateway+Overview
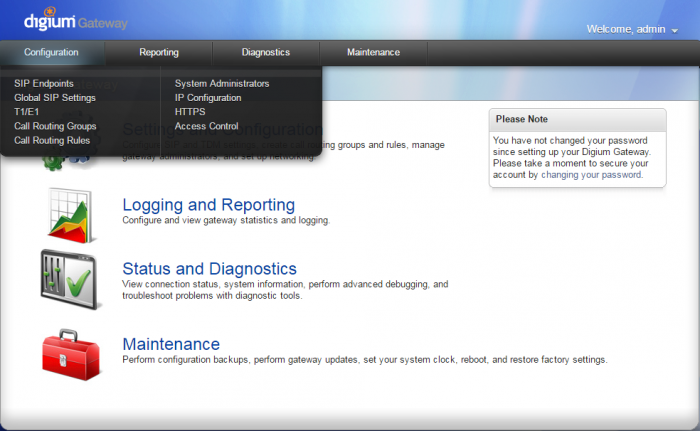
Configuring Digium Gateway
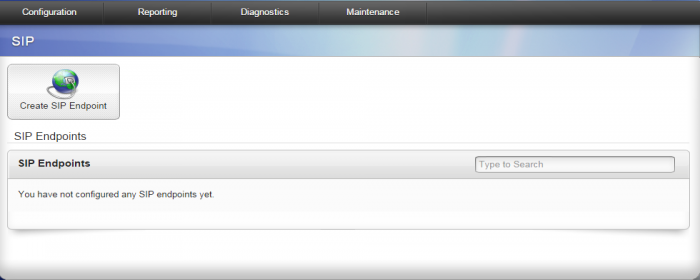
STEP ONE: Create SIP Endpoints
SIP Connection to Primary UCx Server
-
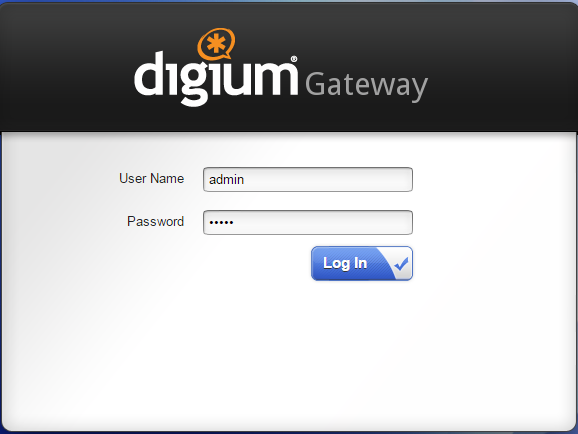
Login to the Digium Gateway. (default username is admin, default password is admin)
-
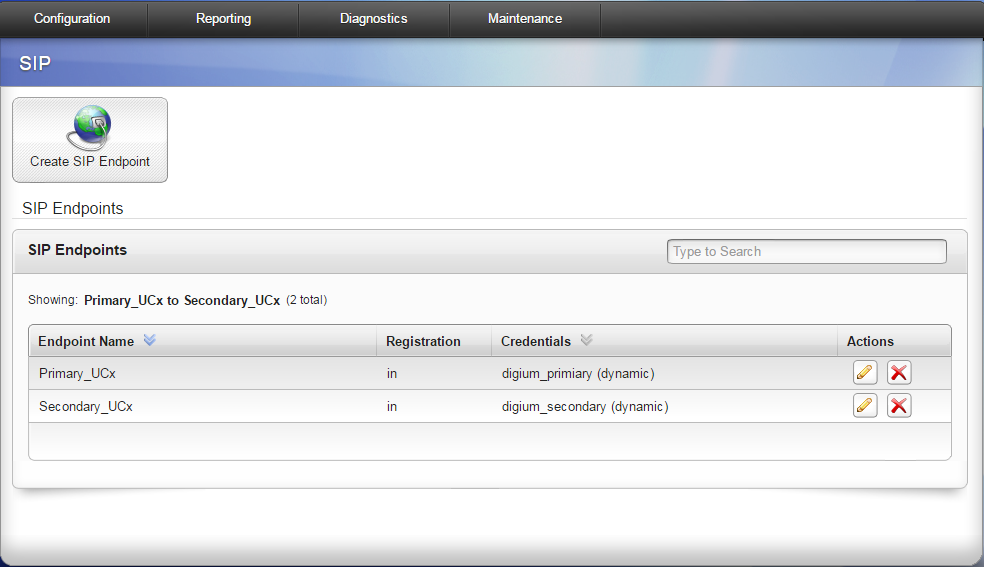
Navigate to the Configuration - SIP Endpoints page
-
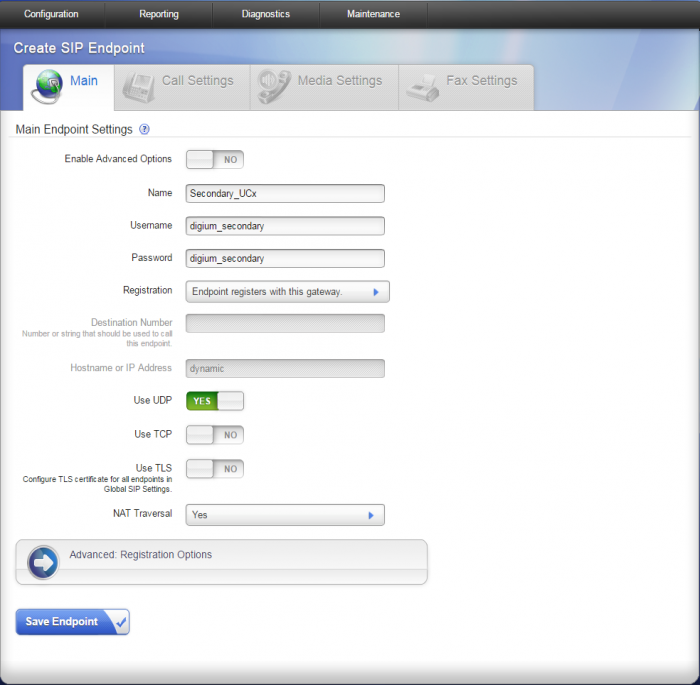
Click on Create SIP Endpoint.
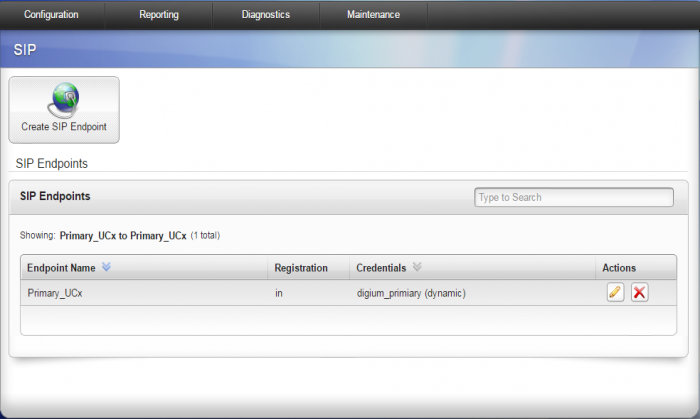
- Give the connection a Name = Primary_UCx
- Set a Username = digium_primary
- Set a Password = digium_primary
- For Registration, select Endpoint registers with this gateway
-
Click on Save EndPoint

-
Edit the Endpoint that you just created by clicking on the Edit icon under the Actions column
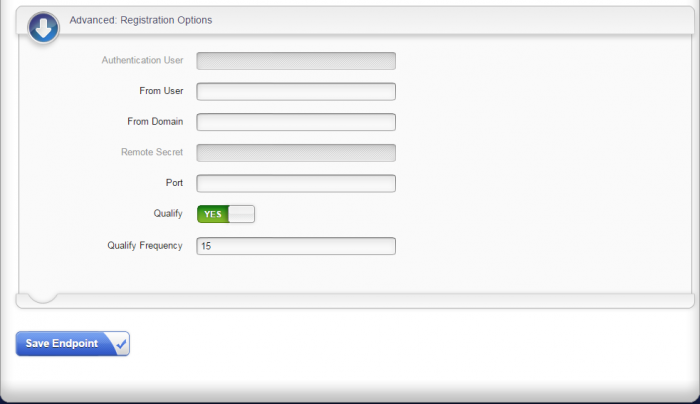
- Click on Advanced Registration Options
- Set Qualify to Yes and Qualify Frequency to 15
-
Click on Save Endpoint


SIP Connection to Secondary UCx Server
- Click on Create SIP Endpoint
- Give the connection a Name = Secondary_UCx
- Set a Username = digium_secondary
- Set a Password = digium_secondary
- For Registration, select Endpoint registers with this gateway
-
Click on Save EndPoint
-
Edit the Endpoint that you just created by clicking on the Edit icon under the Actions column

- Click on Advanced Registration Options
- Set Qualify to Yes and Qualify Frequency to 15
- Click on Save Endpoint

STEP TWO: Configure T1/E1 Interfaces
The T1/E1 circuit n the Digium G100 gateway defaults to a North America PRI interface using the National ISDN 2 (NI2) Customer Side signalling protocol. Most PRI circuits in North America (US and Canada) are configured as this type of NI2 connection. If you have a PRI using something other than NI2 you would naviagte to the Configuration - T1/E1 Settings page and adjust the settings on those pages. We will use the default NI2 settings so no changes are required here.
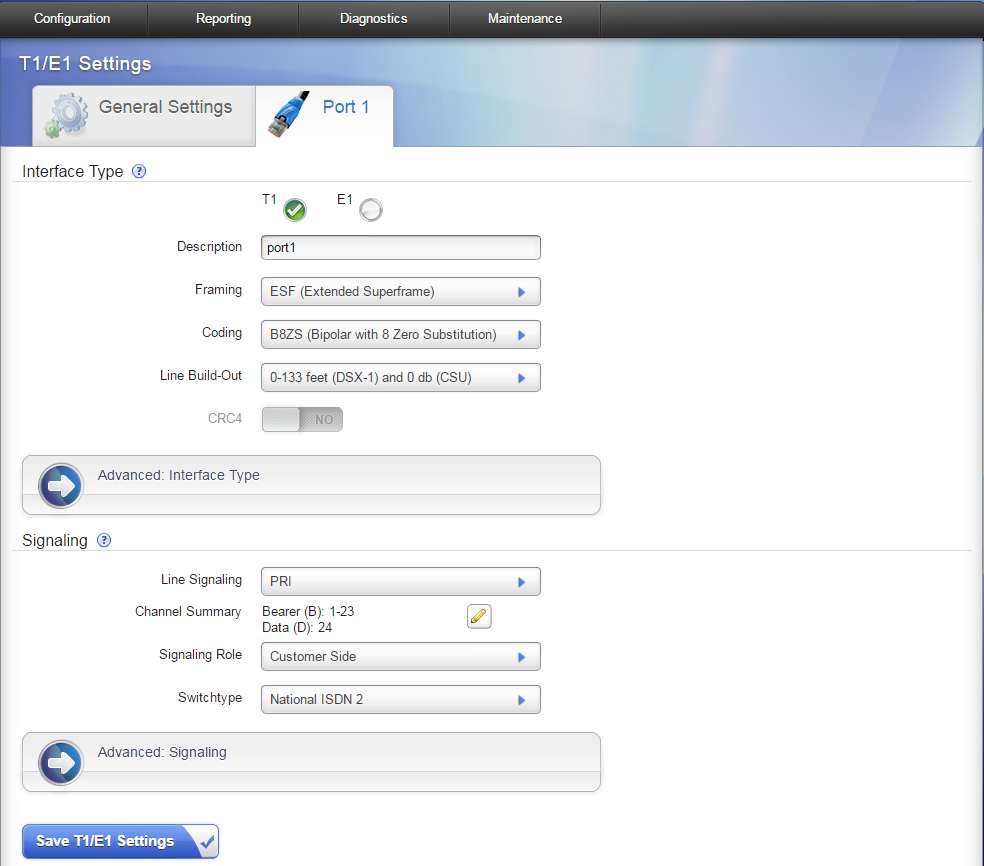
The default interface is labeled port1. You will need to reference this port in STEP FOUR.
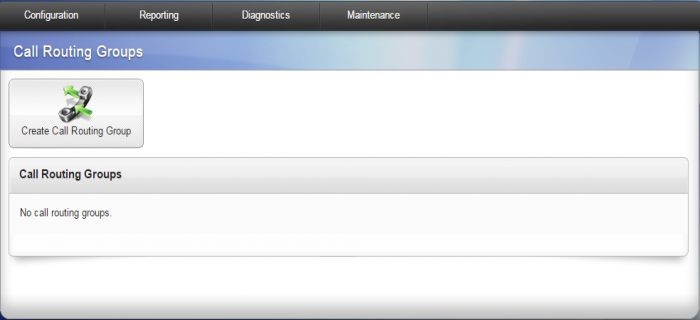
STEP THREE: Create Call Routing Group
- Navigate to the Configuration - Call Routing Group page
-
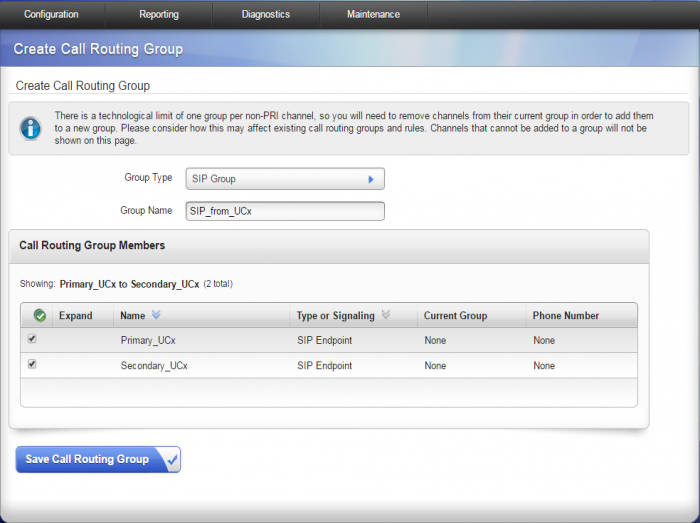
Click on Create Call Routing Group
- Set the Group Type to SIP Group
- Give it a Group Name = SIP_from_UCx
- Select the checkbox for each of the two SIP Endpoints that will be part of this group (Primary_UCx and Secondary_UCx)
-
Click on Save Call Routing Group

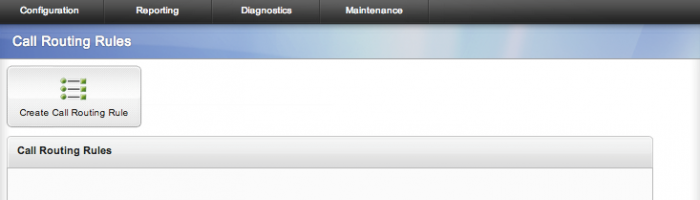
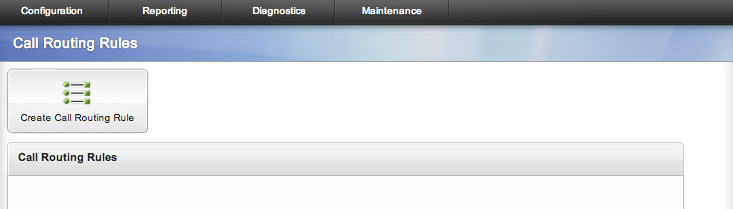
STEP FOUR: Create Call Routing Rules
Outbound Rule
- Navigate to the Configuration - Call Routing Rules page
-
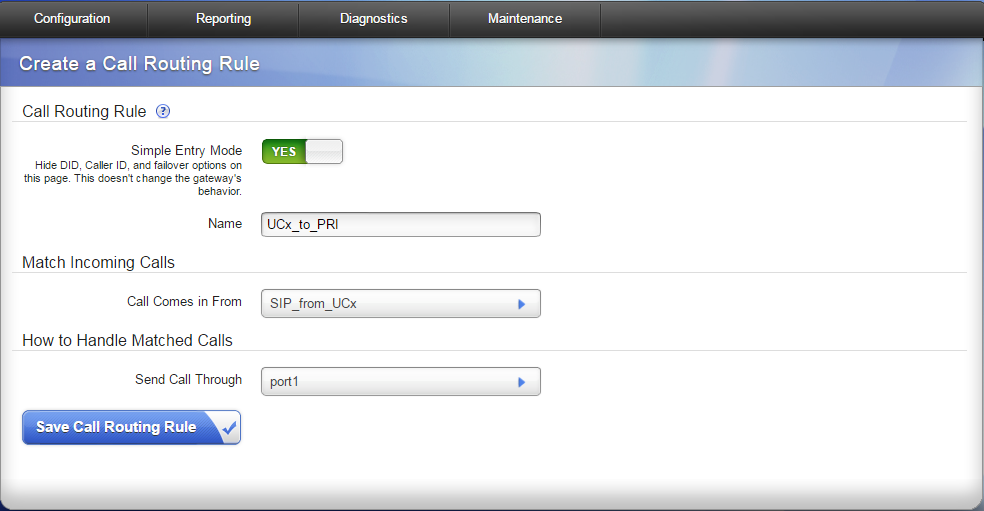
Click on Create Call Routing Rule
- Give this rule a Name = UCx_to_PRI
- For the Call Comes in From field, select the Call Routing Group that you created in STEP THREE. (SIP_from_UCx)
- For the Send Call Through field, select the T1 port labeled port1 (this is the default name configured in STEP TWO).
-
Press Save Call Routing Rule

Inbound Rule
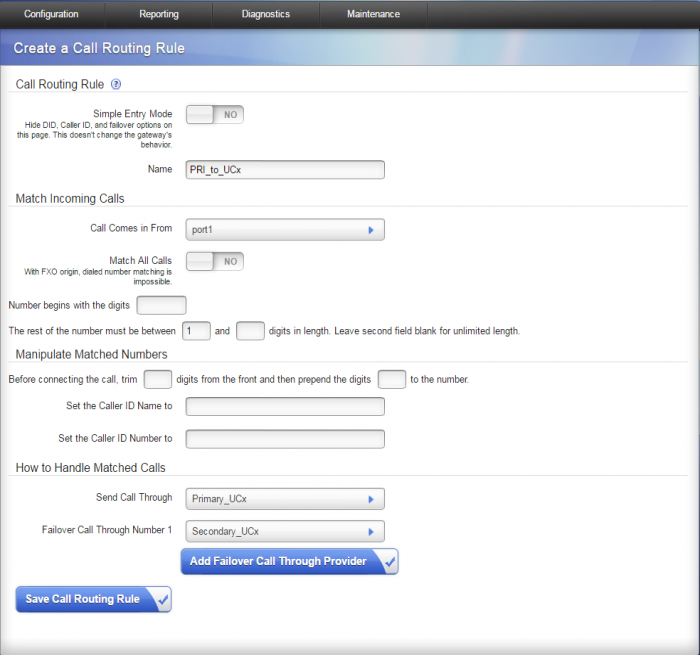
- Click on Create Call Routing Rule button to create a second rule
- Set the Simple Entry Mode field to NO
- Give this rule a Name = PRI_to_UCx
- For the Call Comes in From field, select the T1 port labeled port1 (this is the default name configured in STEP TWO)
- For the field The rest of the number must be between, enter the number 1 in the first box, leave the second box empty.
- For the Send Call Through field, select the primary SIP endpoint that you created in STEP ONE (Primary_UCx)
- Click the Add Failover Call Through Provider button
- Select the secondary SIP endpoint that you created in STEP ONE (Secondary_UCx)
-
Click on Save Call Routing Rule

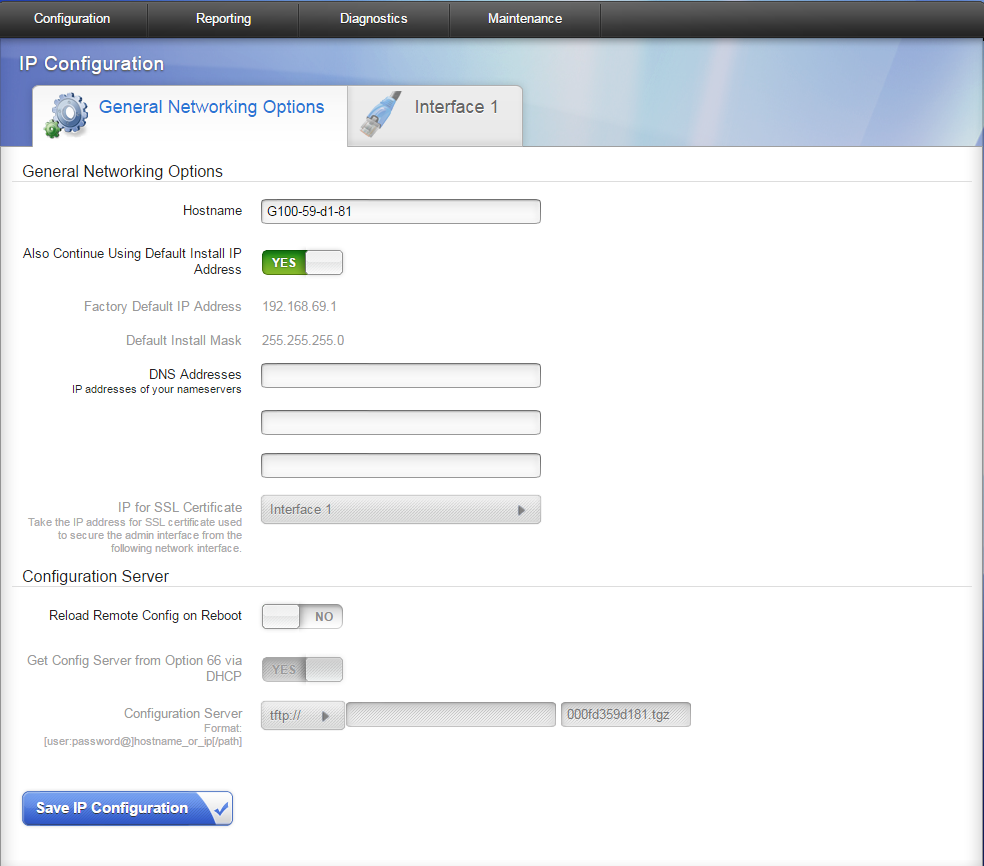
STEP FIVE: Configure Network Parameters
- Navigate to the Configuration - IP Configuration page
- Set the Also Continue Using Default Install IP Address option to YES
-
Set the Reload Remote Config on Reboot option to NO

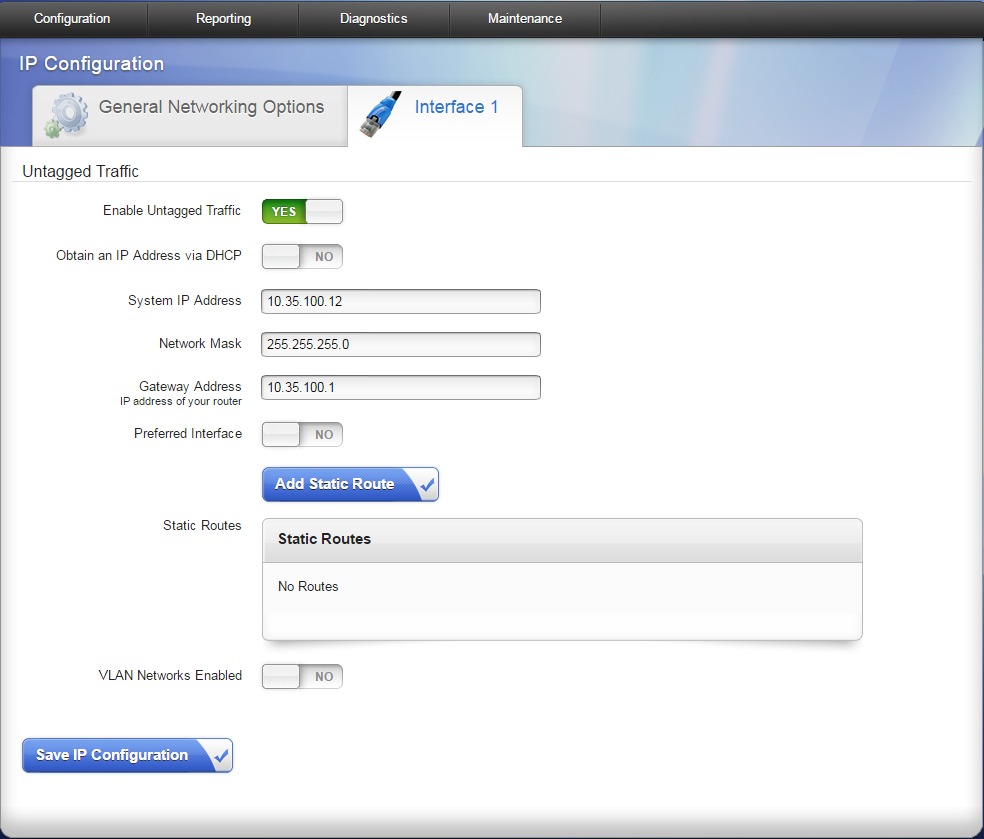
- Select the Interface 1 tab at the top
- Set the Obtain an IP Address via DHCP option to NO
-
Set the following fields to the static addresses provided to you by your Network Administrator:
- System IP Address
- Network mask
- Gateway Address
-
Click on Save IP Configuration

-
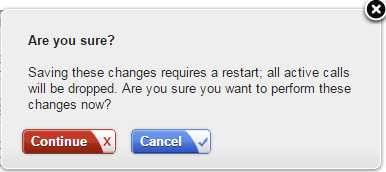
Click o Continue when prompted to save the changes
-
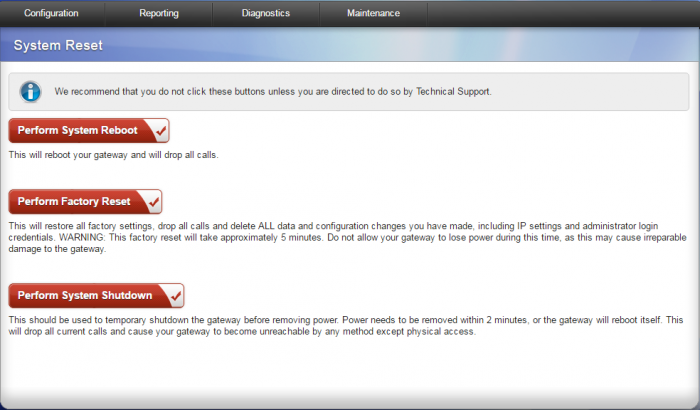
Finally, navigate to the Maintenance - System Reset page and press the Perform System Reboot button

Configuring UCx
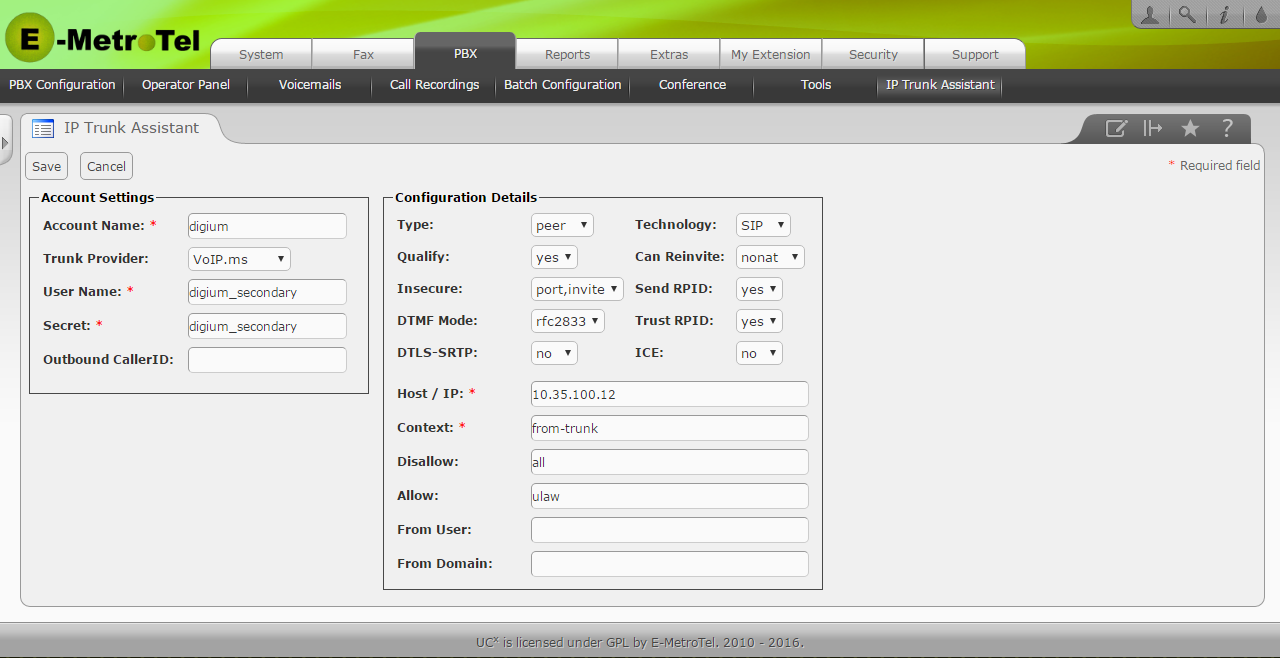
STEP ONE: Create SIP trunk
Primary UCx
Login to the UCx Web-based Configuration Utility of the Primary UCx Server and navigate to the IP Trunk Assistant page to add a new SIP trunk for the Digium Gateway.
Create the new SIP trunk with the following parameters:
- Account Name - provide a name for the account, e.g. Digium
- Trunk Provider - select VoIP.ms
- User Name - enter the SIP Endpoint username you created in Digium Gateway STEP ONE for the primary UCx (e.g. digium_primary)
- Secret - enter the SIP Endpoint password you created in Digium Gateway STEP ONE for the primary UCx (e.g. digium_primary)
- Host / IP - enter the IP address of the Digium Gateway that you configured in Digium Gateway STEP FIVE

Secondary UCx
Login to the UCx Web-based Configuration Utility of the Secondary UCx Server and navigate to the IP Trunk Assistant page to add a new SIP trunk for the Digium Gateway.
Create the new SIP trunk with the following parameters:
- Account Name - provide a name for the account, e.g. Digium
- Trunk Provider - select VoIP.ms
- User Name - enter the SIP Endpoint username you created in Digium Gateway STEP ONE for the secondary UCx (e.g. digium_secondary)
- Secret - enter the SIP Endpoint password you created in Digium Gateway STEP ONE for the secondary UCx (e.g. digium_secondary)
- Host / IP - enter the IP address of the Digium Gateway that you configured in Digium Gateway STEP FIVE
STEP TWO: Check Status of SIP Connection
Navigate to the Asterisk CLI page and execute the sip show registry to see the status of your SIP connection to the Digium Gateway:
Example of output from Primary UCx

Example of output from Secondary UCx
