Configure Cascading Time Groups and Conditions
Introduction
Time Groups and Time Conditions allow different call treatments to be presented on inbound routes depending on the day and time of the day. One time condition can cascade to another time condition, thereby allowing holiday schedules and greetings to be built on top of regular business hour schedules.
The implementation of this feature consists of 3 parts:
- Time Group where day and time schedules are defined.
- Time Condition where call treatment is specified based on whether the date and time matches the associated Time Group.
- Inbound Route where the destination is set to the Time Condition previously created.
Pre-Requisites
None.
Implementing Time Group Schedule for your Business Hours
Step One: Creating a Time Group
Create a Time Group to define your business hours of operation. Outside of your business hours, you can specify a different treatment, for example send the inbound call to a special IVR treatment stating the business is closed with options to leave a message, etc.
- Open the UCx Web-based Configuration Utility
- From the PBX tab, select PBX Configuration
- From the left side column, select Time Groups under the Inbound Call Control section
- Enter a descriptive name in the Description field
- Enter Time to start and Time to finish
- Set Week Day start and Week Day finish
- Press on the Submit button

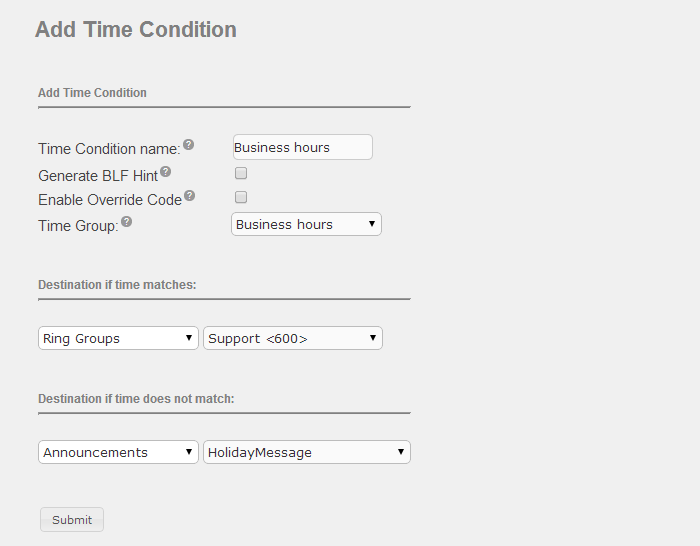
Step Two: Creating a Time Condition
To create a Time Condition for a Time Group, perform the following steps:
- Open the UCx Web-based Configuration Utility
- From the PBX tab, select PBX Configuration
- From the left side column, select Time Conditions under the Inbound Call Control section
- Enter descriptive name in the Time Condition Name field
- Set the Time Group field to the previously created Time Group
- Set the Destination if time matches to the call treatment when the time matches the time group
- Set the Destination if time does not match to the call treatment when the time does not match the time group
- Press on the Submit button
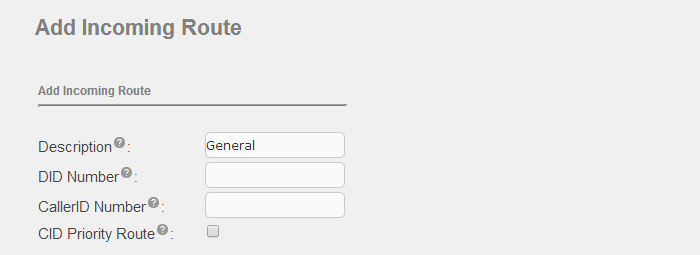
Step Three: Associating Time Group with Inbound Route
To associate a time condition with an inbound Route, perform the following steps:
- Open the UCx Web-based Configuration Utility
- From the PBX tab, select PBX Configuration
- From the left side column, select Inbound Routes under the Inbound Call Control section
- Add new or select an existing Inbound Route listed on the right-hand side of the panel
- Scroll down to Set Destination field and select the Time Condition previously created (e.g. Business hours)
- Press on the Submit button

All calls incoming to this Inbound Route will now be subject to the time group / schedule selected.
Adding Holidays to your Time Group Schedule
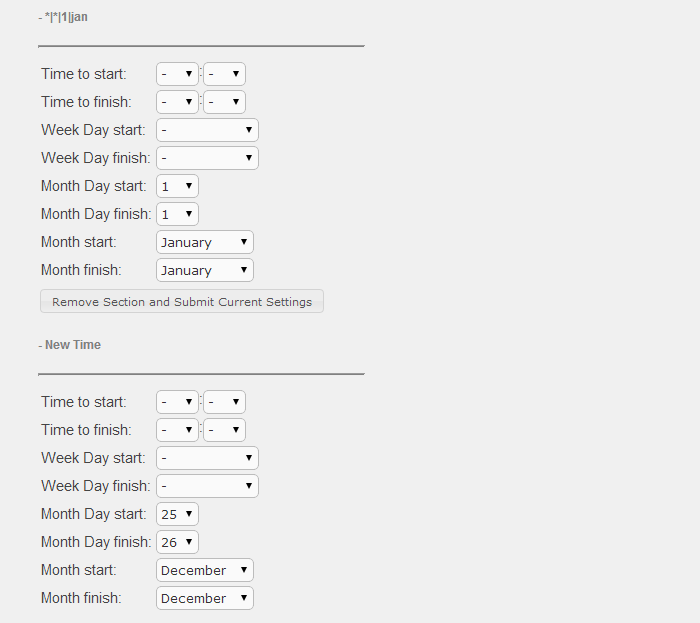
In order to add holidays to your schedule, we have to cascade two Time Groups in order to complete that configuration. In the example below we will enter 2 holiday dates (December 25-26 and January 1). You can enter as many days as required under the same Time Group.
Step One: Creating a Holiday Time Group
- From the left side column, select Time Groups under the Inbound Call Control section
- Enter a descriptive name in the Description field (e.g. Holidays)
- Enter Month Day Start and Month Day Finish from 1st to 1st
- Set Month Start and Month Finish from January to January
- Press on the Submit button
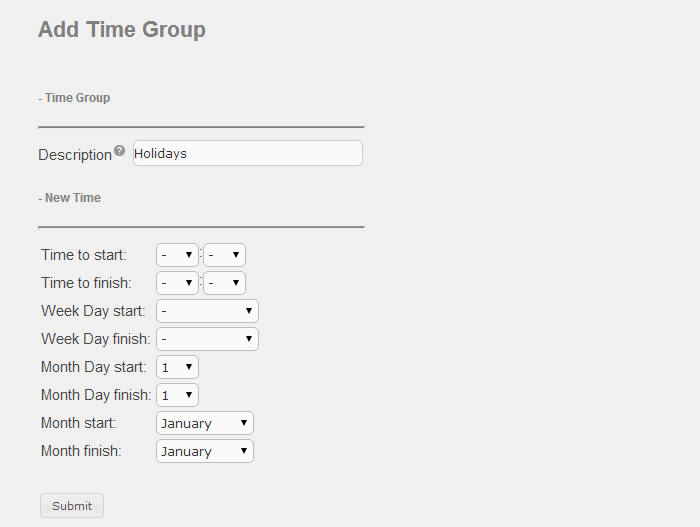
- Now scroll down and note that another time group section has been added for you to enter the next day
- Enter Month Day Start and Month Day Finish from 25 to 26
- Set Month Start and Month Finish from December to December
- Press on the Submit button
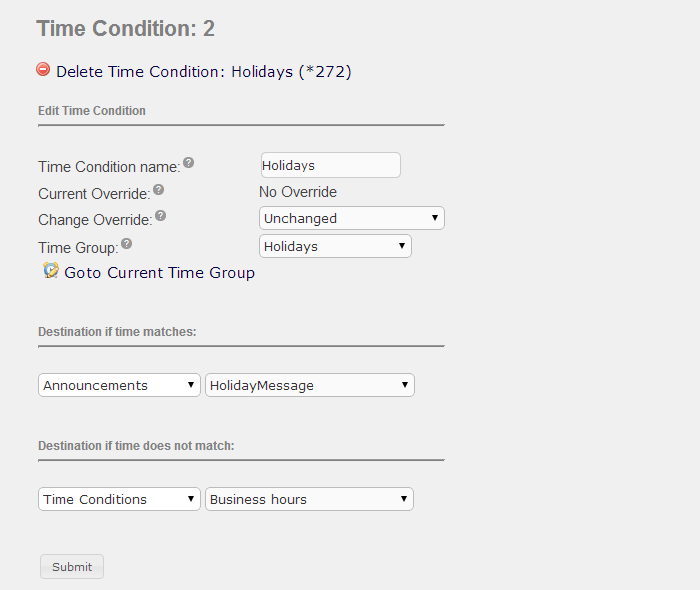
Step Two: Creating a Holiday Time Condition
Next you have to associate the Time Group to a Time Condition as follows:
- From the left side column, select Time Conditions under the Inbound Call Control section
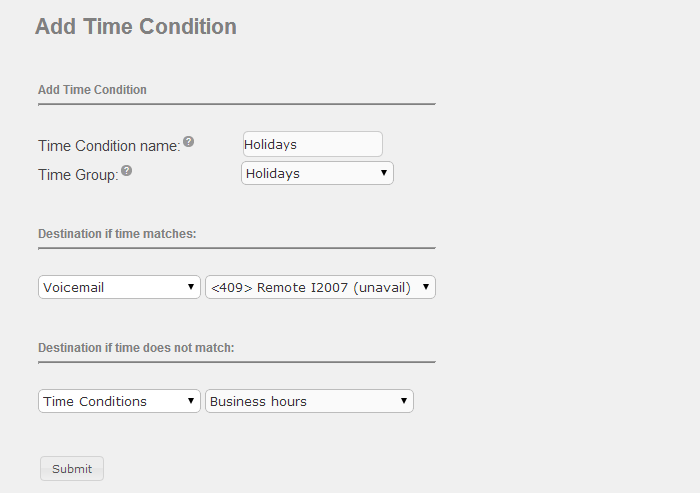
- Enter descriptive name in the Time Condition Name field (e.g. Holidays)
- Set the Time Group field to the previously created Time Group
- Set the Destination if time matches to your desired destination during the holidays.
- Set the Destination if time does not match to the Time Condition previously created (e.g. Business hours)
- Press on the Submit button
Step Three: Associating Inbound Route to the Holiday Time Condition
The final step is to associate the inbound route to the holiday time condition created previously:
- From the left side column, select Inbound Routes under the Inbound Call Control section
- Select an existing Inbound Route listed on the right-hand side of the panel
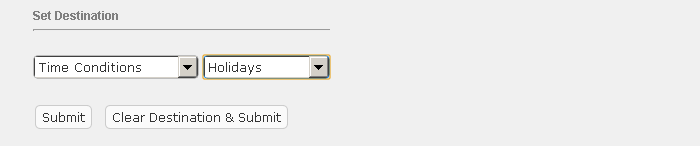
- Scroll down to Set Destination field and select the Time Condition previously created (e.g. Holidays)
- Press the Submit button
The schedule will now handle holidays, business and non-business hours. For ongoing maintenance, the holiday time group just needs to be updated once a year with the actual holiday dates for that year.
Customizing Voice Mail Greeting for Holidays with Time Group Schedule
To set up a special announcement for your holidays call treatment requires 3 parts:
- Create a special holiday greeting recording, see System Recordings for details.
- Create an announcement and associate it with the holiday greeting recorded in the previous step.
- Update the holidays Time Condition treatment to match the announcement created in the previous step
Step One: Creating a Holiday Greeting
See System Recordings for details on creating a recording.
Create a system recording for your holiday greeting, e.g. HolidayGreeting.
Step Two: Creating an announcement
- Open the UCx Web-based Configuration Utility
- From the PBX tab, select PBX Configuration
- From the left side column, select Announcements under the Inbound Call Control section
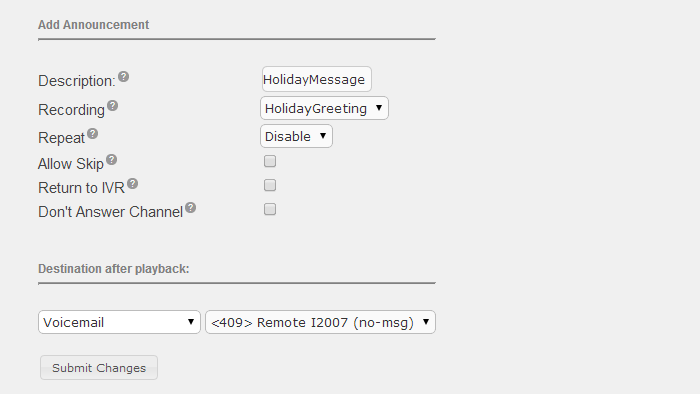
- Enter a Description for the announcement
- In the Recording field, select the special holiday greeting recorded previously (e.g. HolidayGreeting)
- Under Destination after playback, set the call treatment to Voicemail and select the desired voicemail box extension with no-msg so it does not play the mailbox greeting and plays the specified holiday greeting instead.
- Press the Submit button
Step Three: Update Time Condition to Holiday Announcement
- Open the UCx Web-based Configuration Utility
- From the PBX tab, select PBX Configuration
- From the left side column, select Time Conditions under the Inbound Call Control section
- Under Destination if time matches, set to Announcements and select the holiday announcement created previously
- Press the Submit button