Adding IAX2 Trunks
IAX protocol (Inter-Asterisk eXchange protocol) was designed to provide control and transmission of VoIP data between Asterisk servers. UCX server uses Asterisk as the telephony engine and hence supports IAX2 trunk types. The main goals of IAX are:
- Minimize bandwidth usage for both control and media transmissions with specific emphasis on individual voice calls
- Avoid NAT problems (Network Address Translation)
- Support the ability to transmit dialplan information
In order to avoid NAT problems, IAX2 uses UDP transport protocol, normally on port 4569, and both signaling information and data go together using the same protocol (unlike SIP). Therefore, IAX2 has less NAT problems and it can pass through routers and firewalls in a better way.
To configure your UCX server to communicate with another system using IAX2 protocol, you have to complete the following tasks on each of the systems:
- Create and configure an IAX2 trunk
- Create a route that will direct calls over the IAX2 trunk
To add a new IAX2 trunk, perform the following steps:
- Open the UCX Web-based Configuration Utility
- From the PBX tab, select PBX Configuration
- From the left side column, select Trunks
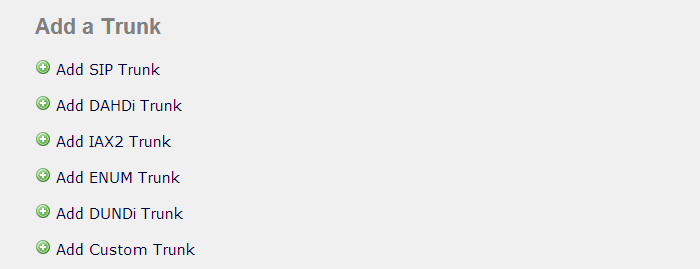
- Add the Add a Trunk page which presents available trunk types, select the Add IAX2 Trunk link
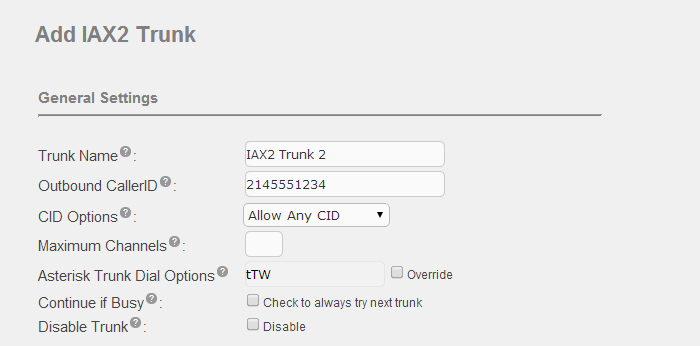
- On the Add IAX2 Trunk page, enter the name you want to use for the trunk in the Trunk Name field
-
Fill in all trunk specific parameters. You should configure at least the following fields:
- Outbound Caller ID (caller ID used for outgoing calls - this field is usually set to the company's main phone number and name - e.g., "My Company" <2145551234>)
- Outgoing Settings - PEER Name (a unique name of the trunk, i.e. channel ID of the trunk) - this field was labeled Trunk Name in earlier releases
- Outgoing Settings - Peer Details (host = remote system's IP address or name, remote user account name, secret for the user account, type = peer, trunk = yes, qualify = yes, requirecalltoken = no)
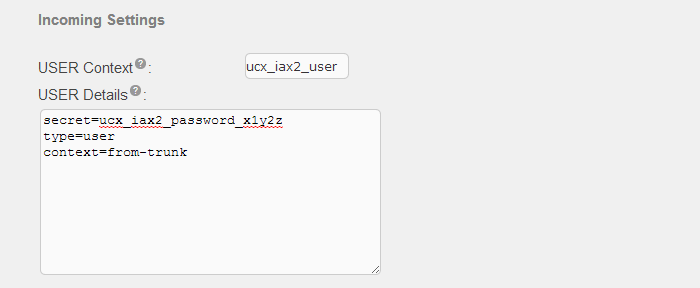
- Incoming Settings - User Context (login name of the local IAX2 user account)
- Incoming Settings - User Details (password for the local IAX2 user account, type = user, context = from-trunk)
- Press the Submit Changes button to create the IAX2 trunk